Panda Belt
- Product Link: Buy Here
Revision Log
| Version | Date | Revision |
|---|---|---|
| v1.00 | December 4th, 2025 | Initial Version |
Introduction
The Panda Belt is a timing belt replacement kit designed specifically for Bambu Lab P1/X1 3D printers. It simplifies the process of replacing the printer’s timing belt.
Key Features
-
ACCURATE TRANSMISSION - Precision-engineered tooth profile ensures exact positioning, reduces deviation and errors, and delivers consistent print dimensions.
-
EXTENDED DURABILITY - Premium rubber with fiberglass cord resists stretching and cracking, maintains optimal tension for a longer life-span.
-
QUIET OPERATION - Smooth engagement for reduced noise during printing.
-
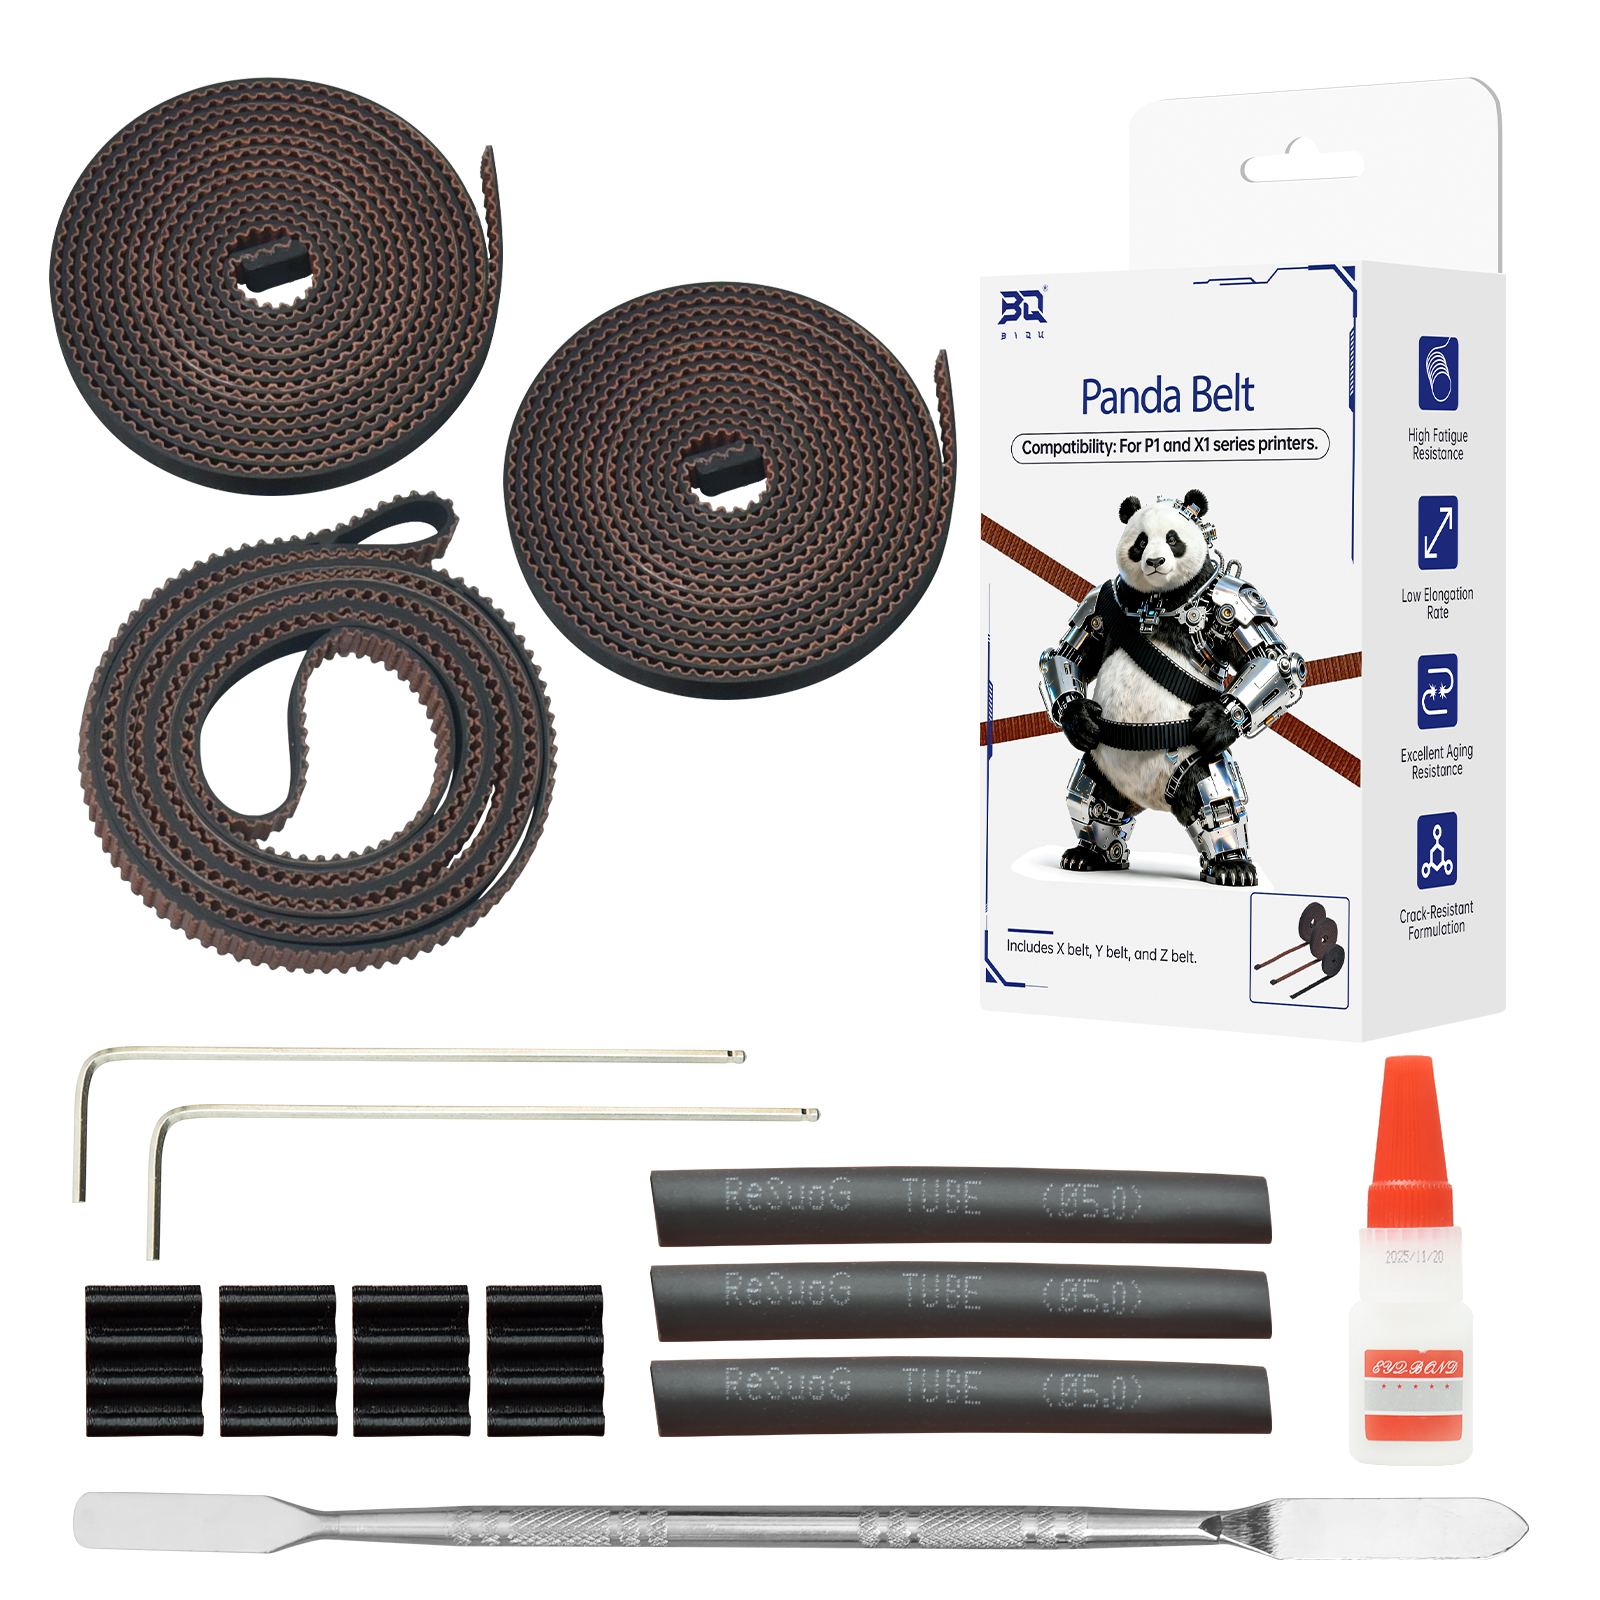
INCLUDED ACCESSORIES - In addition to the XYZ belts, the package includes a pry tool, glue, hex keys, fixing blocks, and heat shrink tubing.
Specifications
- Product Name: BIQU Panda Belt
- Material: Rubber + Fiber Glass
- Compatibility: Designed for Bambu Lab P1/X1 printers
Panda Belt Assembly Guide
Video Tutorial
Replace the XY Timing Belt
-
Step 1: Lower the Heated Bed, Then Power Off the Printer
Lower the heated bed: Use the printer's control panel to lower the heated bed to its lowest position.
Turn off the printer: Once the bed is fully lowered, power off the printer and disconnect it from the power supply for safety.
-
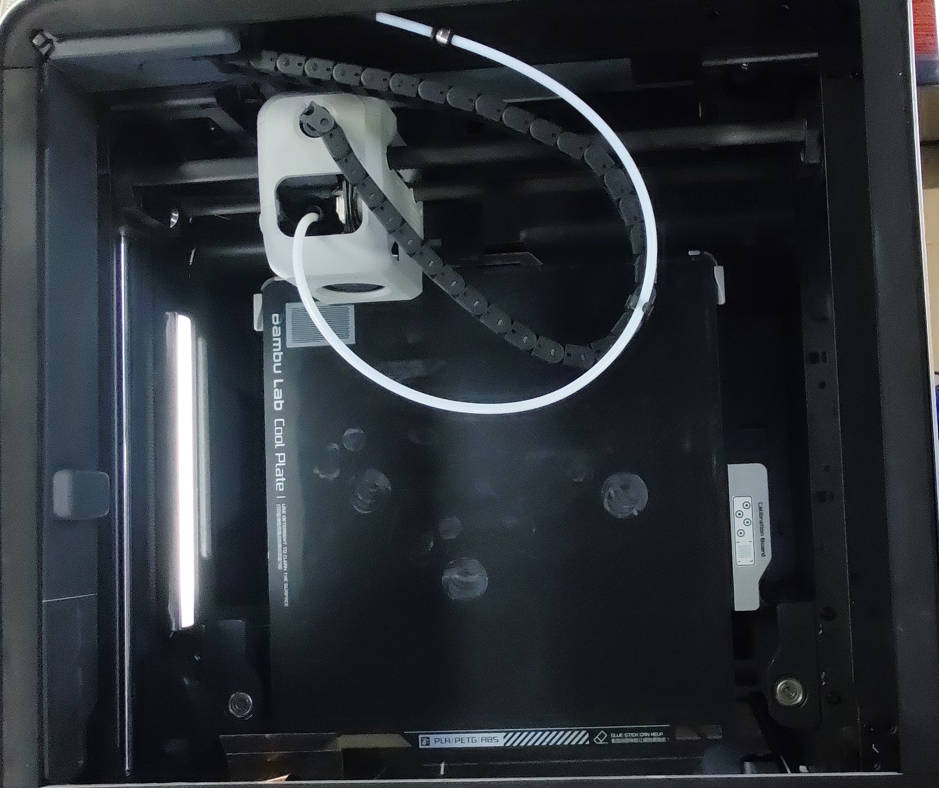
Step 2: Remove Both the Front and Rear Housings from the Toolhead
Use the provided H1.5 hex key to unscrew the 4 screws securing the toolhead housings.
Remove both the front and rear housings and set the screws and housings aside for reinstallation after the belt replacement.
-
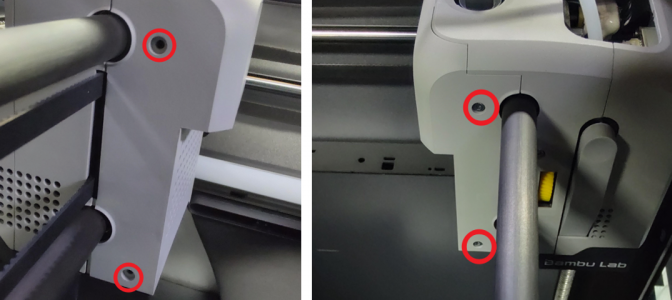
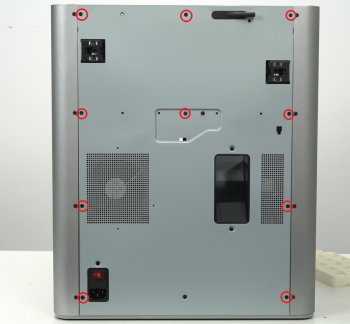
Step 3: Remove the Rear Panel
Use the H2.0 hex key to remove the screws securing the rear panel.
Detach the panel and set the panel and screws aside for later reinstallation.
-
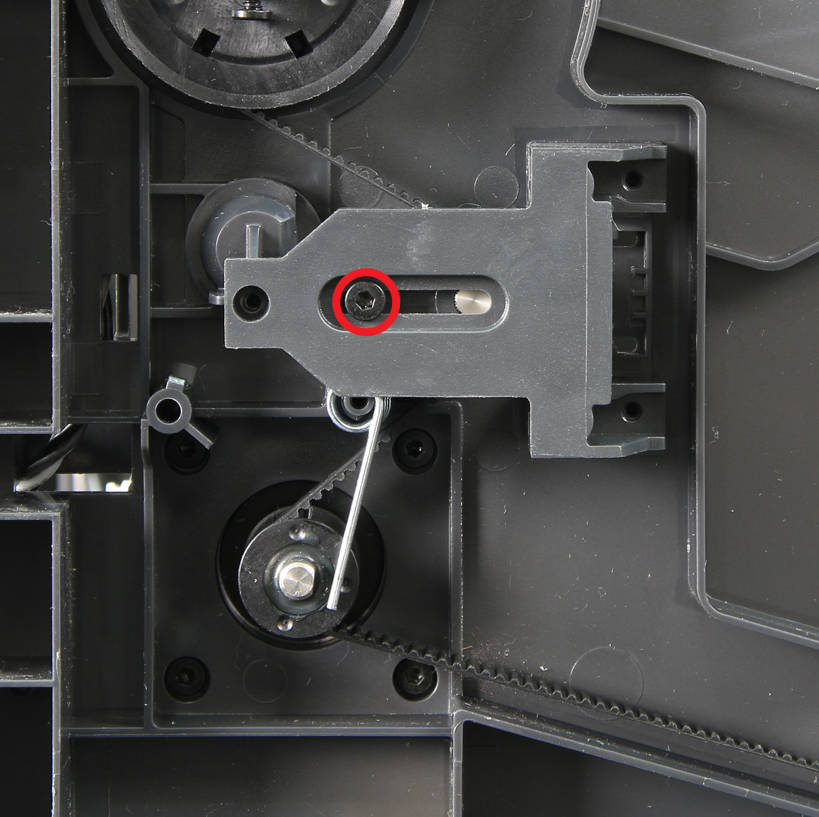
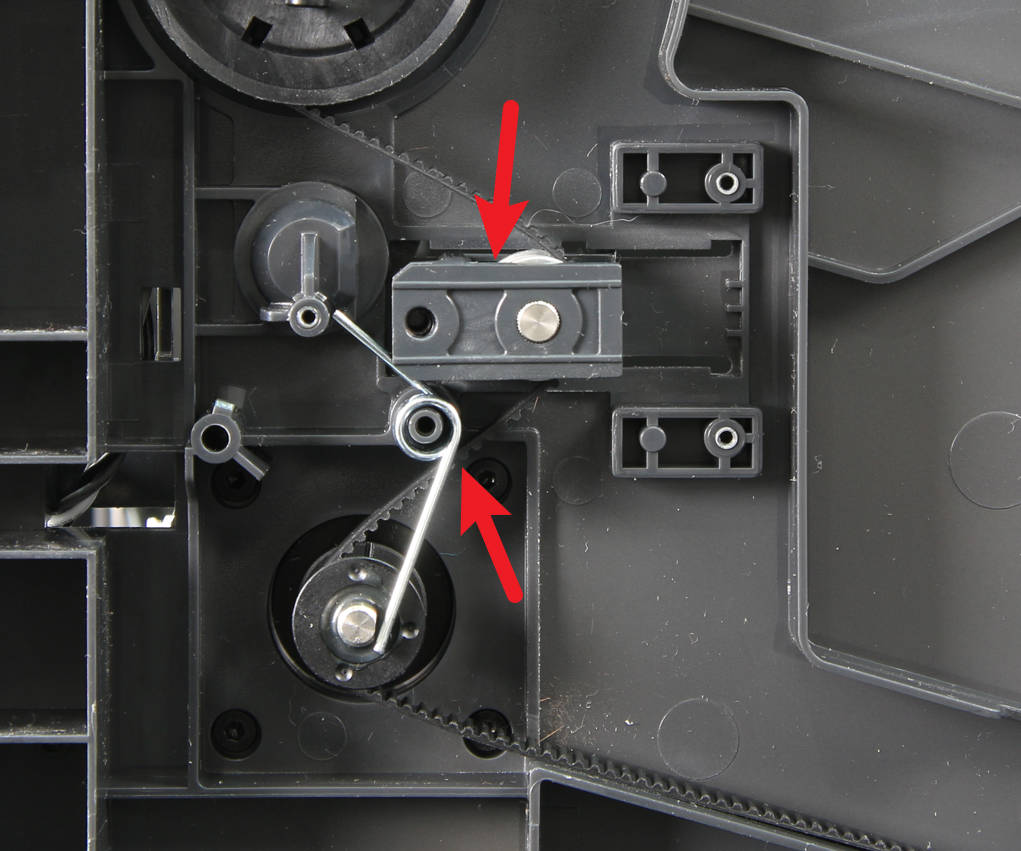
Step 4: Remove the XY Tensioner
Use an H2.0 screwdriver to remove the XY tensioner.
-
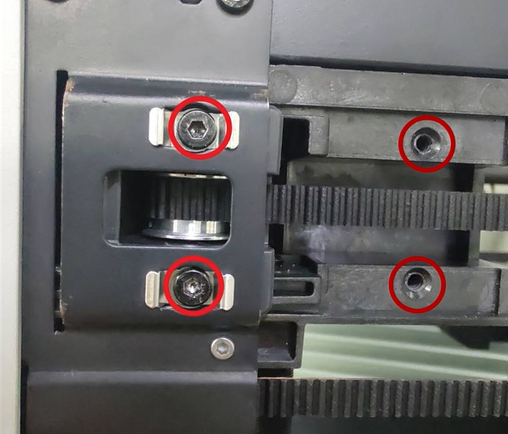
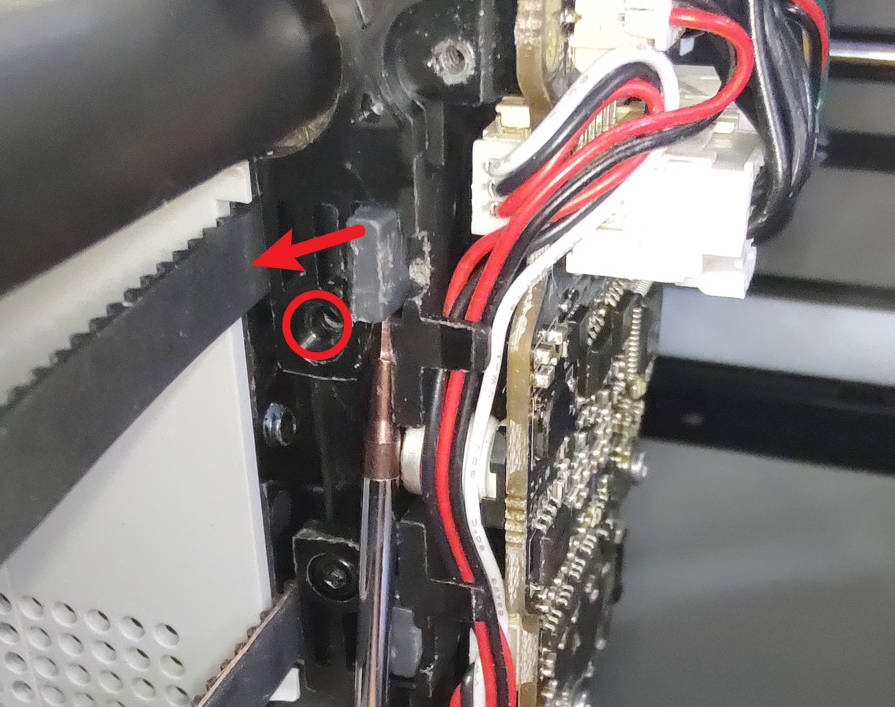
Step 5: Take Out the Original Belt
Use a hex key to unscrew the screws securing the timing belt.
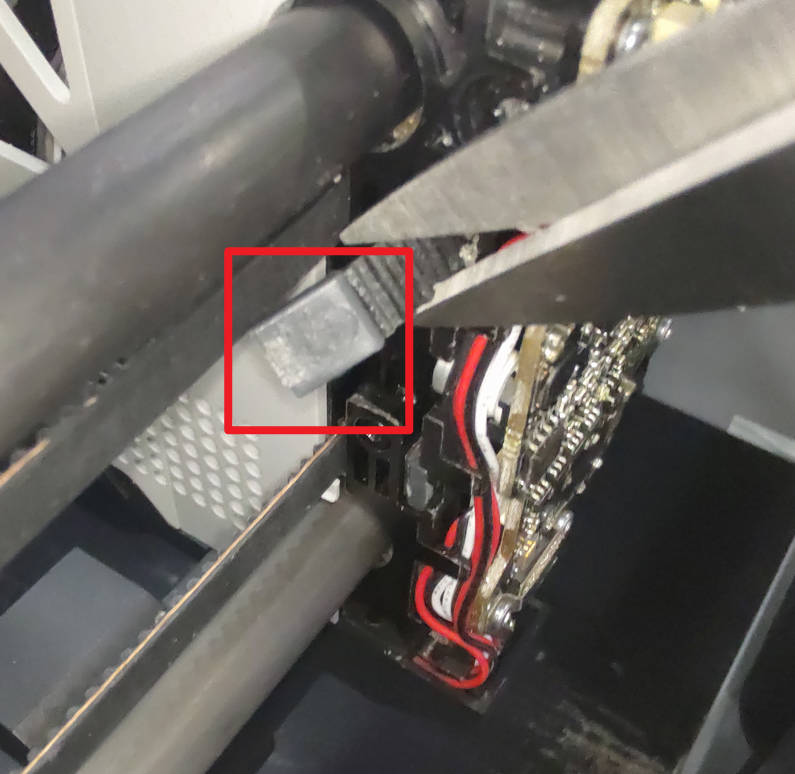
Use the provided pry tool or a slotted screwdriver to carefully pry out the fixing block.
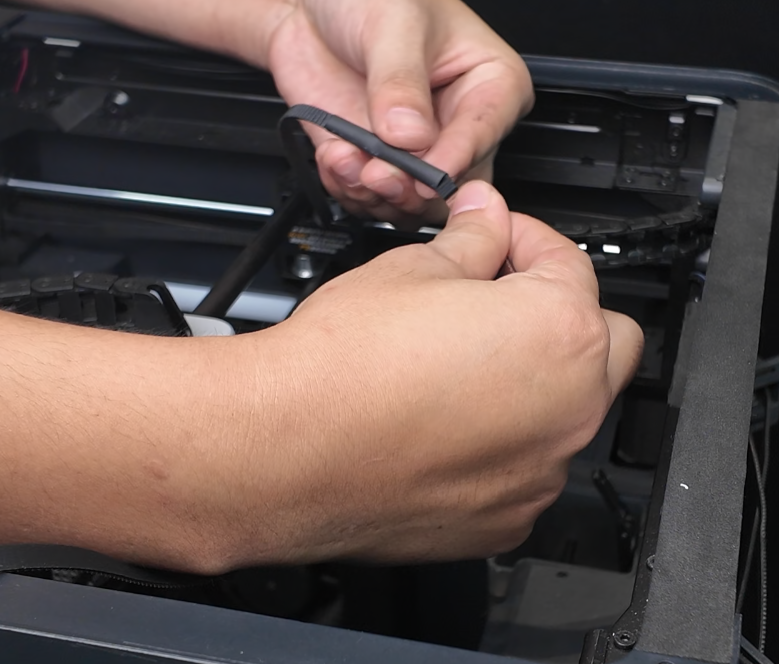
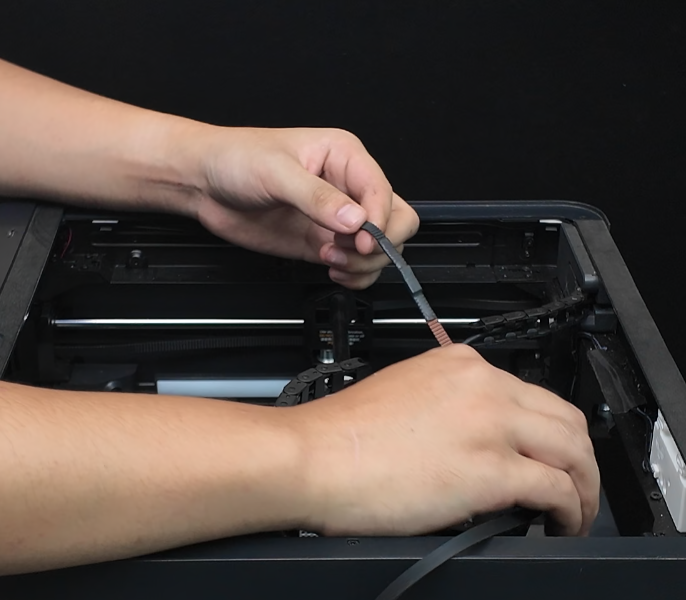
Use tweezers/pliers to gently grasp the fixing block and pull out the original belt.
Note: If the belt is still intact, hold it with your fingers and push it toward the fixing block to make it easier to pry off the fixing block.
-
Step 6: Install the Panda Belt
Connect the new belt to the old one: Take the Panda Belt, and thread both the new belt and the old belt’s fixing block through the heat shrink tubing. Then, heat the tubing to create a firm connection.
Replace the old belt with the new one: Pull the other end of the old belt to guide the new belt through the path.
Secure the fixing block: Use the provided glue to attach the fixing block to the other end of the new belt.
-
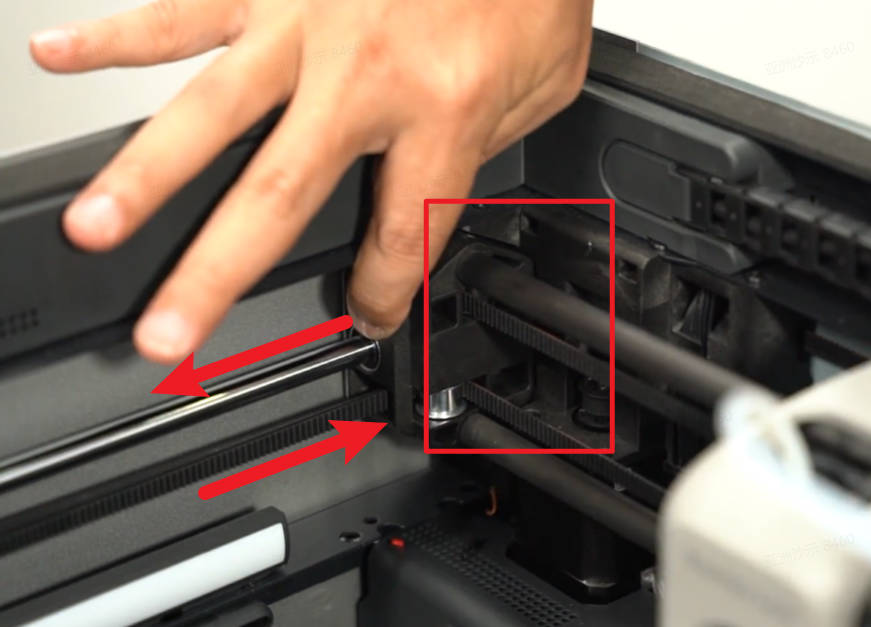
Step 7: Secure the Panda Belt
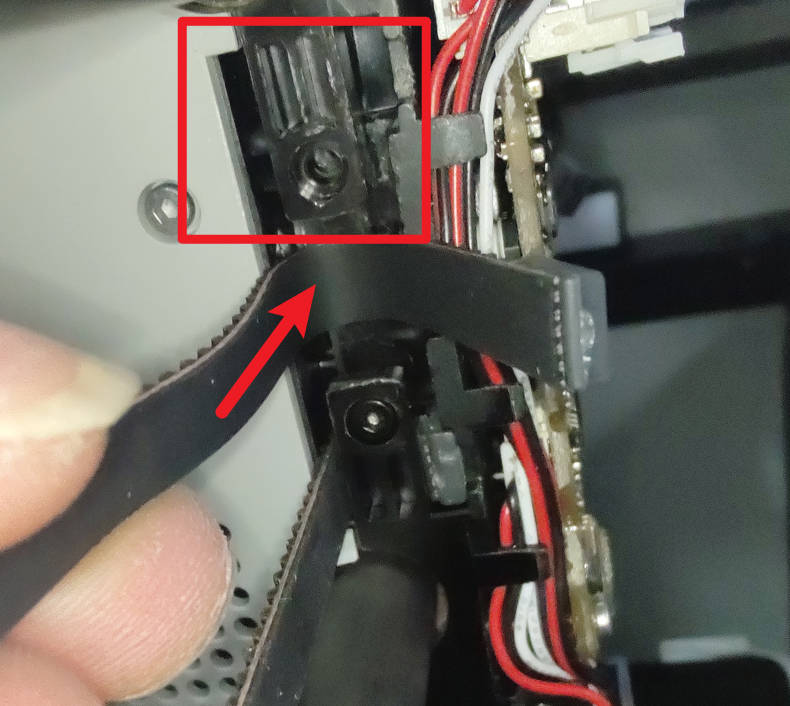
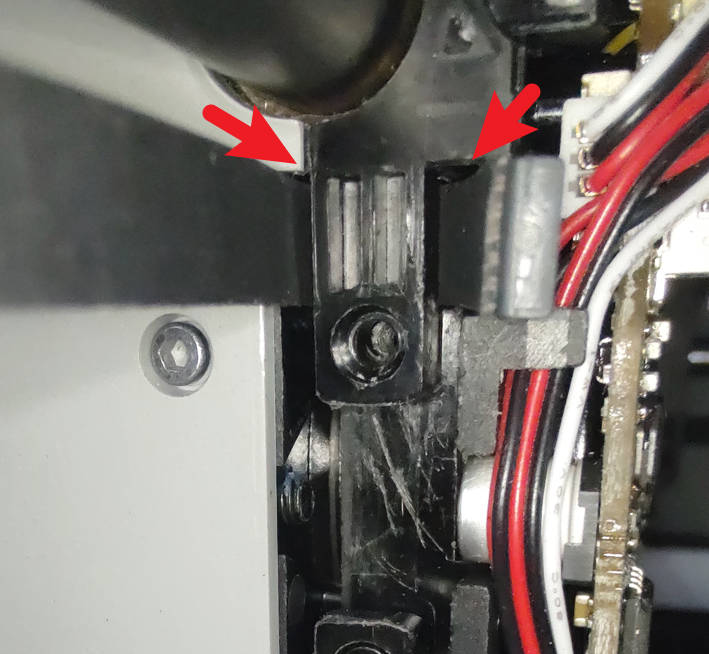
Insert both ends of the new belt into the corresponding slots on both sides of the toolhead. Then reinstall the fixing screws.
Note: Manually pull the belt tight to ensure there is no slack. After securing one end, pull the other end to ensure both sides are evenly tensioned. The belt should be taut, but not overly tight.
Tip: Use the pry tool to ensure the fixing blocks are securely seated in the slots.
-
Step 8: Reinstall the Toolhead Housings, Tighten the Tensioner, and Reattach the Rear Panel
Replace the Z Timing Belt
-
Step 1: Lower the Heated Bed, Then Power Off the Printer
Lower the heated bed: Use the printer's control panel to lower the heated bed to its lowest position.
Turn off the printer: Once the bed is fully lowered, power off the printer and disconnect it from the power supply for safety.
-
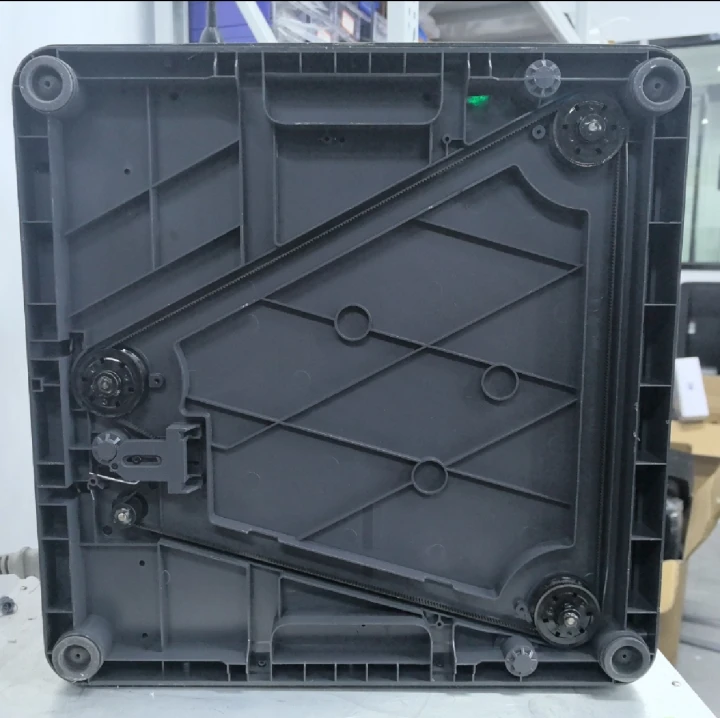
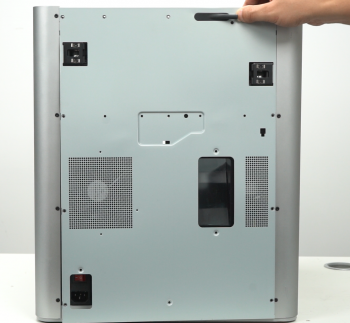
Step 2: Lay the Printer Down for Access
Place the printer on its side: Gently lay the printer on a flat surface with the back facing left and the door facing right. Be cautious not to damage any components.
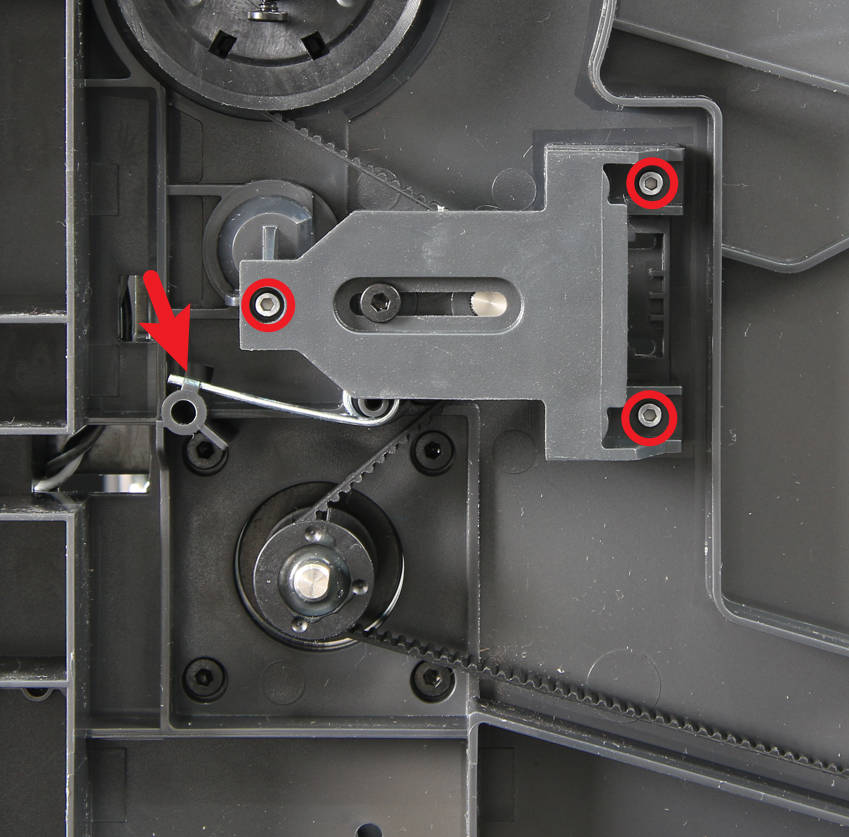
Remove the tensioner cover and the tensioner: Use an H1.5 hex key to remove the 3 screws securing the tensioner cover. Use an H2.0 hex key to unscrew the tensioner screw and remove the Z tensioner cover, spring, and tensioner.
-
Step 3: Install the Panda Belt on the Z-Axis
Remove the old Z timing belt: Carefully take out the old Z timing belt.
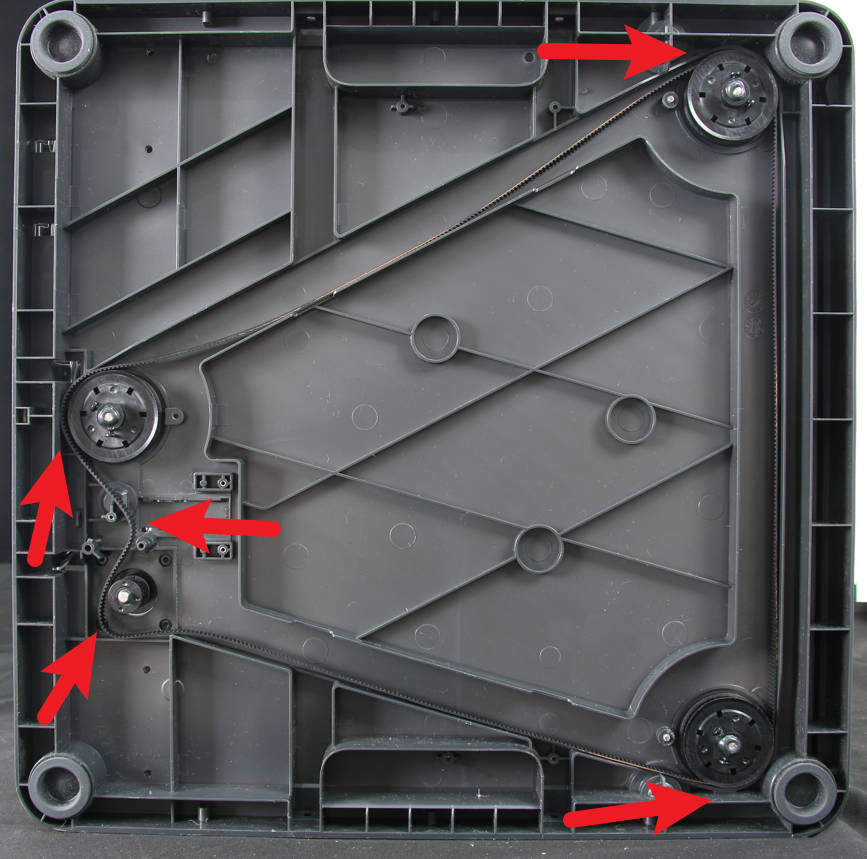
Install the new Z timing belt: Place the new Z timing belt at the bottom of the printer, ensuring it is positioned as shown in the figure. Make sure the toothed side faces inward.
-
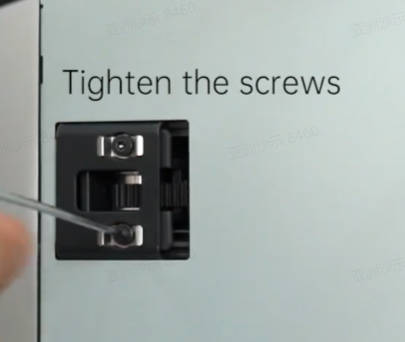
Step 4: Reinstall the Tensioner and Cover
Reinstall the tensioner and cover and adjust it to ensure the Z timing belt is taut.
Tighten the tensioner screw to secure it.