Panda Aura A1 & A1 mini & A1 Plus & A1 RGBW
Important Notes
- This manual covers four product models: Panda Aura A1 (for A1, includes light panel and controller), Panda Aura A1 Plus (for A1, includes light panel, RGBW strip, and controller; light effects for the panel and strip can be controlled independently via Web UI), Panda Aura A1 RGBW (for A1, includes light strip and controller), and Panda Aura A1 mini (for A1 mini, includes light panel and controller). For simplicity, subsequent sections regarding software and shared features are referred to as "Panda Aura A1" in later sections.
- Panda Aura A1 monitors printer status only – it does not control the printer. Its functionality is not affected by Bambu Lab firmware updates. For more information regarding affected and unaffected features, please refer to the Official Bambu Lab Announcement.
- Panda Aura A1 supports 2.4G Wi-Fi only.
- After connecting to the Panda Aura A1 AP hotspot, you will be redirected to the Web UI. Due to mobile device permissions, firmware updates may not upload in the redirected interface. Please use a mobile or desktop browser to access the Web UI for file uploads.
- If you encounter any issues not addressed in this wiki, please contact customer support at:
support01@bigtree-tech.com.
Product Introduction
Panda Aura A1 Series — Intelligent Audio-Visual Experience Empower your creativity with light. The Panda Aura A1 series seamlessly fuses dynamic RGB effects, task lighting, and intelligent alerts into one elegant solution. With full-spectrum color control and customizable audio alerts, it offers a deeply personalized experience managed via Web UI or the upcoming mobile app, while native Home Assistant compatibility ensures it thrives within your existing smart home ecosystem. More than just decoration, the light panel acts as a visual pulse for your printer to communicate status through intuitive color shifts. From silent monitoring to intuitive alerts, Panda Aura A1 bridges the gap between machine and maker, bringing visual precision to your desktop.
Product Features
-
Product Position: Decorative light panel, illumination strip, and audio-visual alarm for A1/A1 mini printers.
-
Customizable RGB lighting and sound effects (via Web UI and App).
-
Controllable through Home Assistant and the App (coming soon) with support for scene automation.
-
Real-time print status display (H2D Style Status Color Indicator).
-
Audio-visual alerts for print completion and errors.
Model Comparison
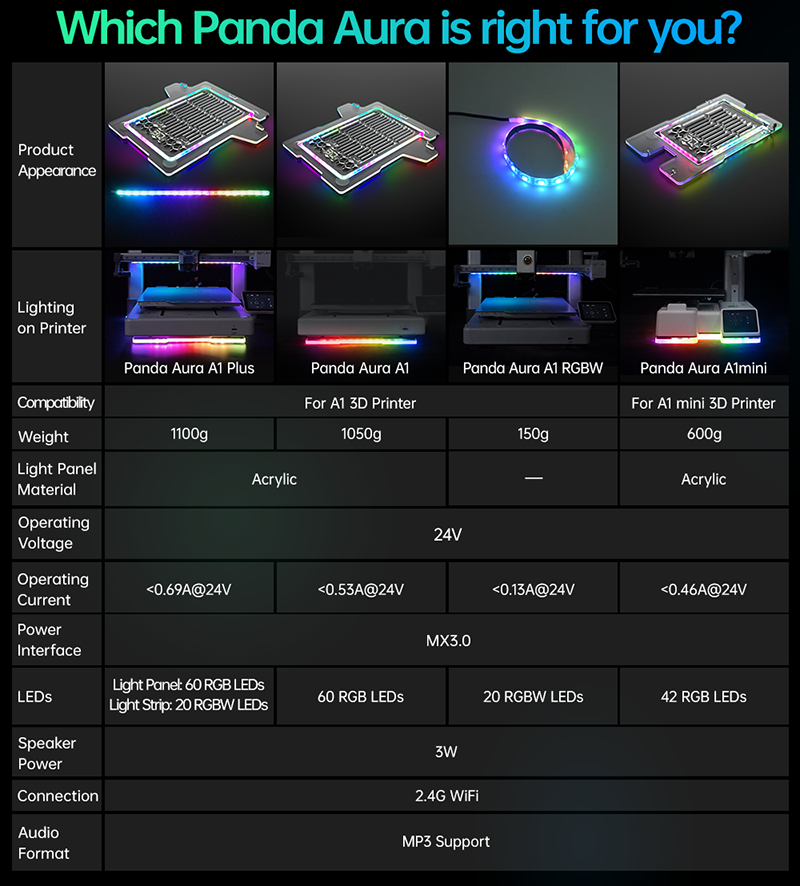
Basic Parameters
| Microprocessor | Built-in ESP32-C3FH4 chip, RISC-V 32-bit single-core microprocessor, up to 160 MHz |
|---|---|
| Memory | 384 KB ROM, 400 KB SRAM, 4 MB On-board Flash |
| Logic Voltage | 3.3V |
| Input Voltage | 24V |
| Current | Panda Aura A1: 0.53A; A1 Plus: 0.69A; A1 RGBW: 0.13A; A1mini: 0.46A |
| Power Interface | Supports MX3.0 4-pin & MX3.0 2-pin |
| Light Panel Material | Acrylic |
| LED Count | A1 & A1 Plus Light Panel: 60 LEDs; A1mini Light Panel: 42 LEDs; A1 RGBW & A1 Plus Strip: 20 LEDs |
| Packaging Dimensions | A1 & A1 Plus: 427 x 406 x 37mm; A1mini: 416 x 230 x 37mm; A1 RGBW: 190 x 78 x 50mm |
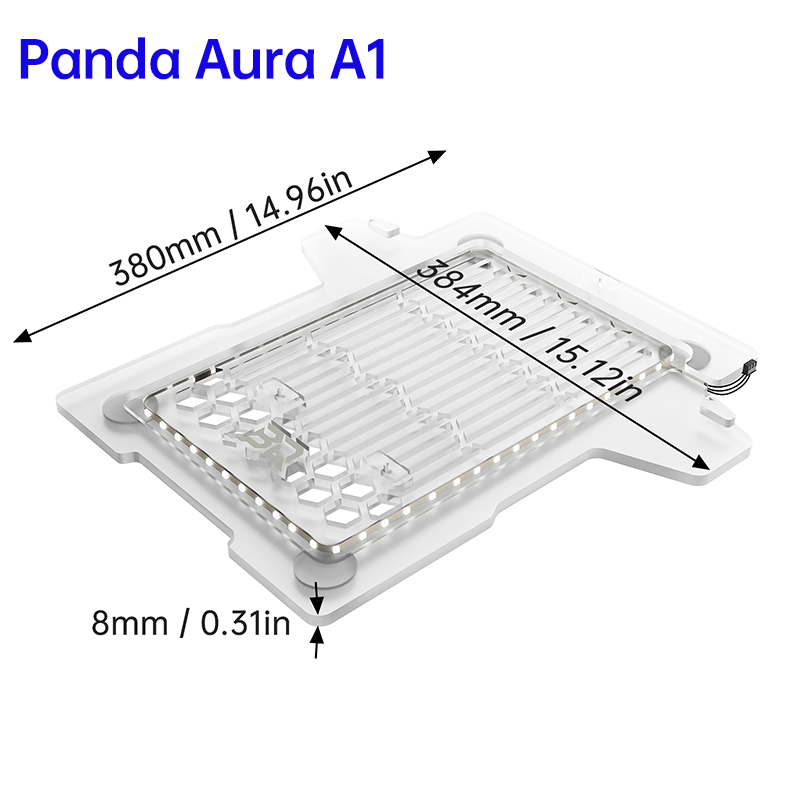
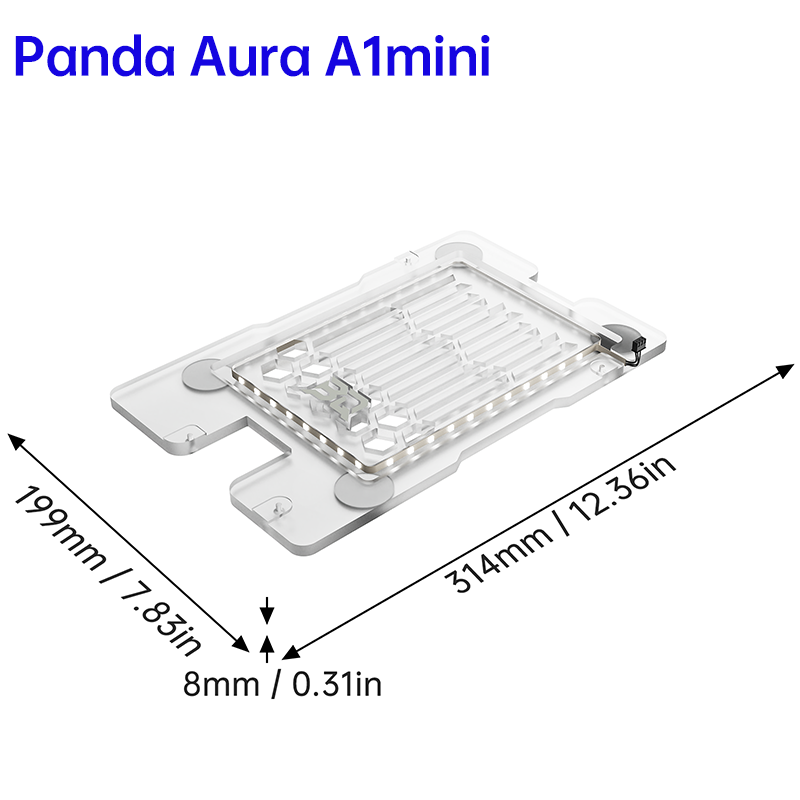
| Light Panel Dimensions | Panda Aura A1: 384 x 380 x 8mm; Panda Aura A1mini: 314 x 199 x 8mm |
| Speaker Power | 3W |
| Audio Format | Supports MP3 format |
| Communication | 2.4G Wi-Fi (IEEE 802.11 b/g/n) |
| Operating Temp | 0℃ to +50℃ |
| Storage Temp | -20℃ to +70℃ |
Dimensions
Installation Guide
Installing the Light Panel on an A1 Printer
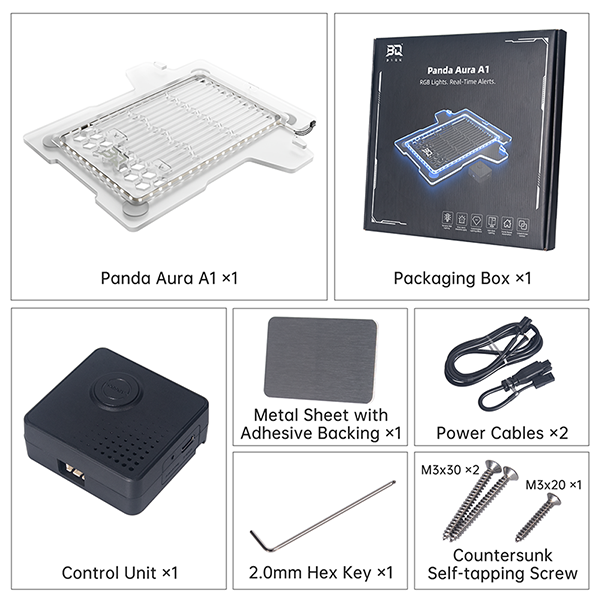
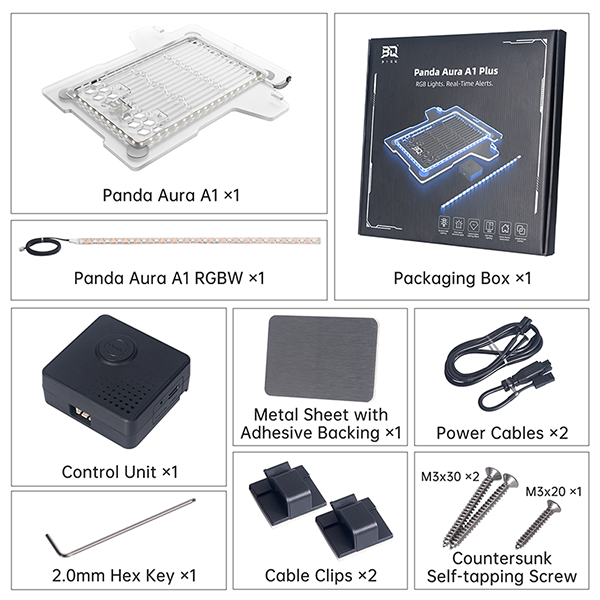
Panda Aura A1 and Panda Aura A1 Plus include the light panel.
Panda Aura A1 Parts List
Panda Aura A1 Plus Parts List
Installation Steps
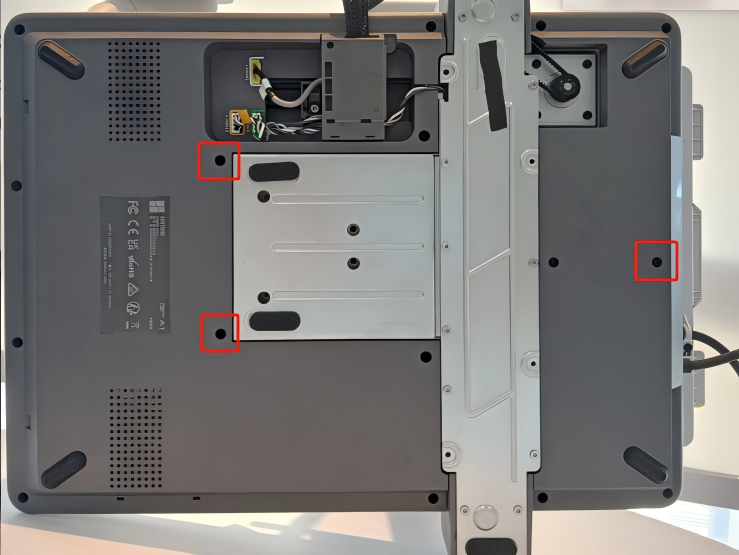
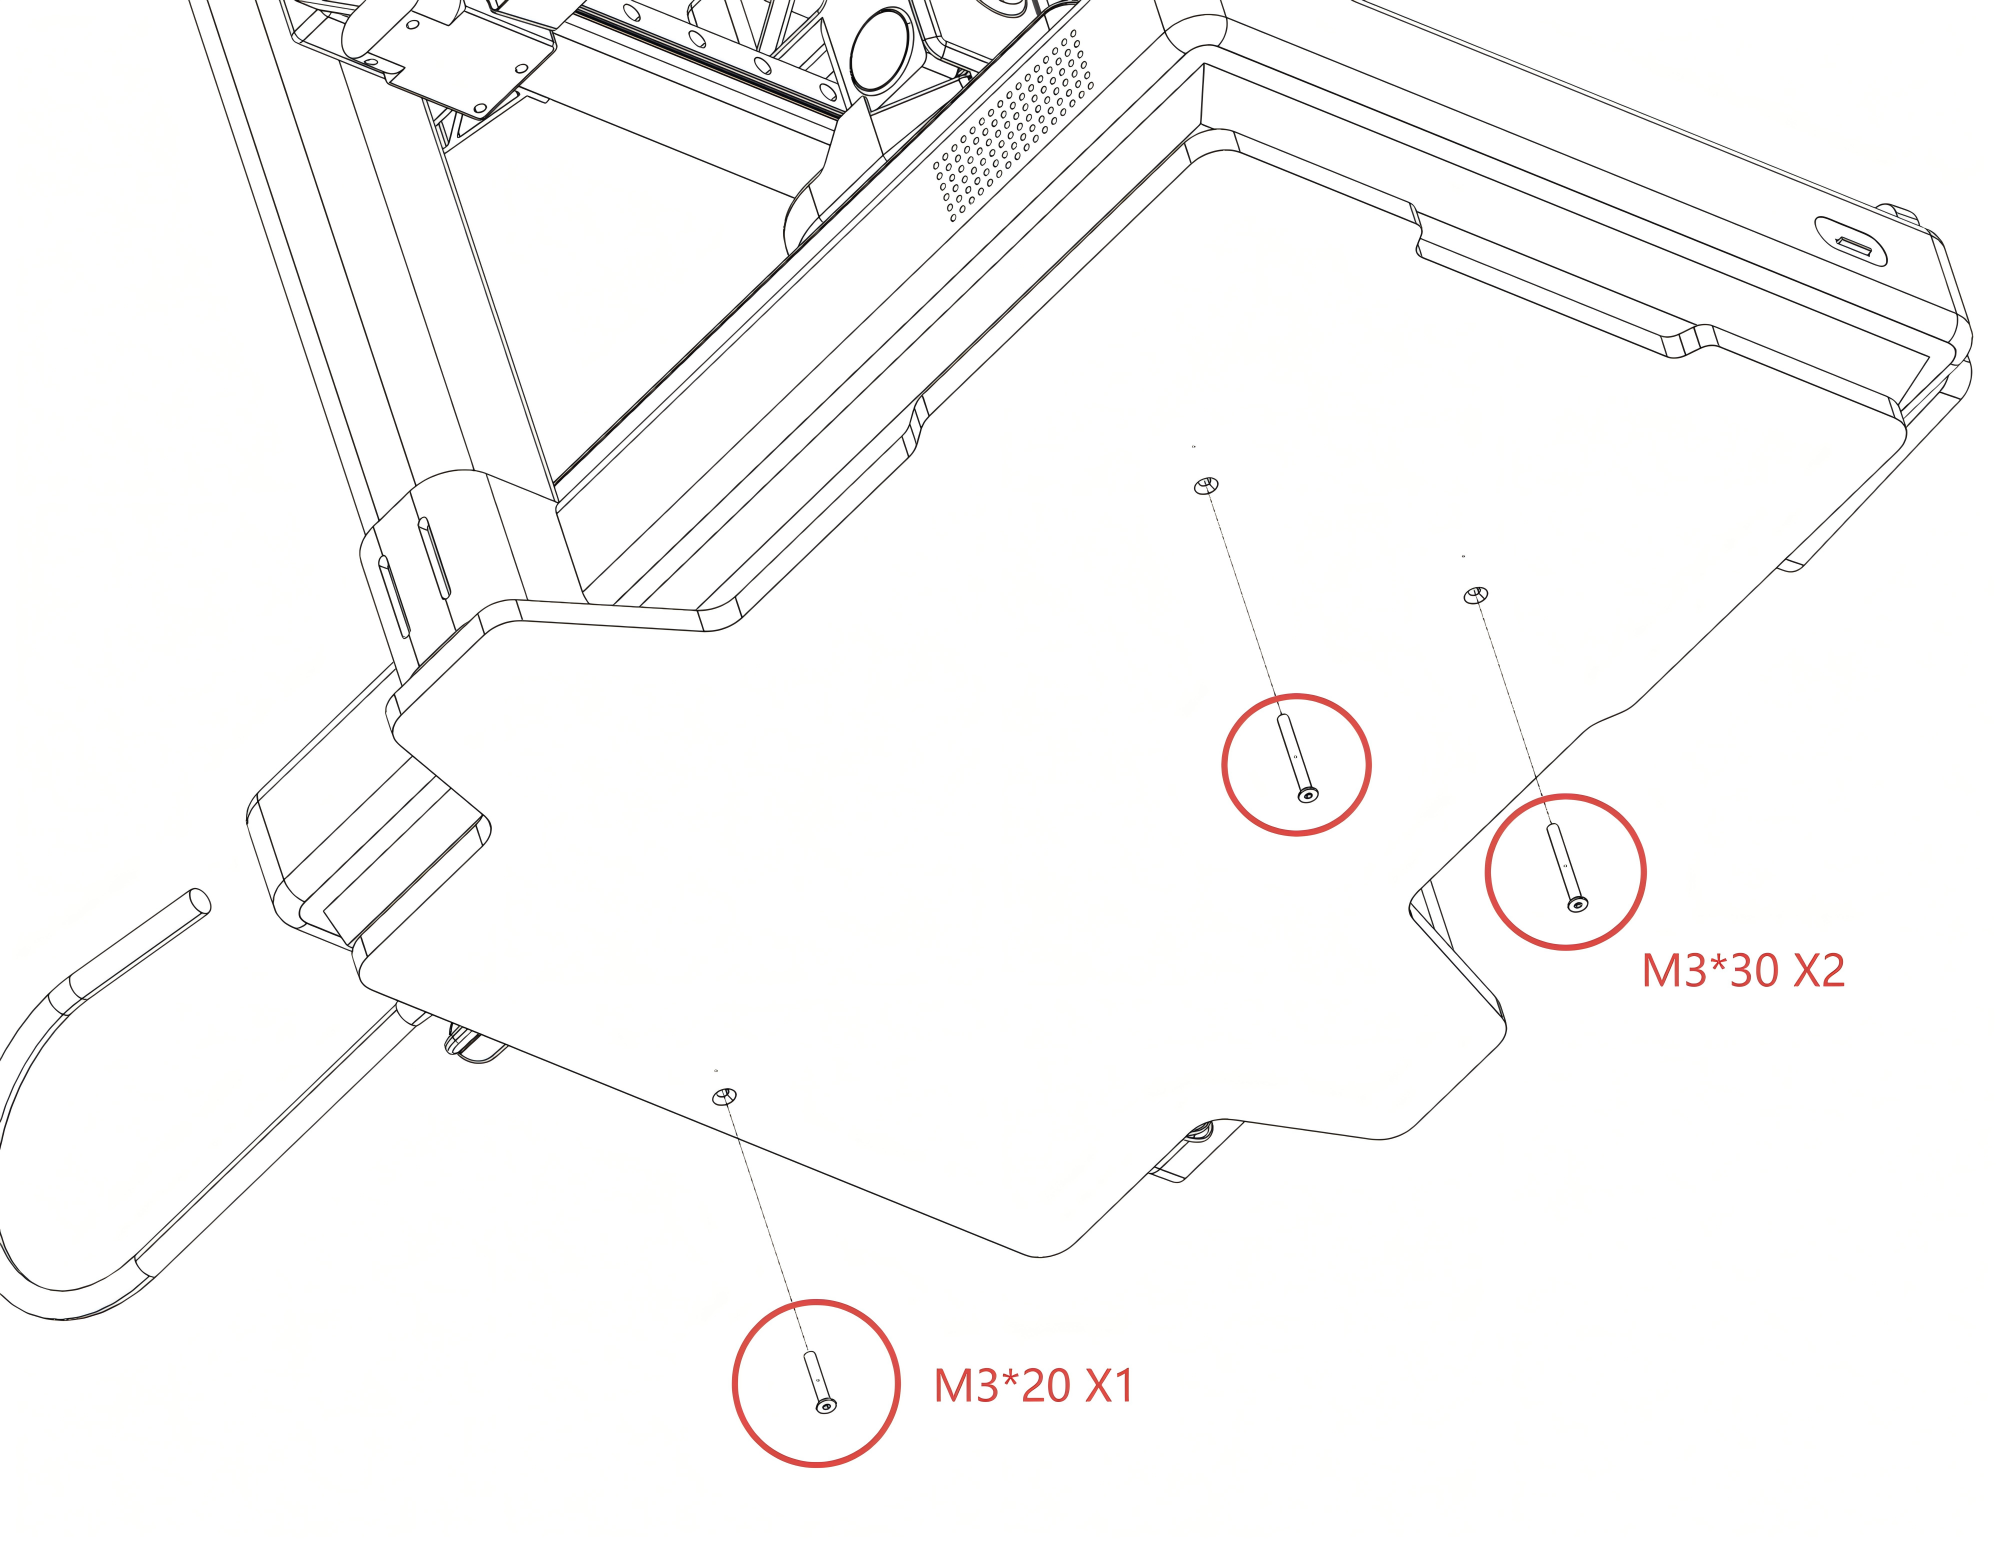
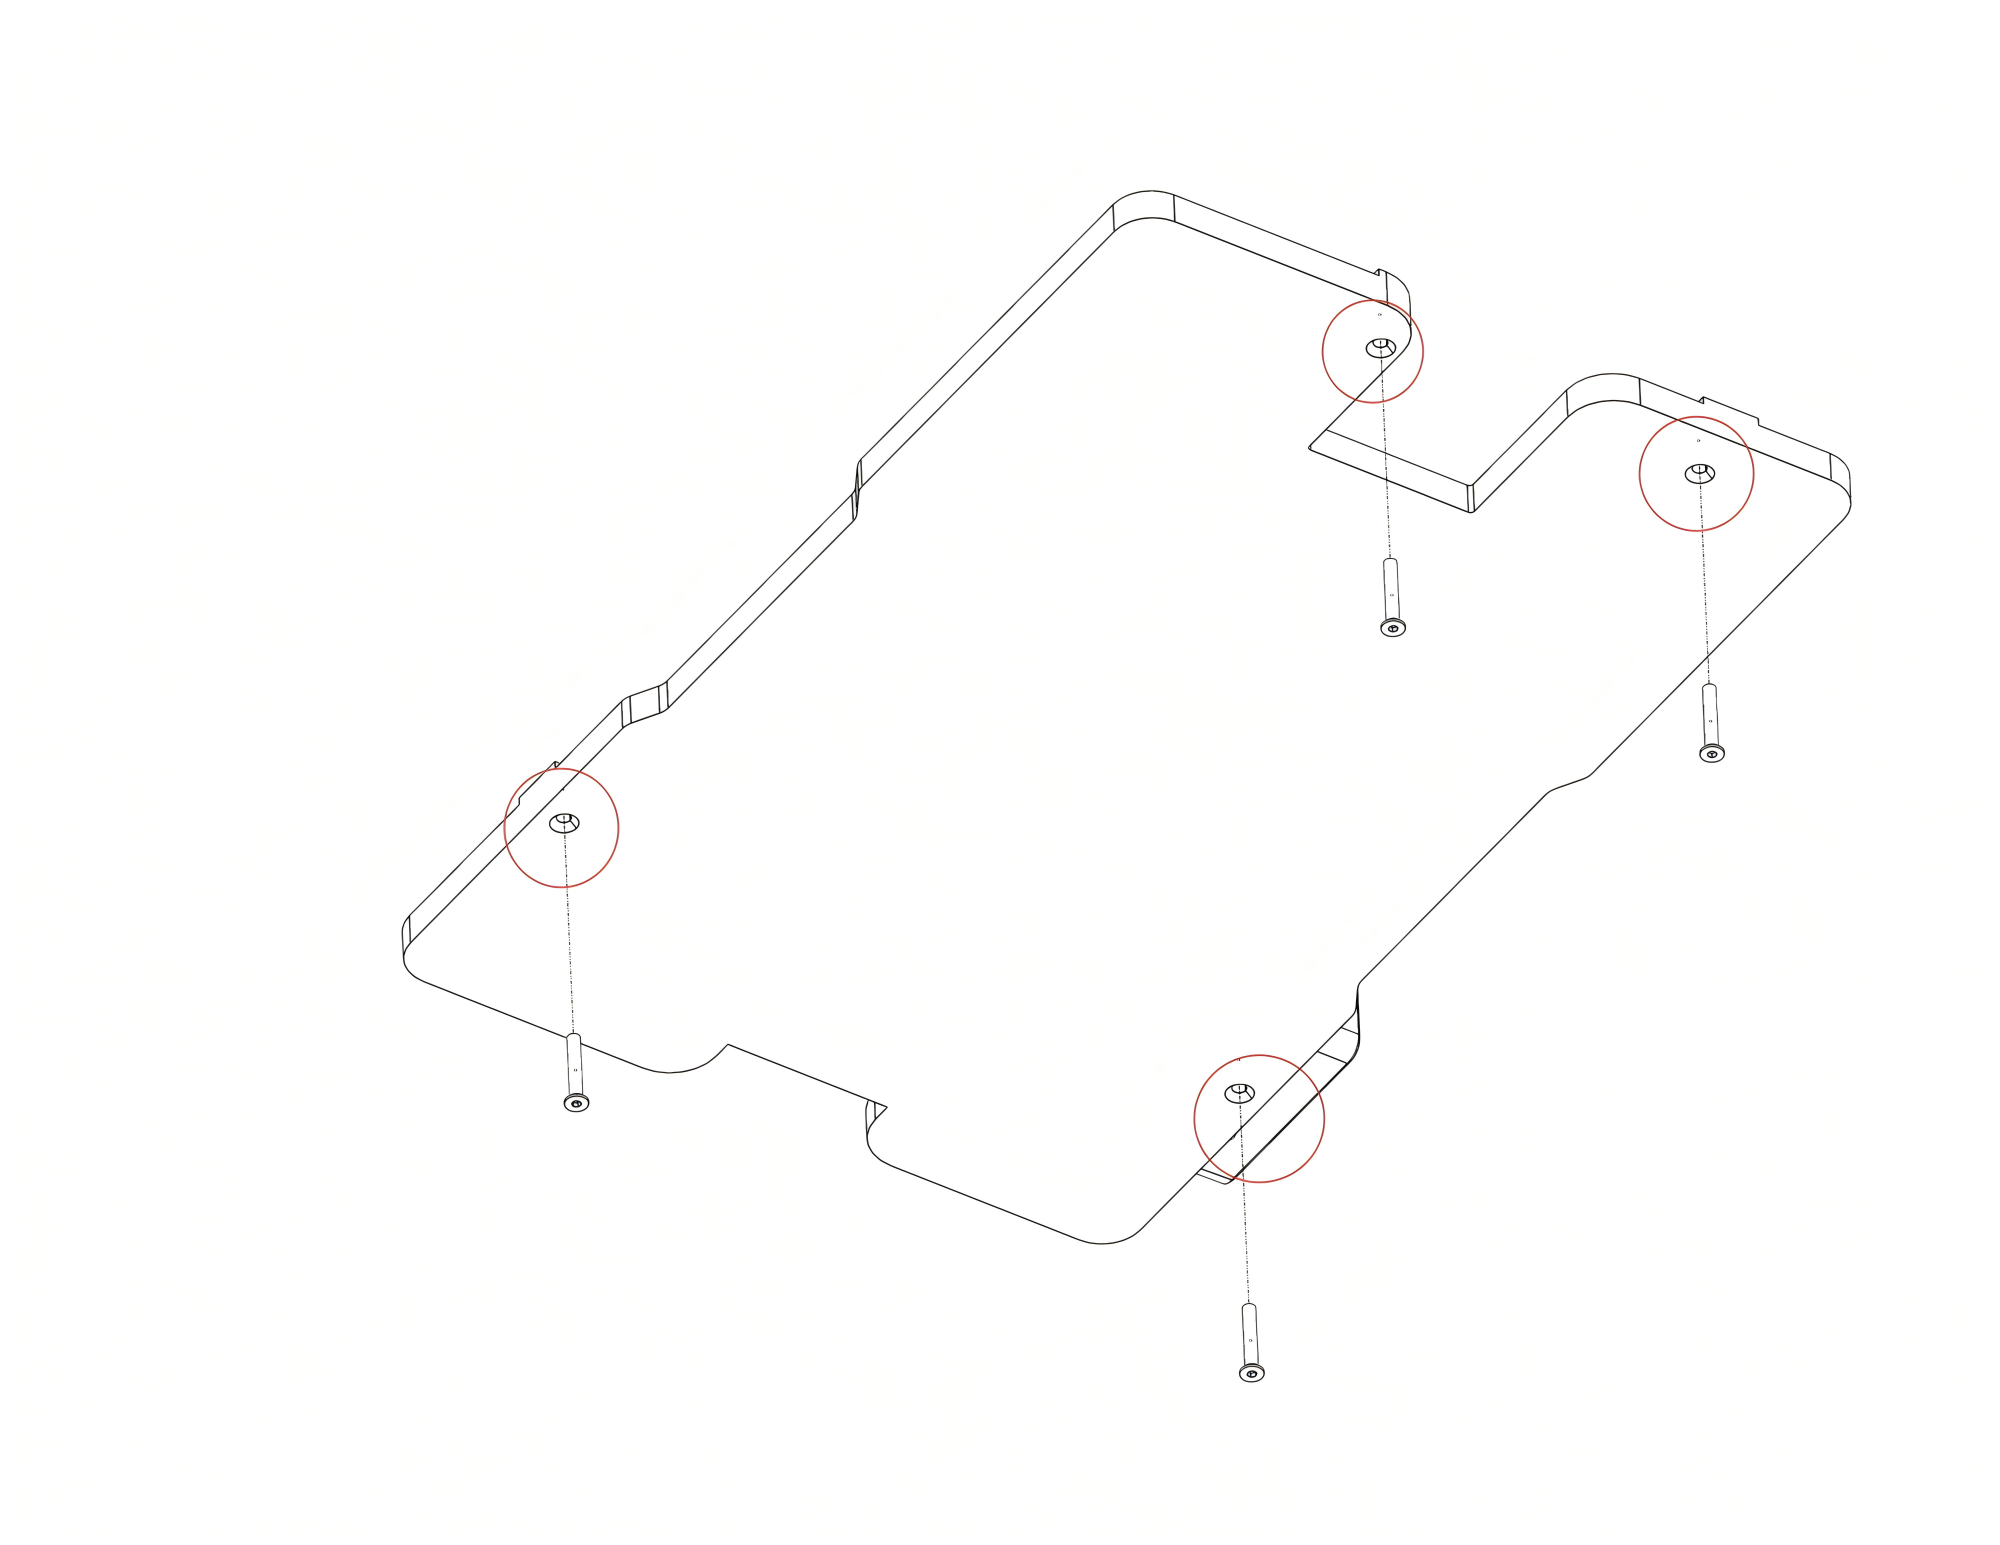
- Remove the three screws from the bottom of the A1 printer as shown below.
- Place the A1 printer onto the Panda Aura A1 acrylic light panel.
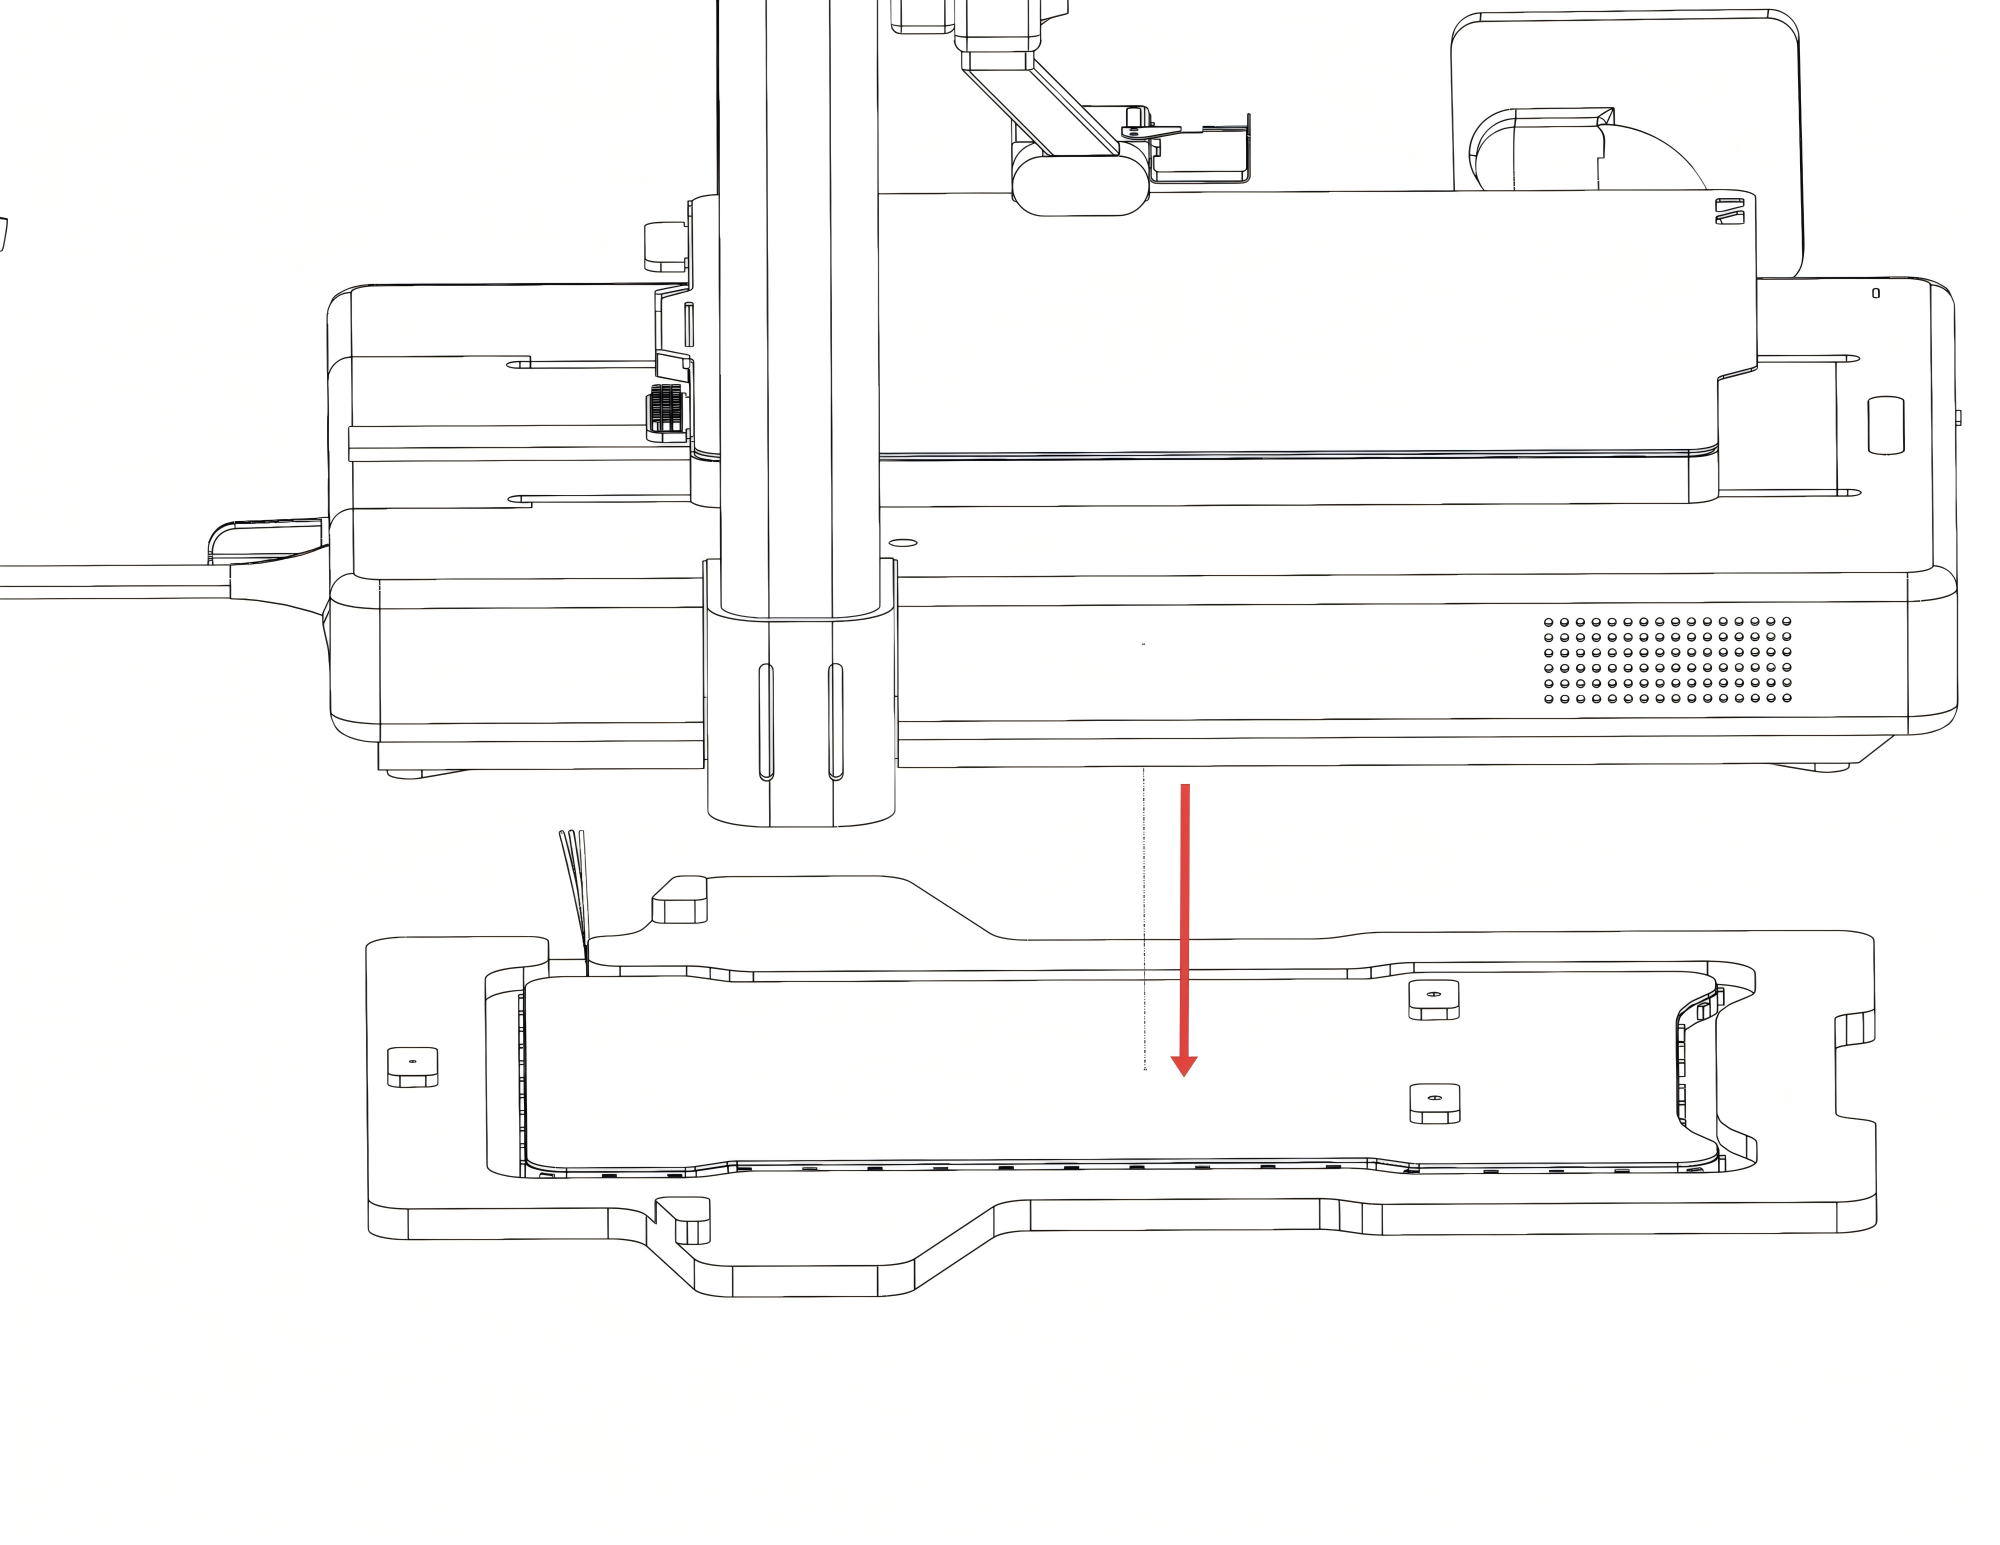
- Center the printer so that both left and right columns are flush against the rear limit blocks.
- For easiest installation, position the printer at the edge of your work surface. Then, install the three self-tapping screws from the underside. This method avoids the need to flip the printer over.
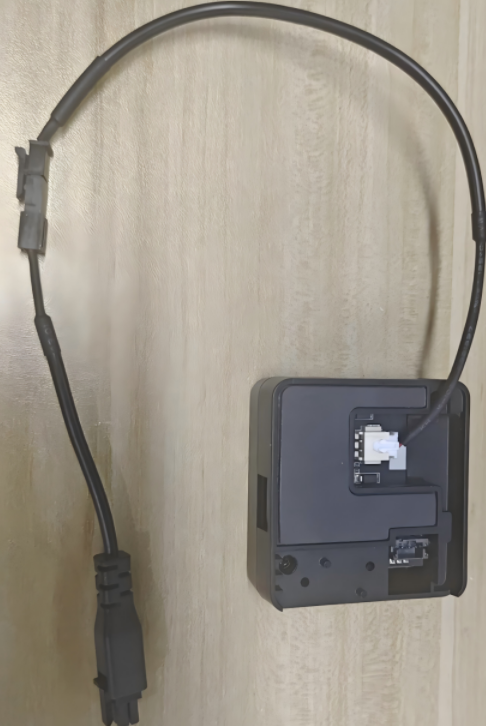
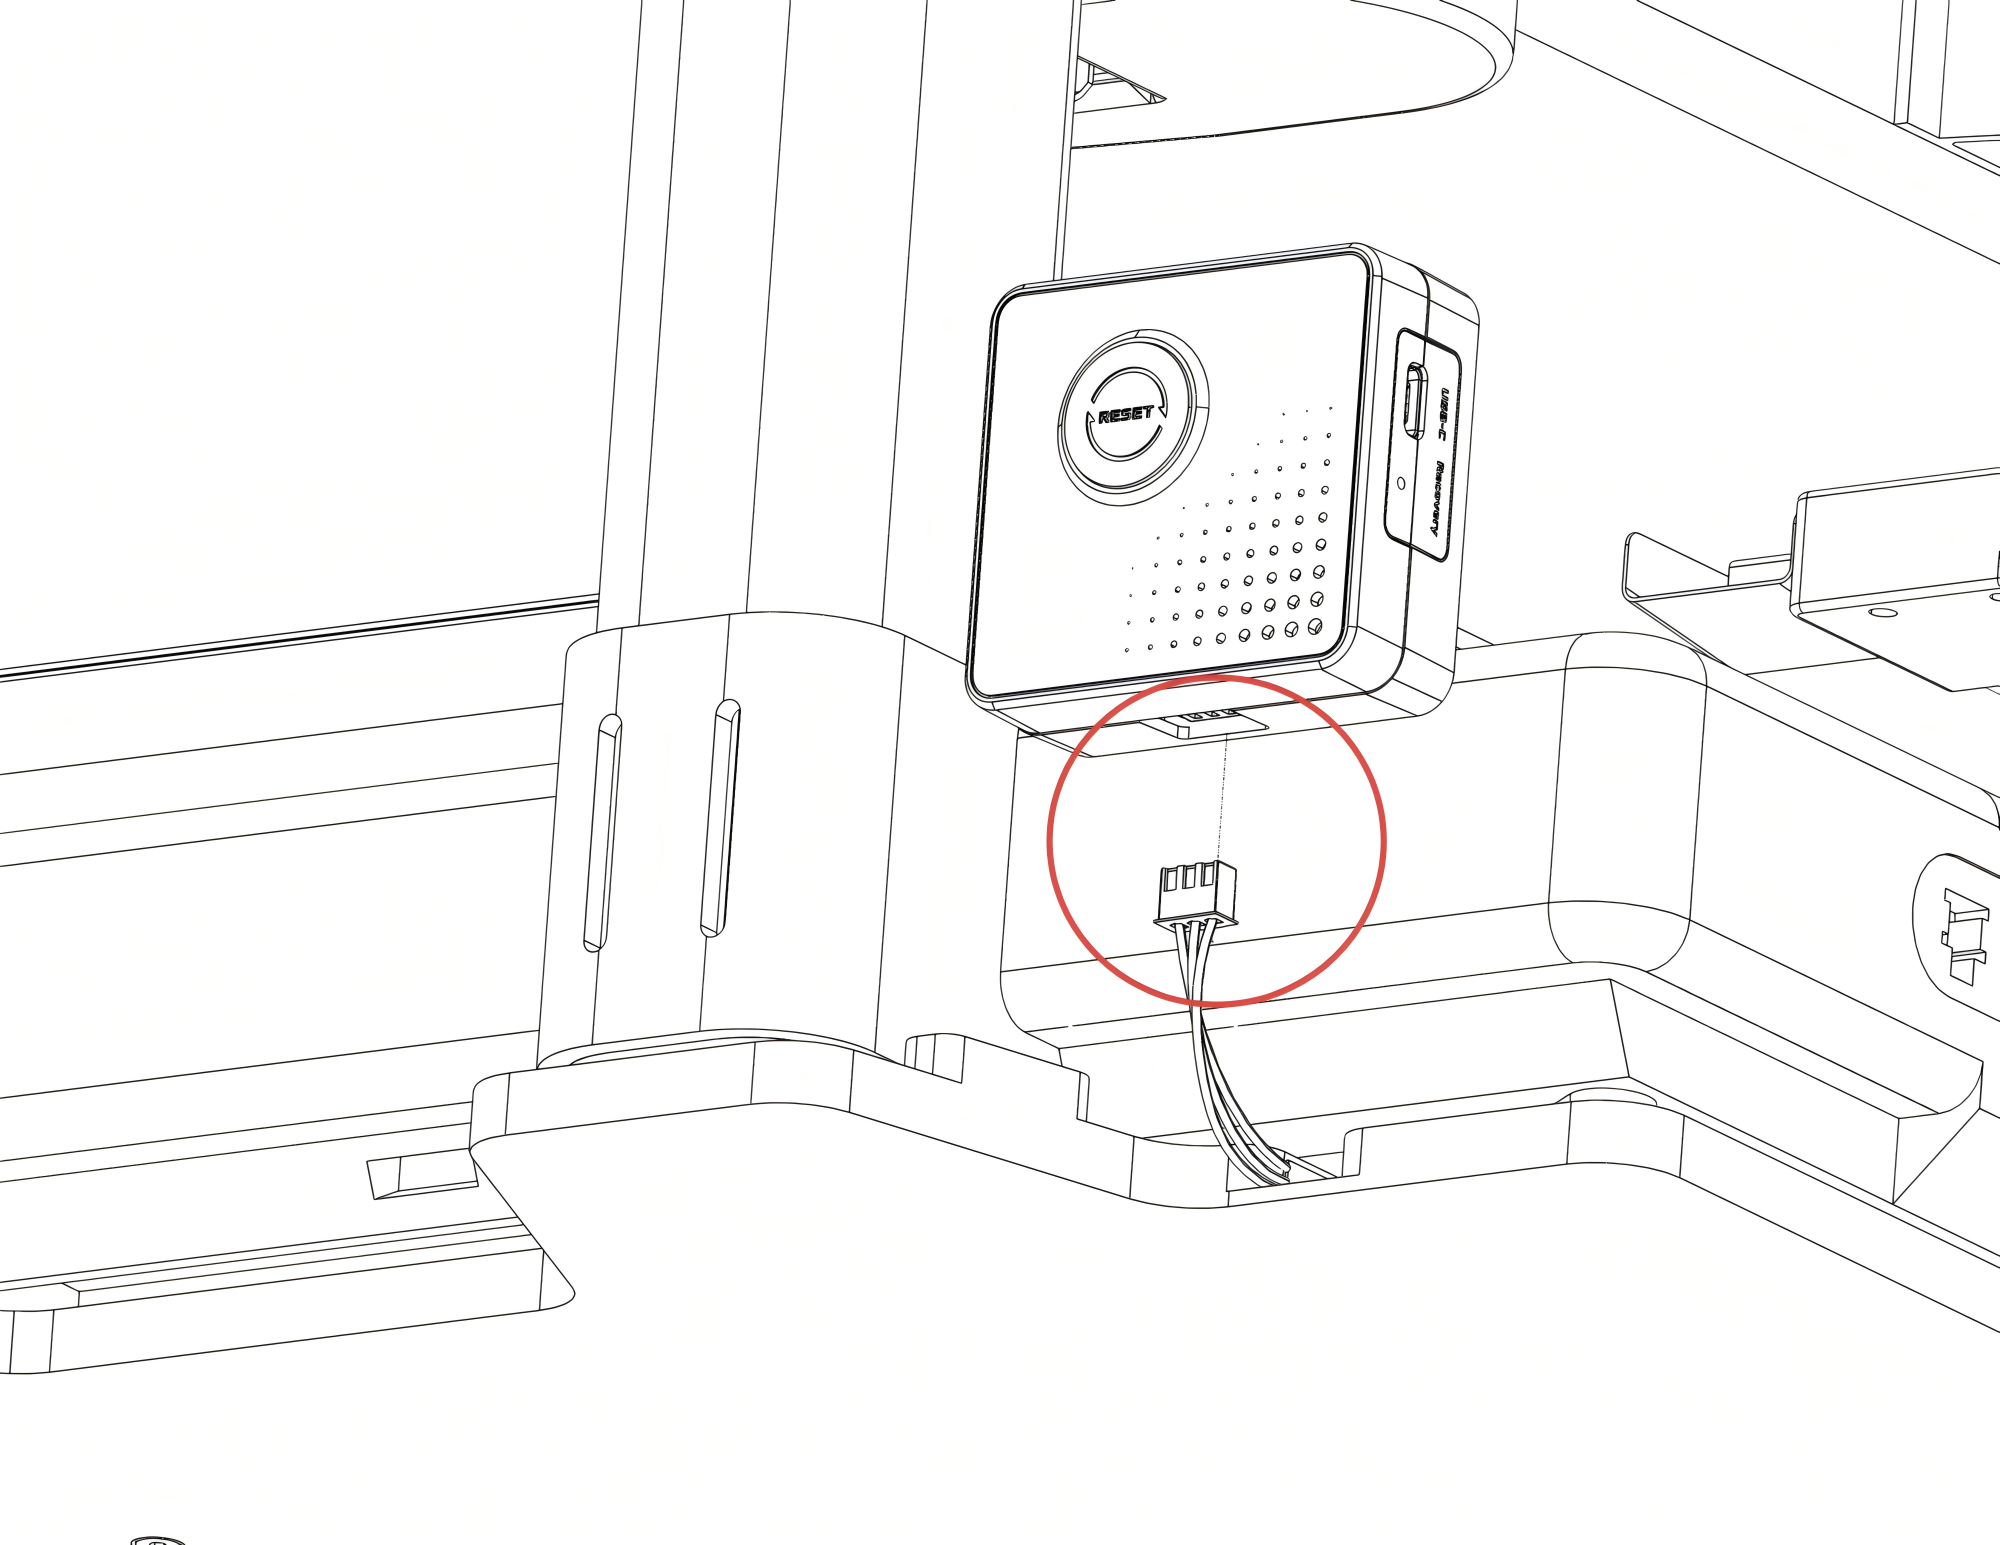
- Connect the acrylic light panel's cable to the port on the bottom of the controller, as illustrated.

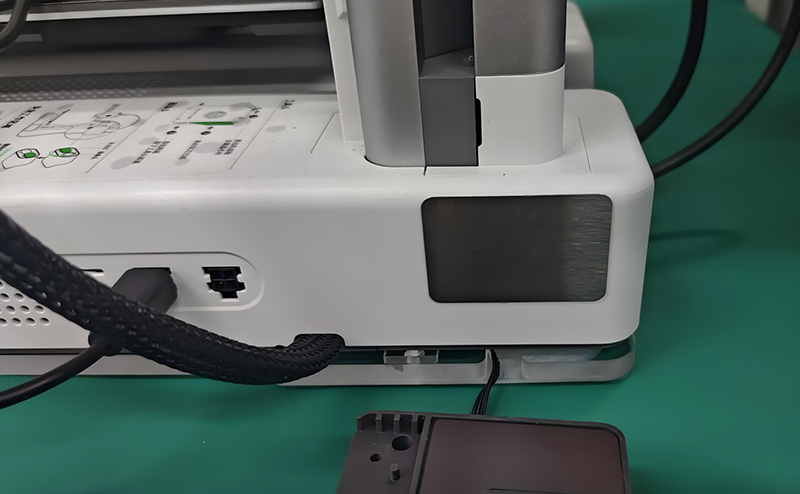
- To determine the metal sheet's position, hold the controller in its intended location on the printer. Once positioned, attach the sheet to secure the box.
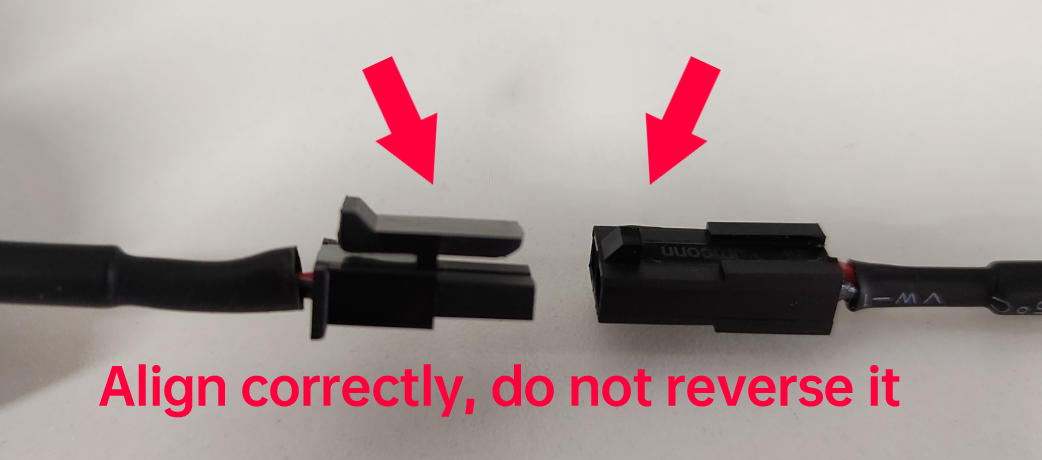
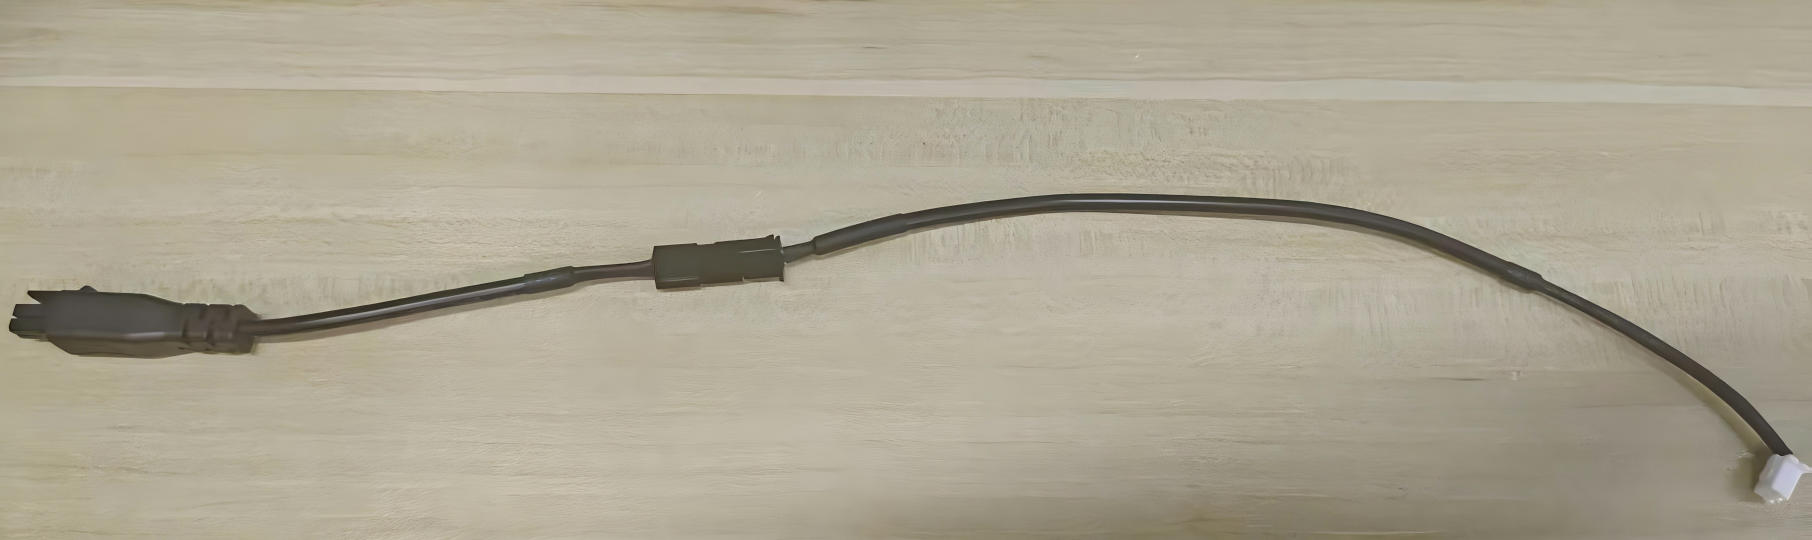
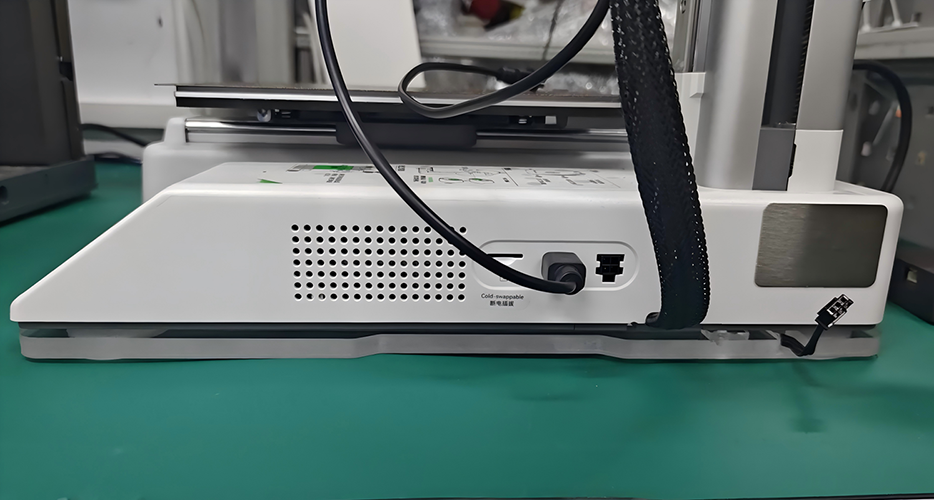
- Connect the power cable to the adapter cable, ensuring the buckles are properly aligned.
- Connect the 2-pin plug to the port on the back. (When disconnecting, please pull from the connector housing; do not pull directly on the wires, as this can cause damage).
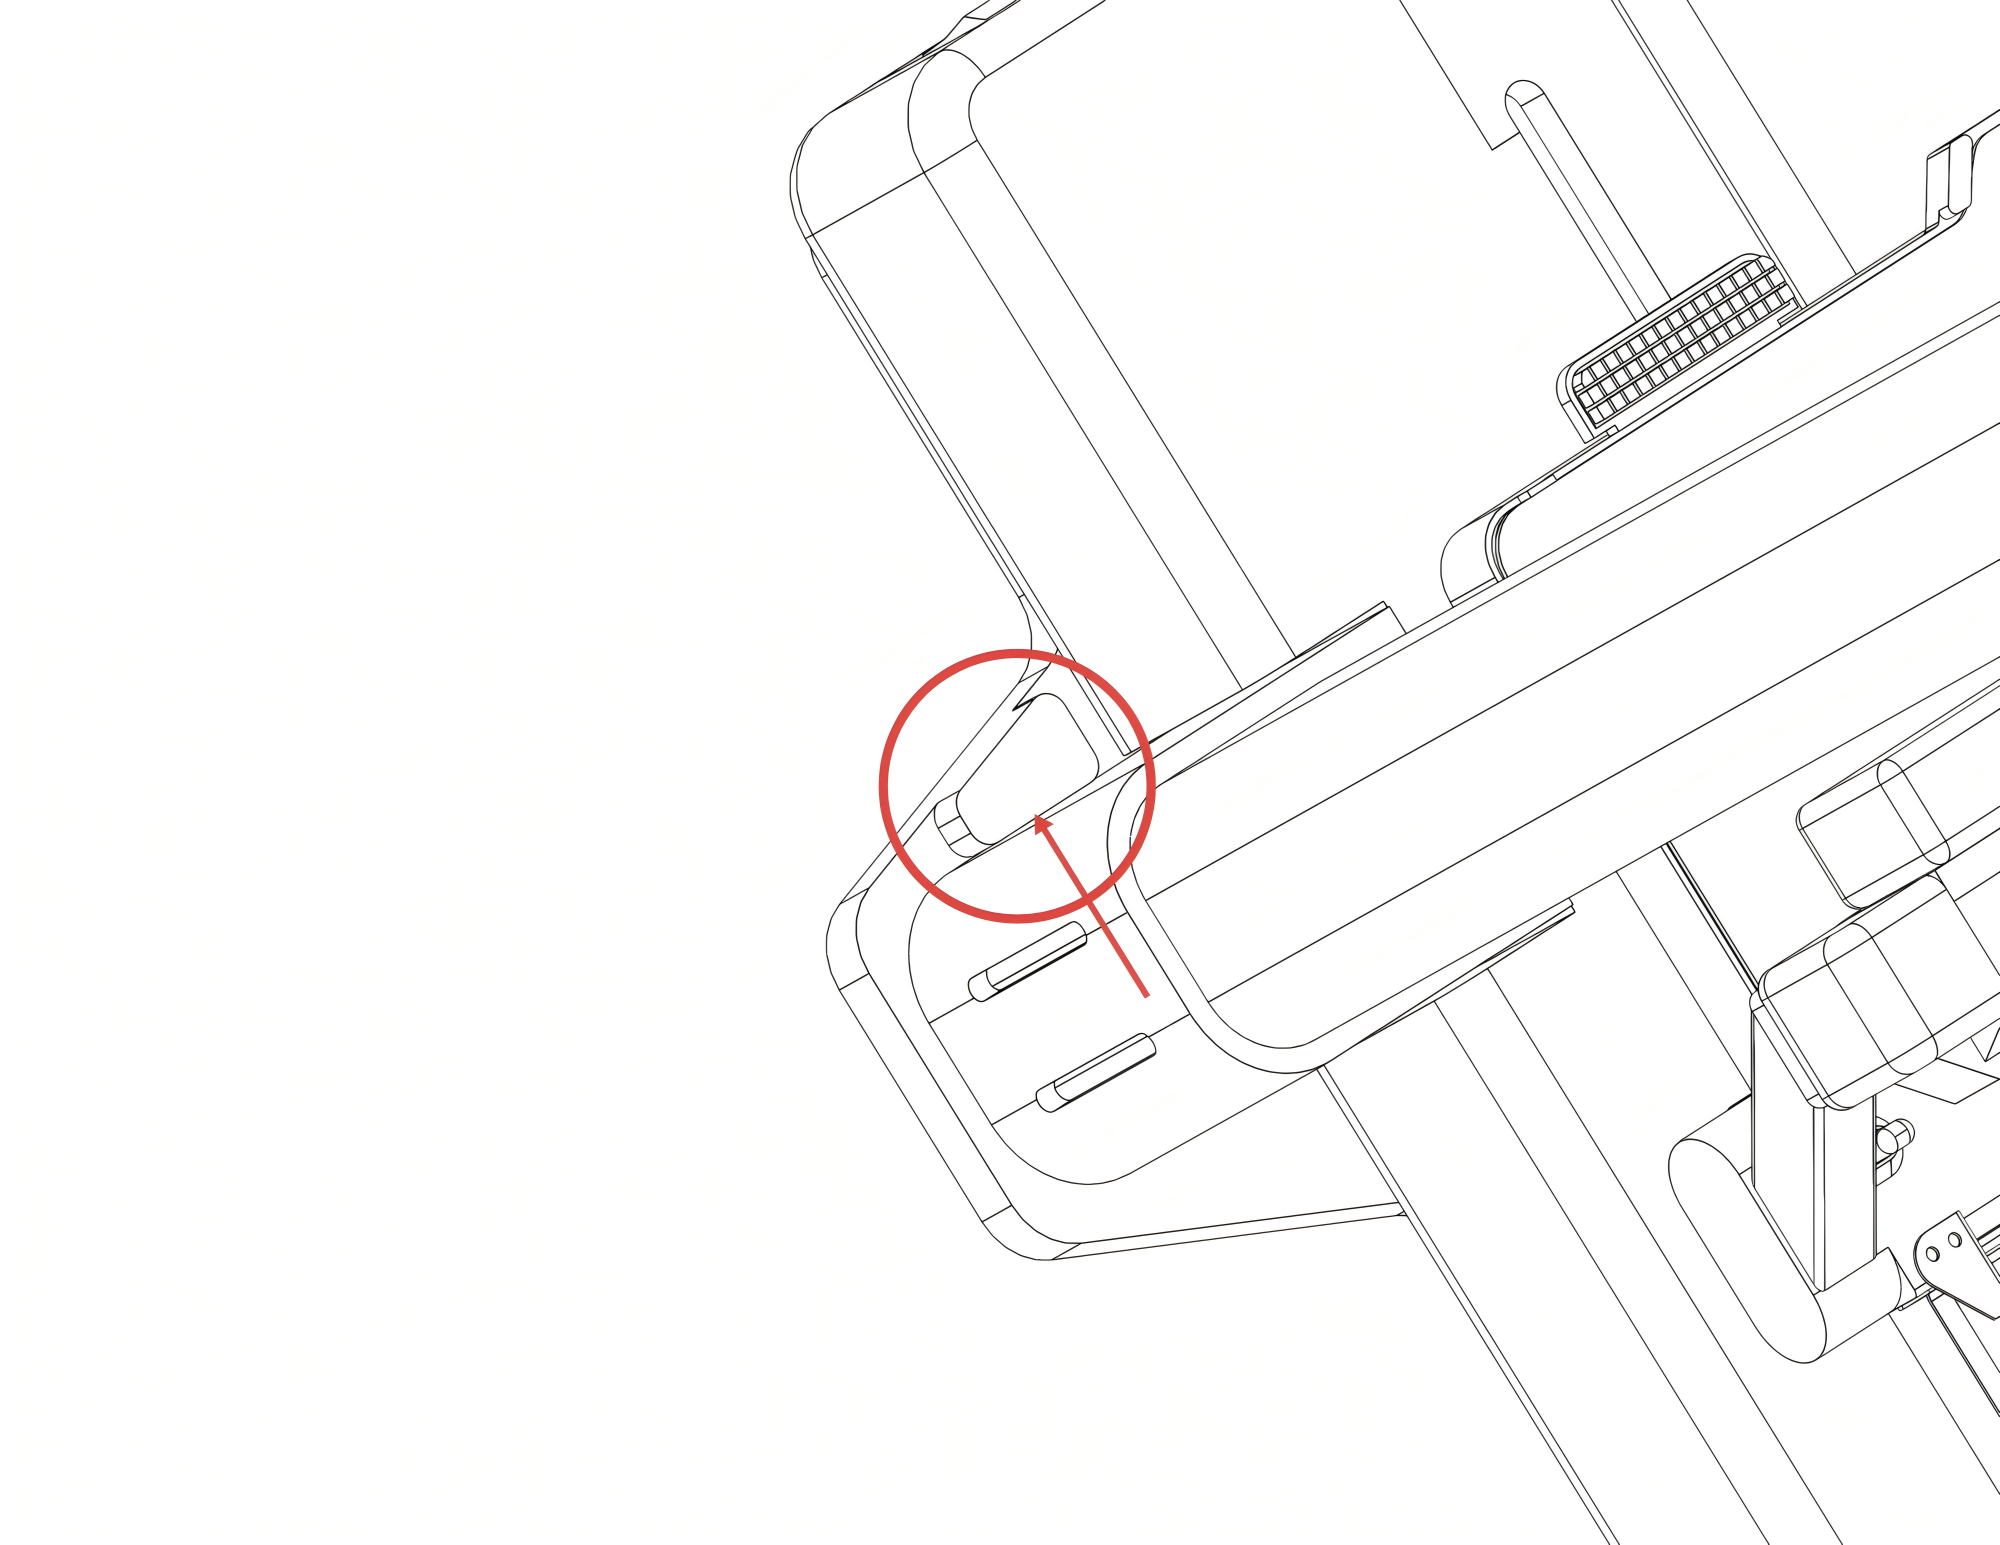
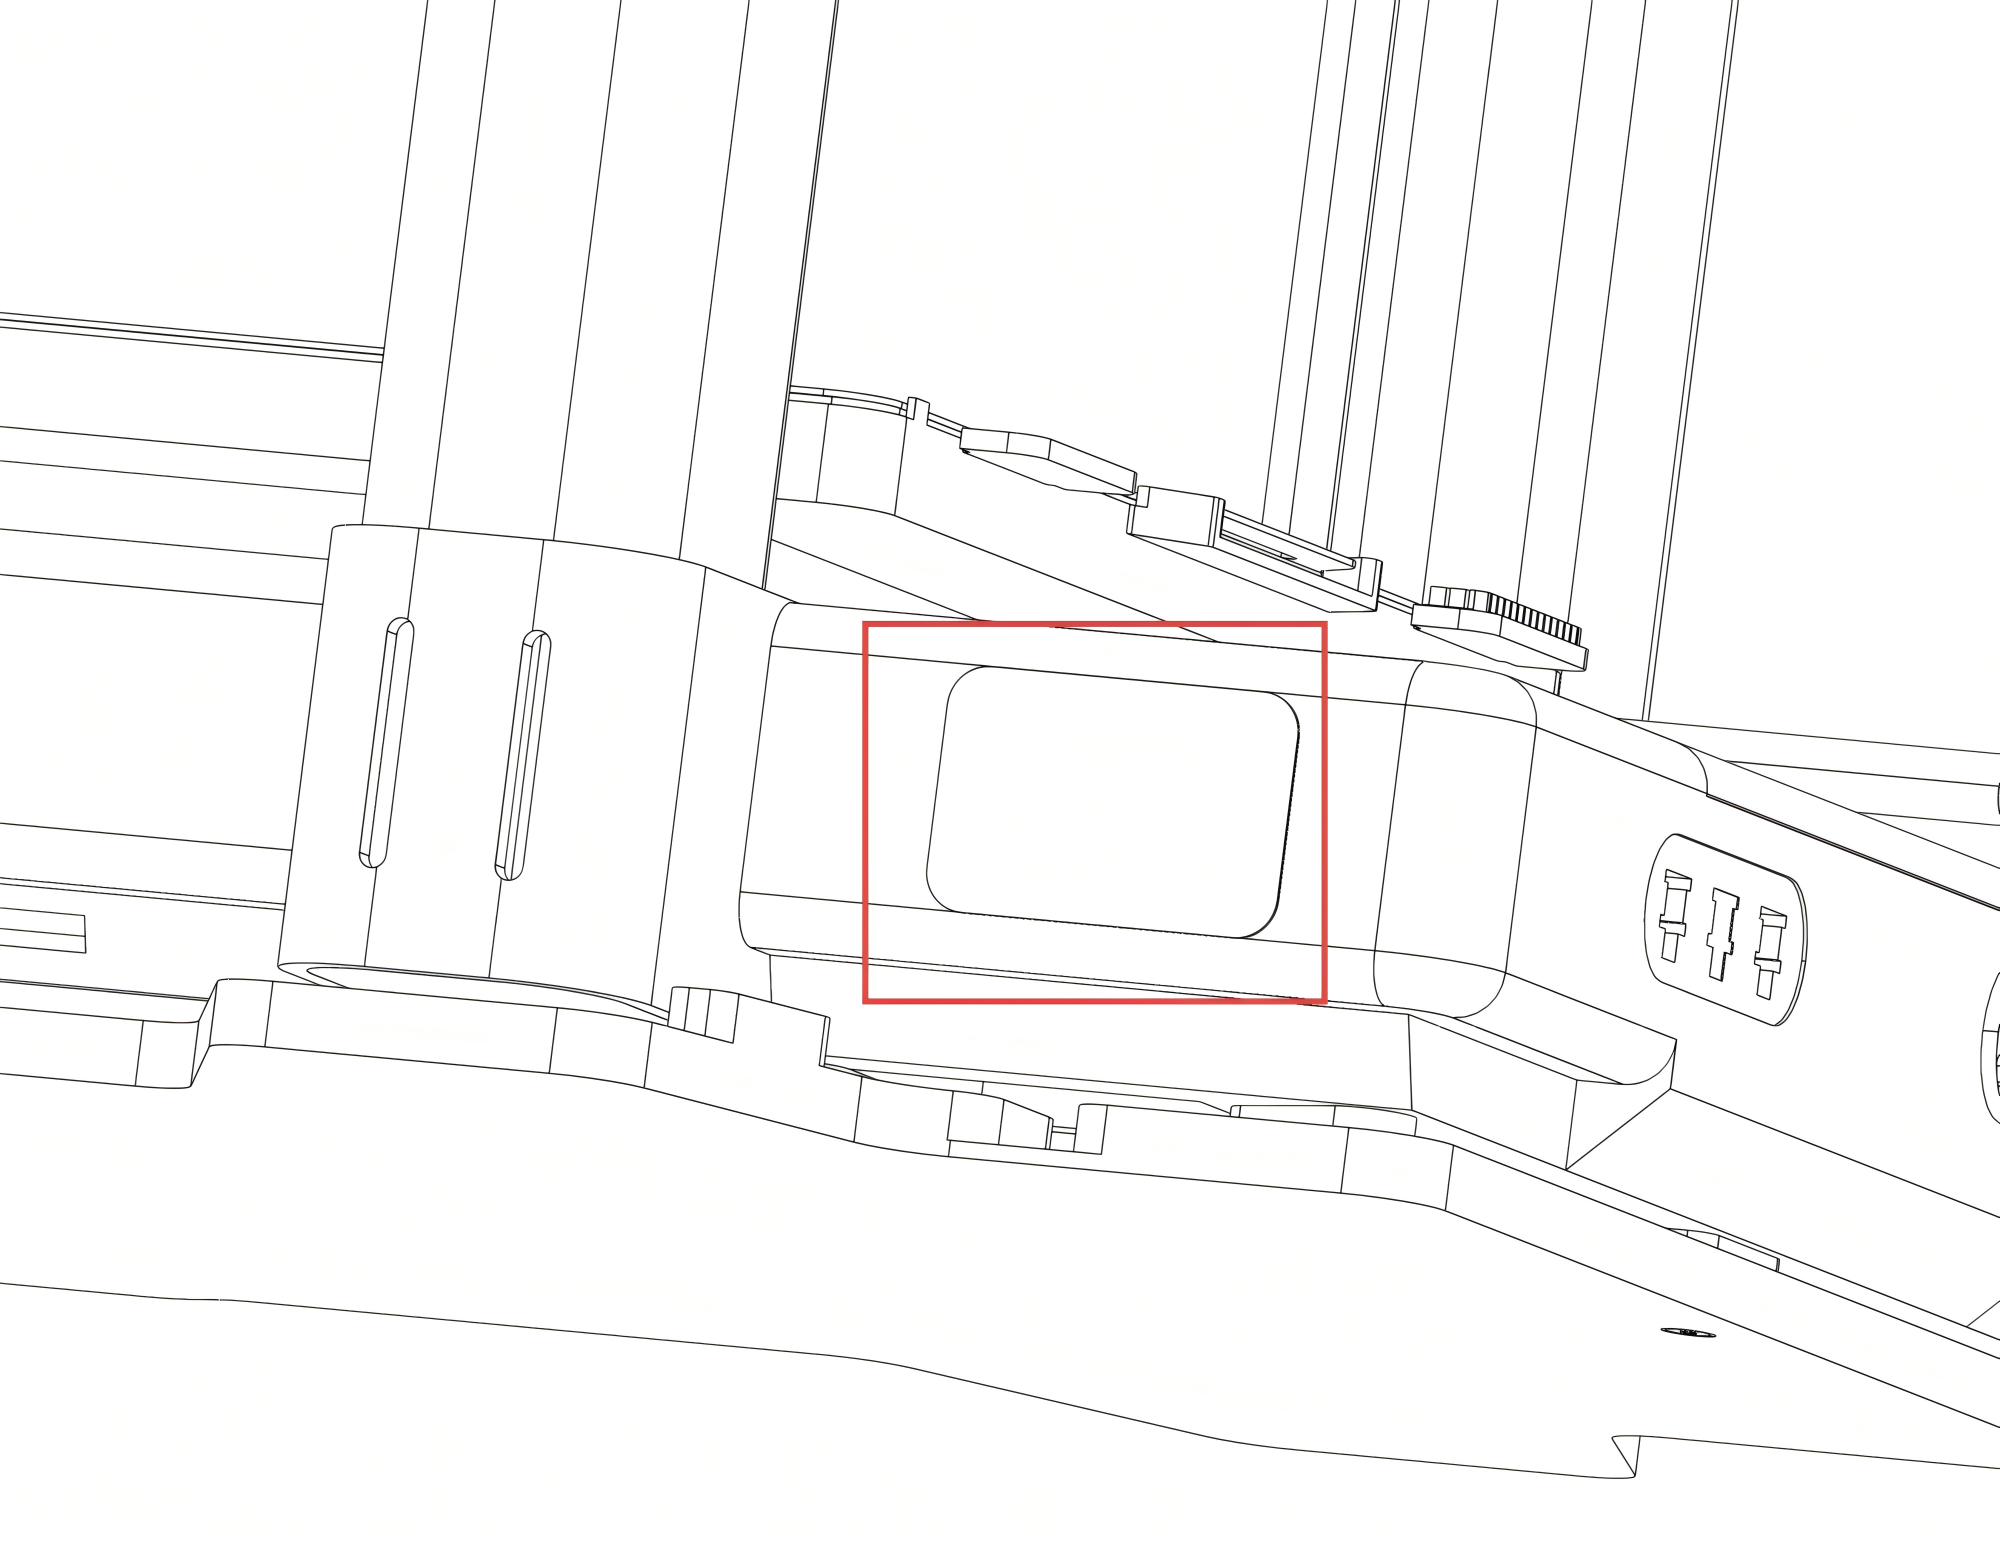
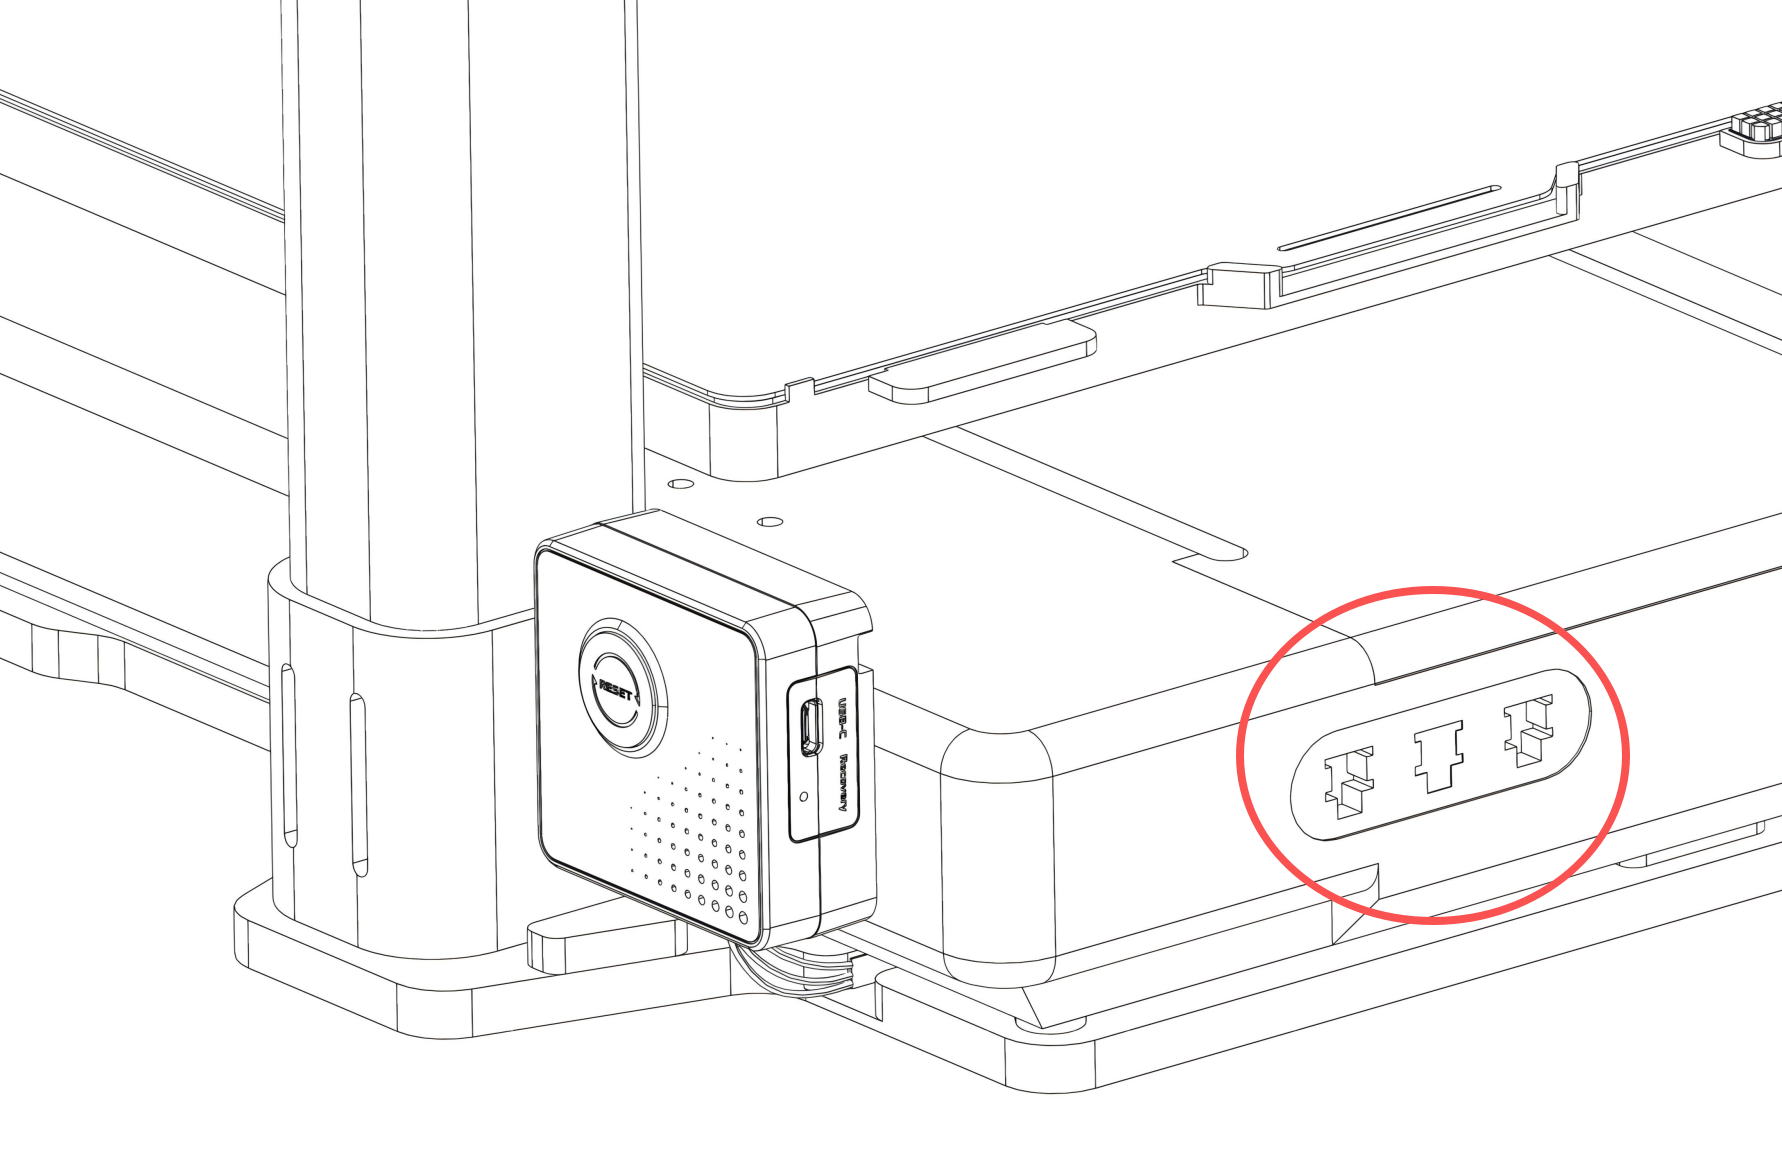
- Locate an unused 4-pin power port on the back of the A1 printer. Insert the MX3.0 4-pin connector from the adapter cable into the printer’s MX3.0 4-pin port.
Powering via Panda Branch Plus
If you prefer not to use the printer's power or if the MX3.0 port is already occupied, you can purchase the Panda Branch Plus (sold separately). Simply plug the Panda Aura A1’s MX3.0 2-pin connector into the Panda Branch Plus to provide power.

Installing the A1mini Light Panel on an A1 mini Printer
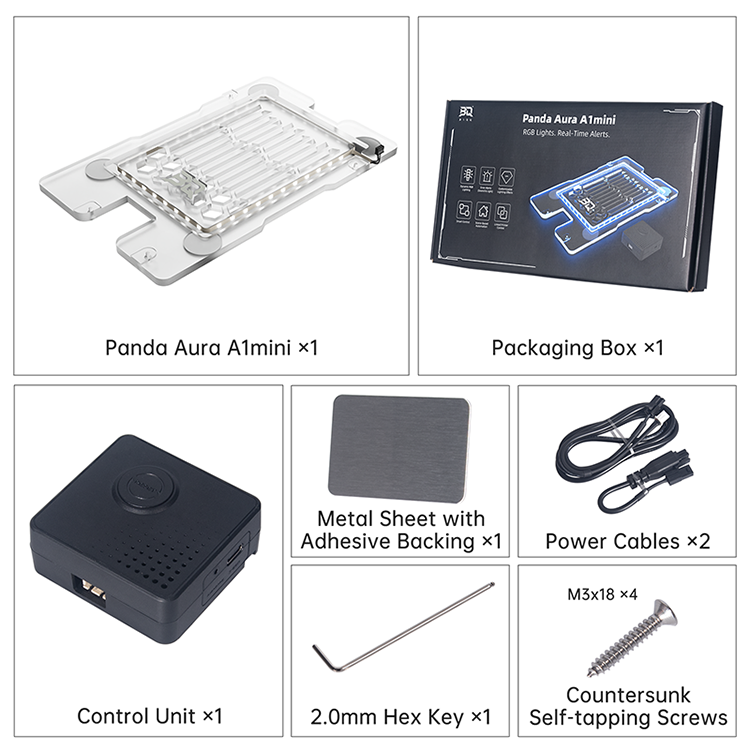
Panda Aura A1mini Parts List
Installation Steps
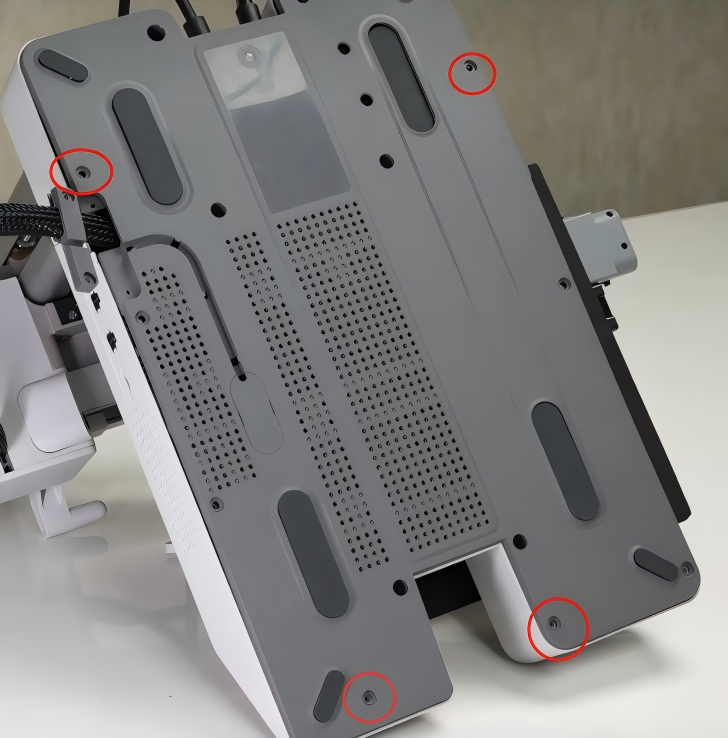
- Remove the four screws from the bottom of the A1 mini printer as shown below.
- Place the A1 mini printer on the acrylic light panel, aligning the panel’s edges with the printer body.
- For easiest installation, position the printer at the edge of your work surface. Then, install the four M3x18 self-tapping screws from the underside. This method avoids the need to flip the printer over.
- Connect the light panel cable to the port at the bottom of the controller as shown.
- To determine the metal sheet's position, first place the controller in its intended location on the printer. Then, attach the sheet to secure it.
- Connect the power cable to the adapter cable, ensuring the buckles are properly aligned.
- Connect the 2-pin plug to the port on the back. (When disconnecting, please pull from the connector housing; do not pull directly on the wires, as this can cause damage).
- Locate an unused 4-pin power port on the side of the A1 mini printer. Insert the MX3.0 4-pin connector from the adapter cable into the printer’s port as shown.
Powering via Panda Branch Plus
If the printer's MX3.0 port is occupied, you can use the Panda Branch Plus (sold separately). Plug the Panda Aura A1 mini’s MX3.0 2-pin connector into the Panda Branch Plus for power.
Installing the Light Strip on an A1 Printer
Panda Aura A1 RGBW and Panda Aura A1 Plus include the light strip.
Panda Aura A1 RGBW Parts List
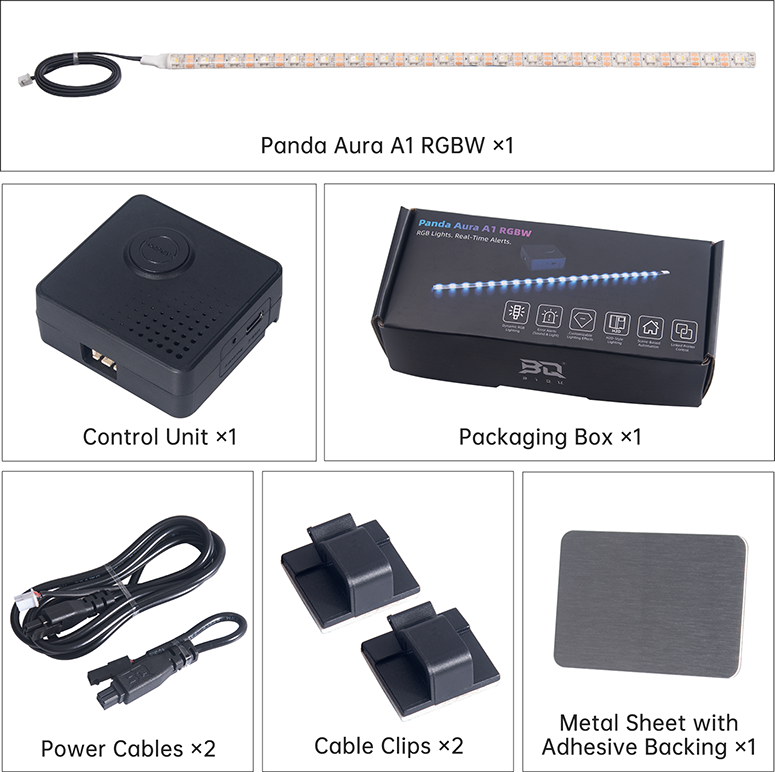
Panda Aura A1 Plus Parts List
Installation Steps
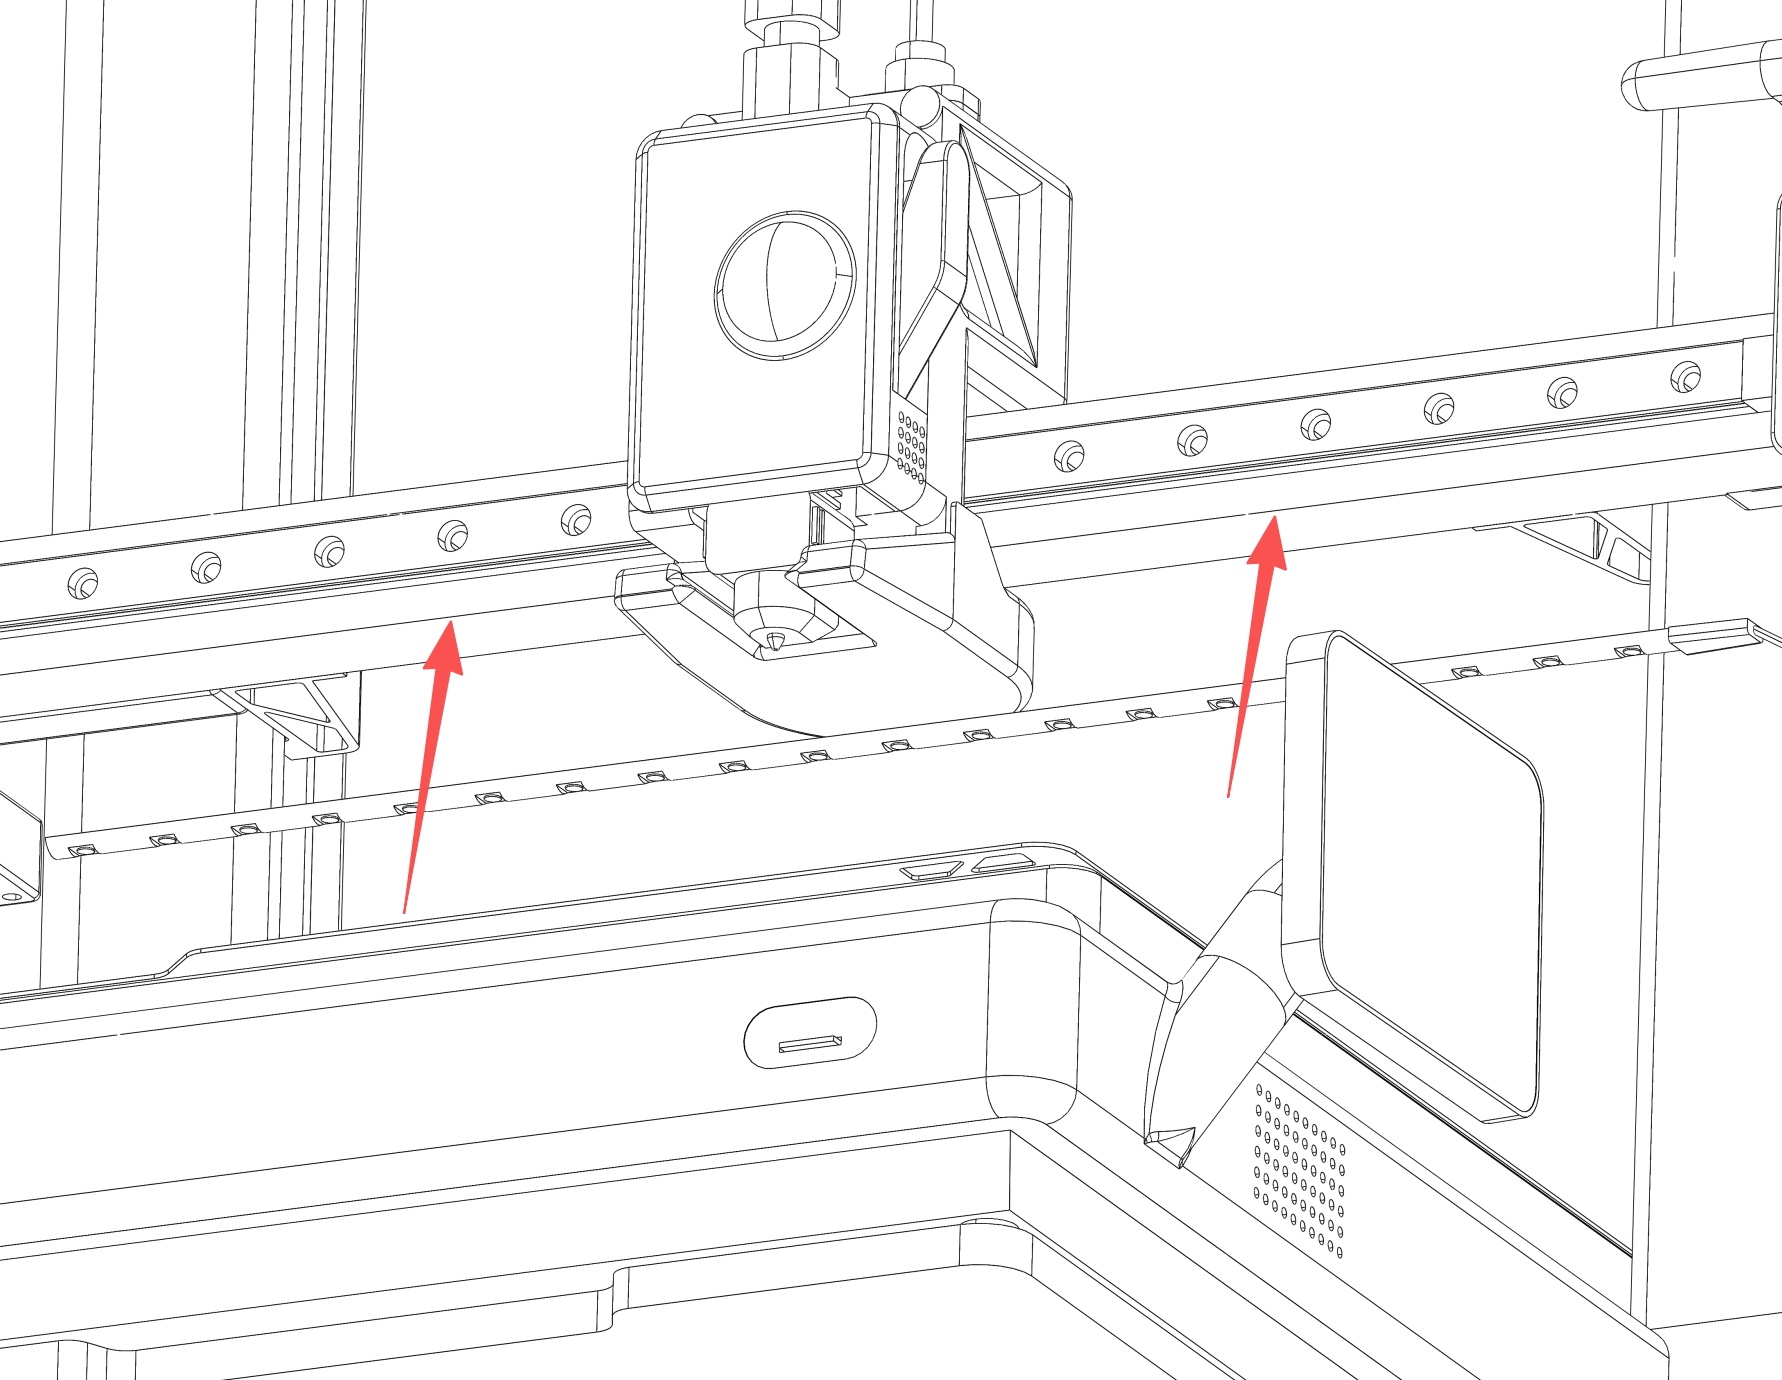
- Remove the adhesive backing from the light strip and paste it onto the underside of the A1 X-axis, ensuring it is flush. The cable should exit toward the right.
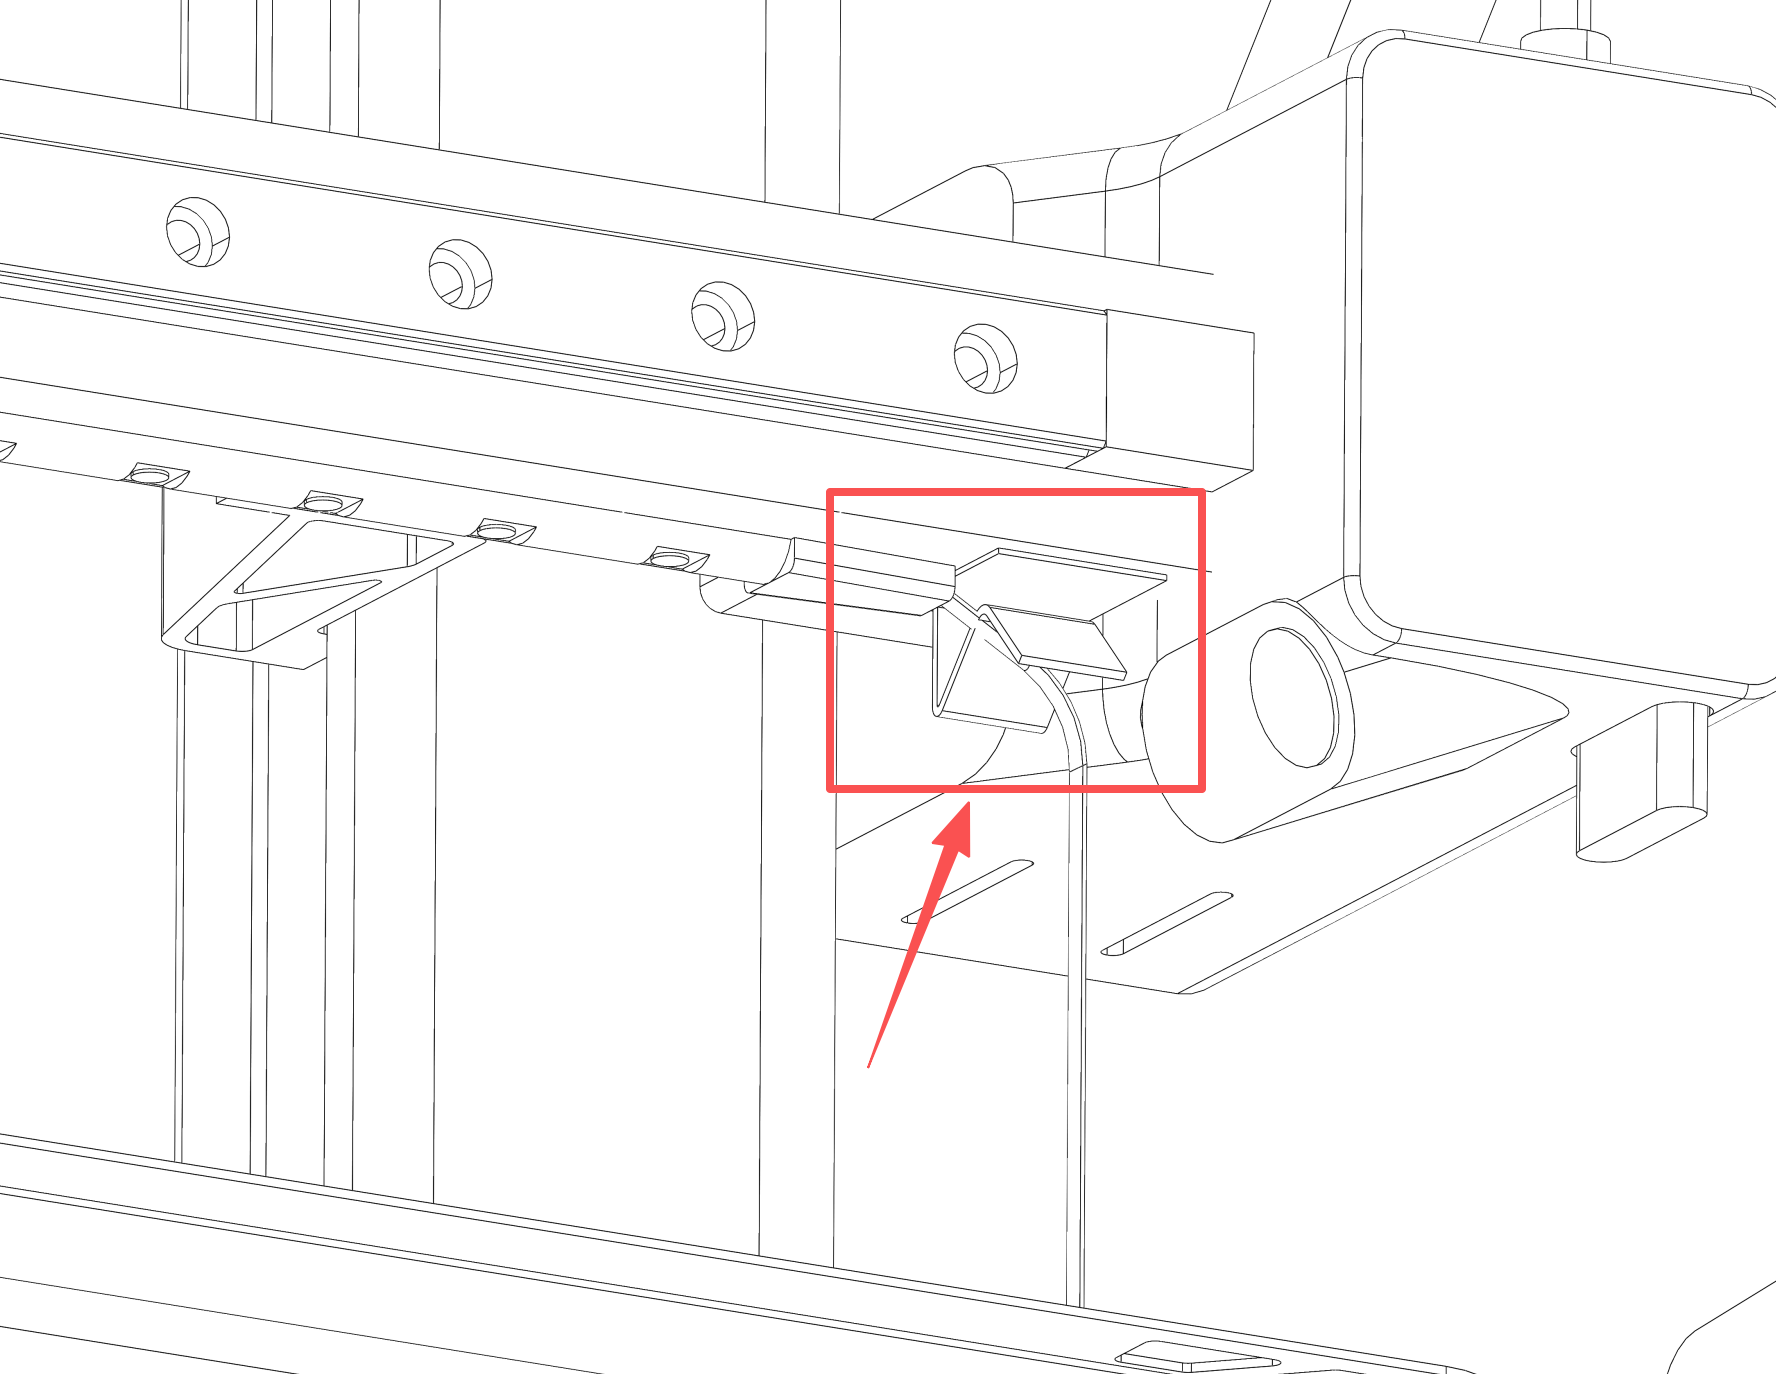
- Attach a cable clip near the end of the light strip to secure the wire.
- Attach another cable clip to the back of the frame.
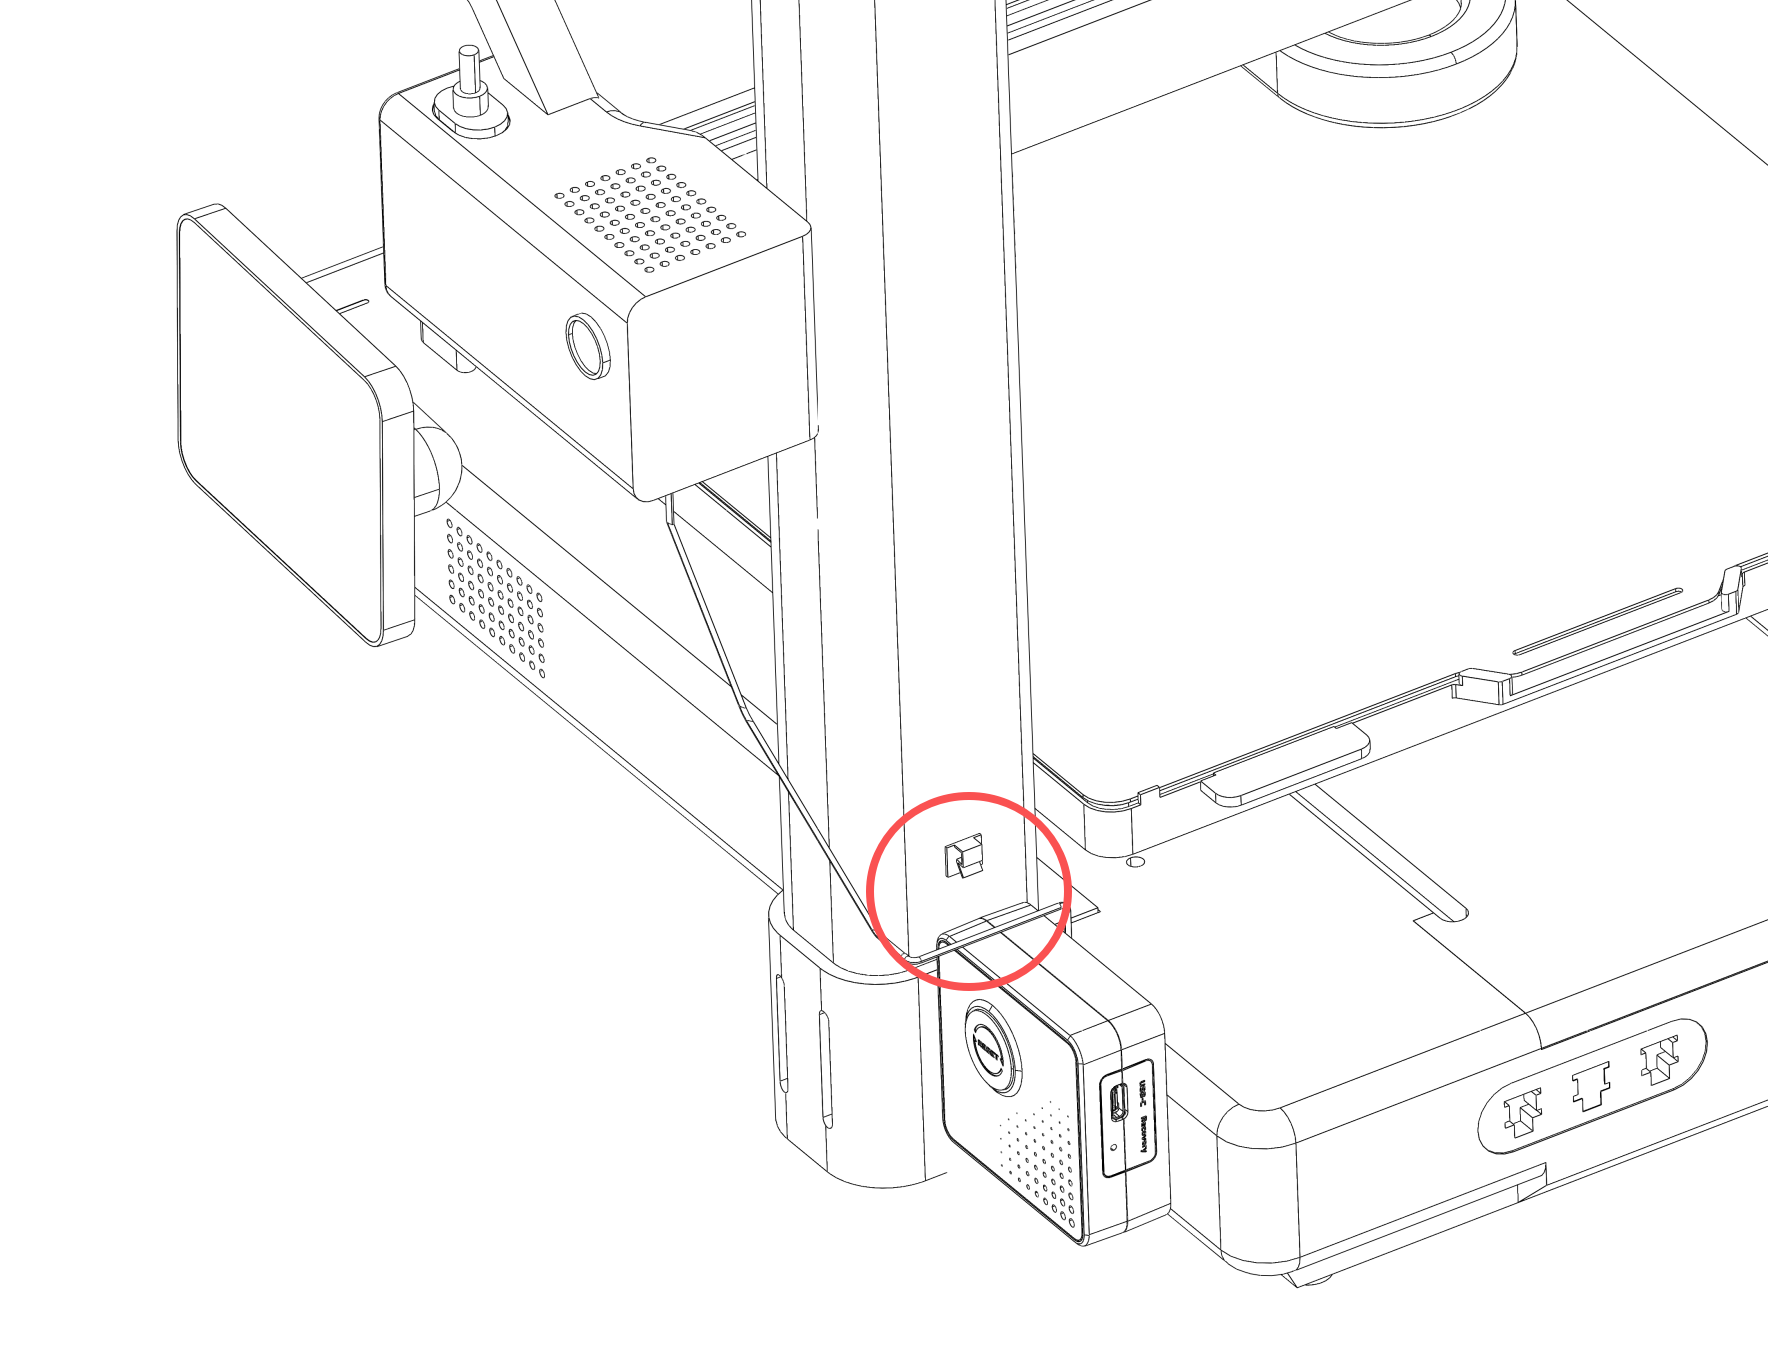
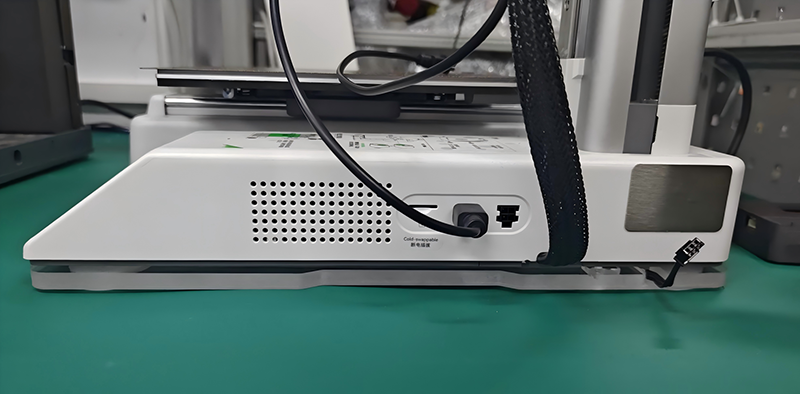
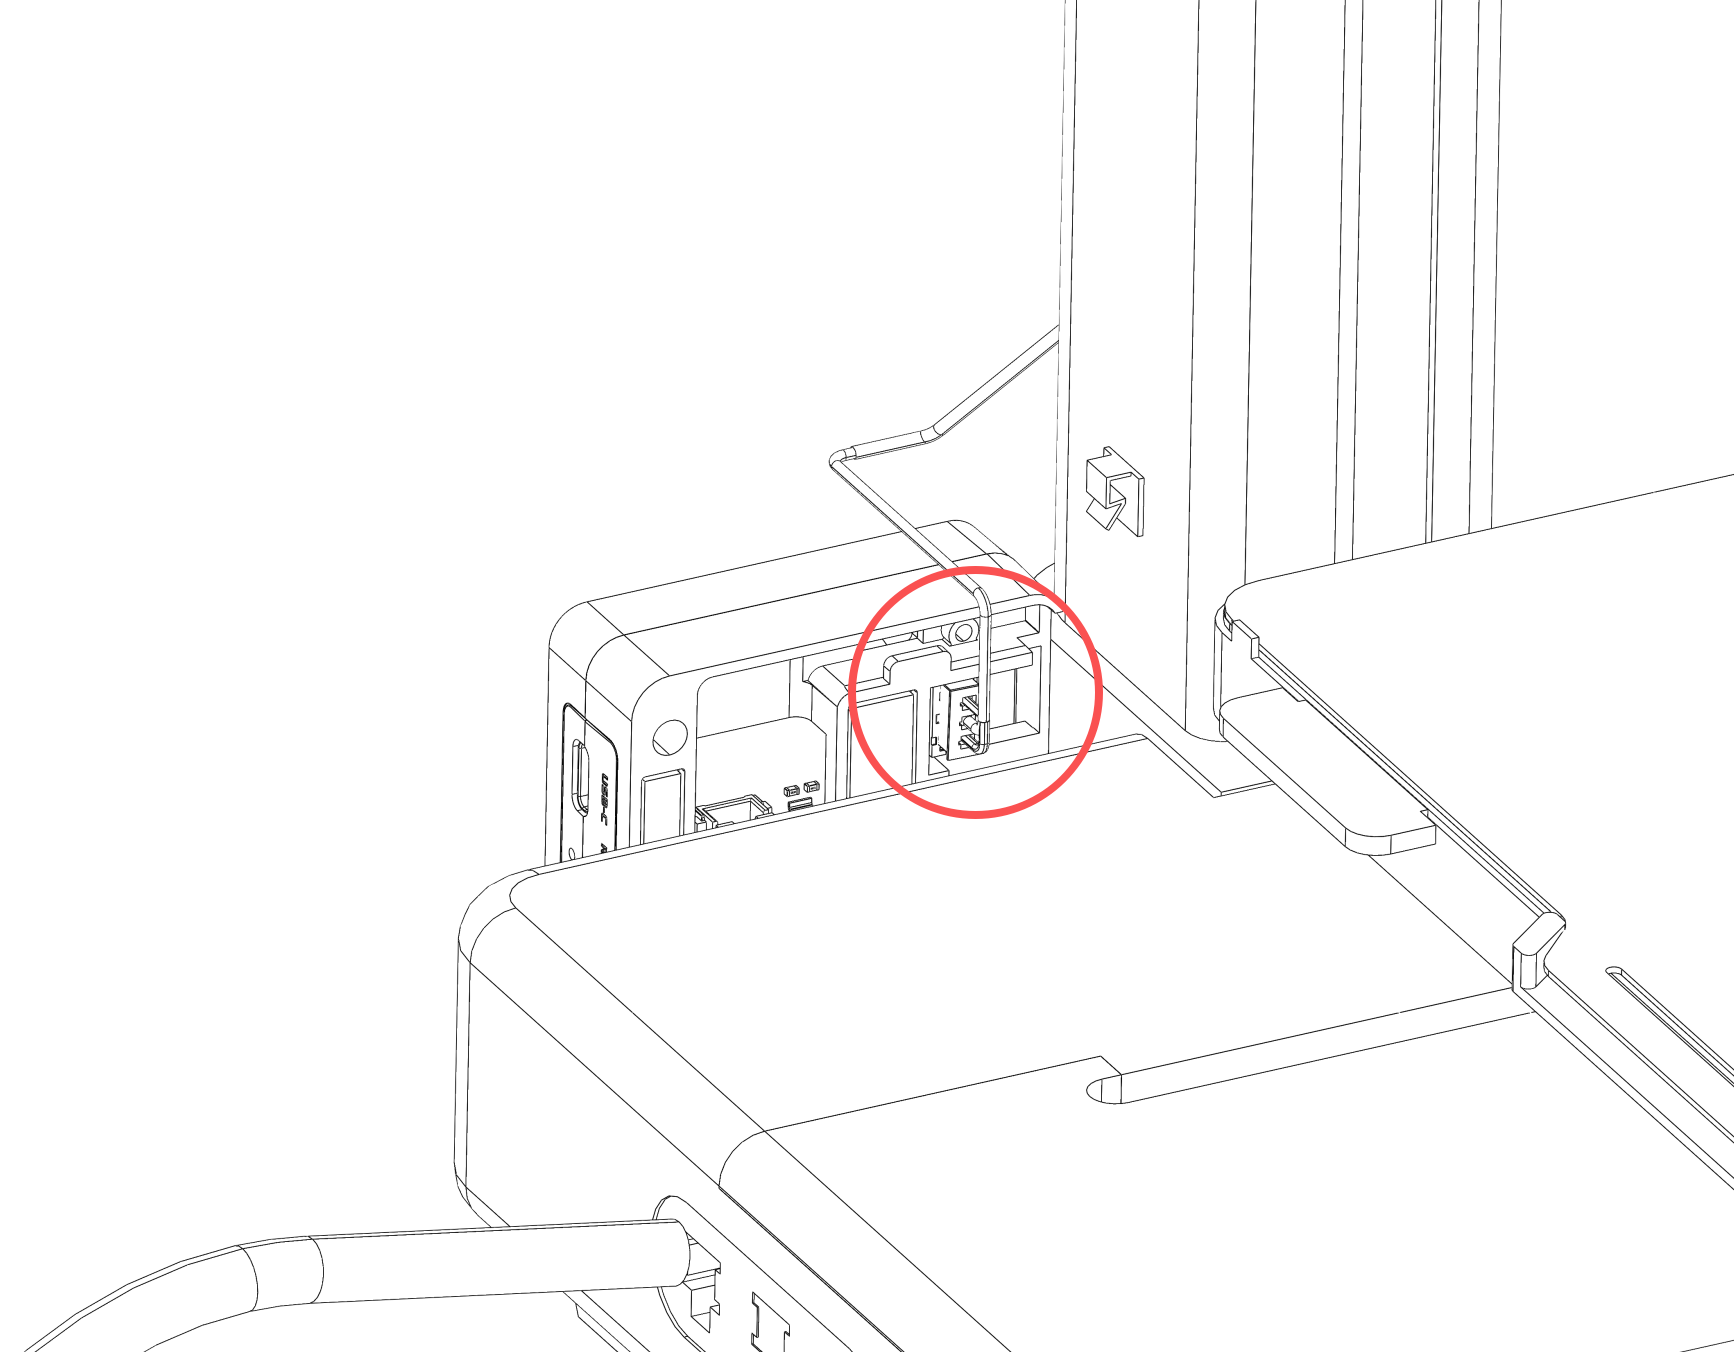
- Insert the light strip plug into the port on the back of the controller.
Initial Setup Guide
Note: The software operation steps for the controller of Panda Aura A1, A1mini, A1 Plus, and A1 RGBW are identical. They will be referred to collectively as Panda_Aura_A1 below. Upon initial powering on or after a factory reset, you will see a blue flowing light effect, indicating that the Panda_Aura_A1 is not yet bound to a printer.
Wi-Fi Connection Guide
-
Connect to the Device Wi-Fi Hotspot
-
Connect to the AP hotspot generated by the device:
Panda_Aura_A1_XXXXXXXXXX. The default password is987654321.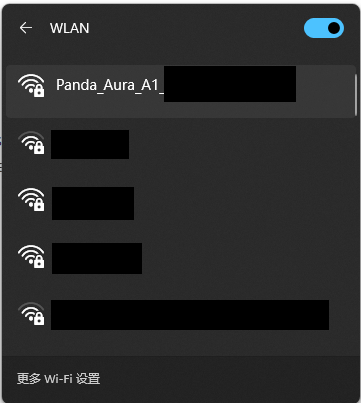
-
Access the AP Web UI
- Once connected, PC users can enter the default IP in a browser:
192.168.254.1. Mobile users should see the Web UI pop up automatically; otherwise, enter192.168.254.1in a mobile browser. (Note: This is the factory default IP).
- Once connected, PC users can enter the default IP in a browser:
-
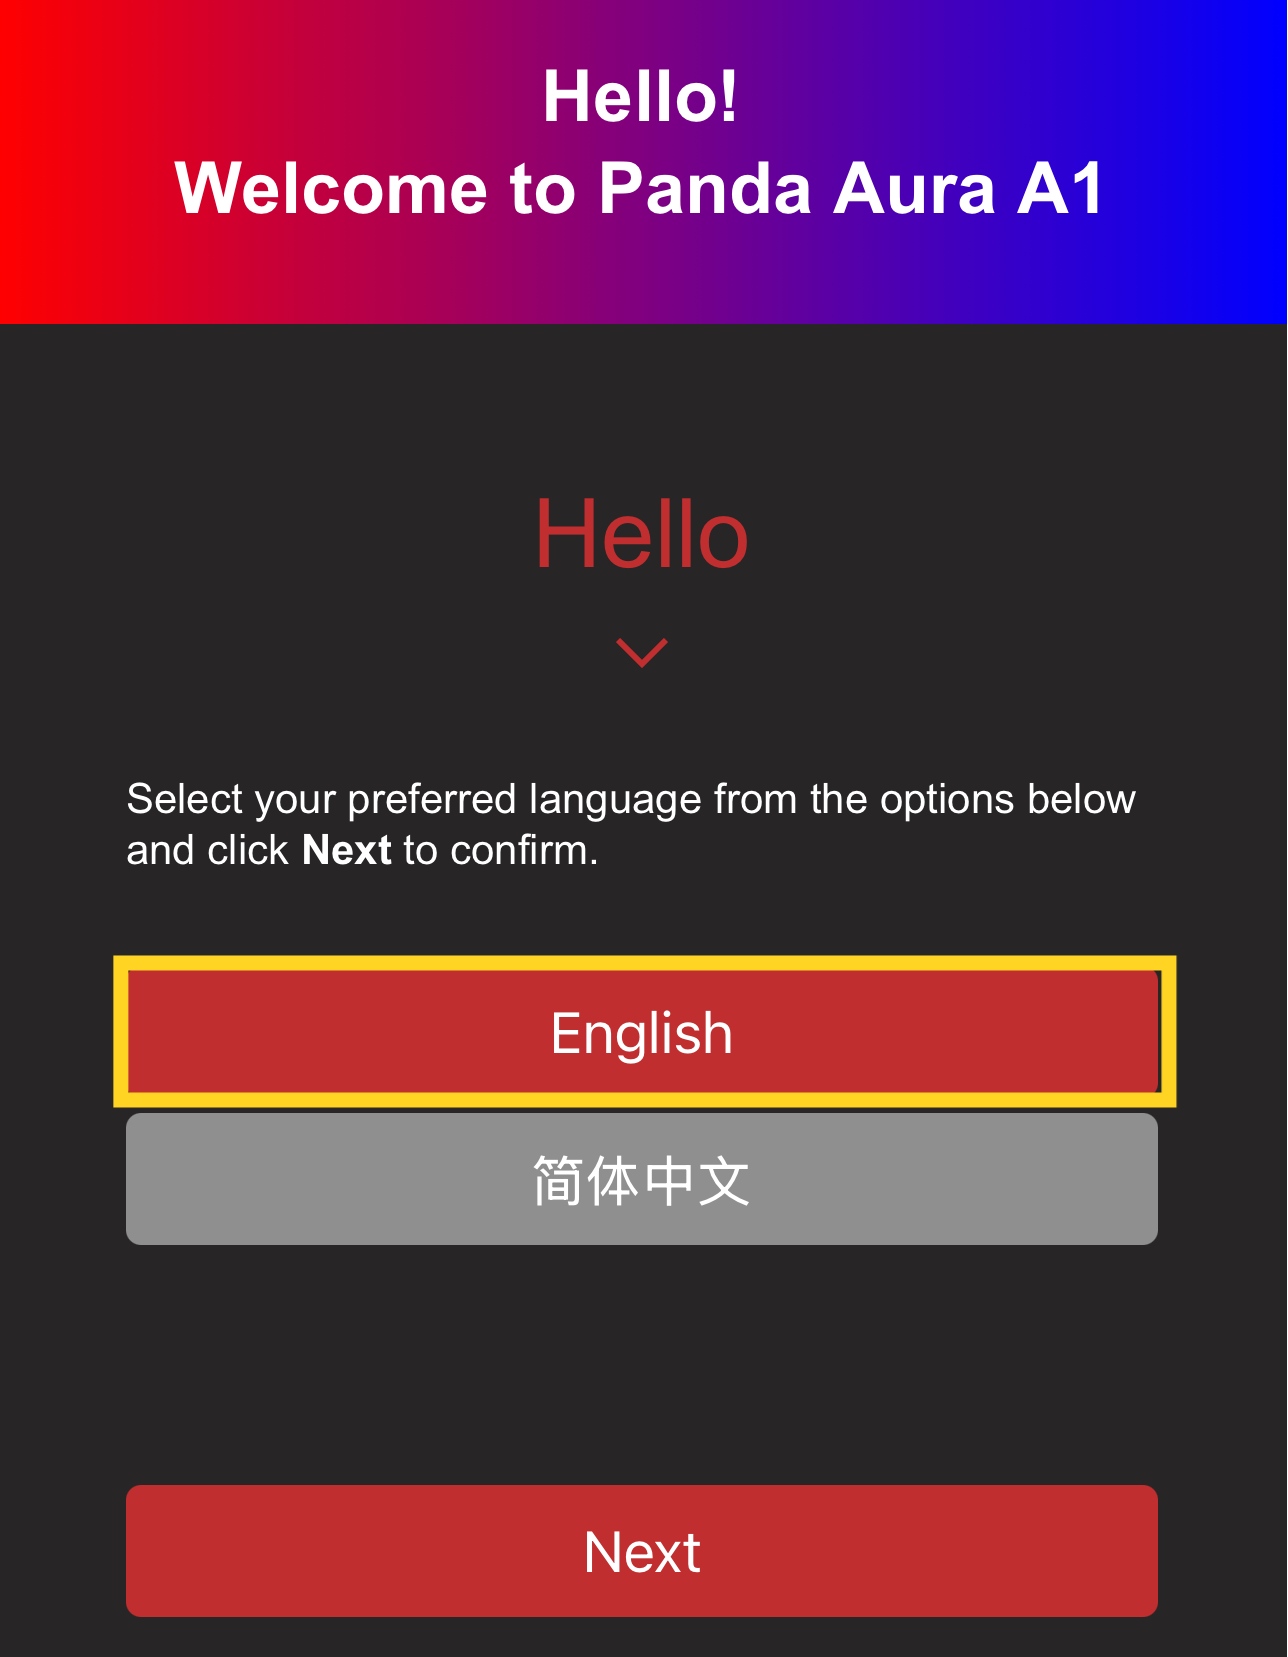
Select Language (Default: English)
-
Select your language and tap "Next."
-
-
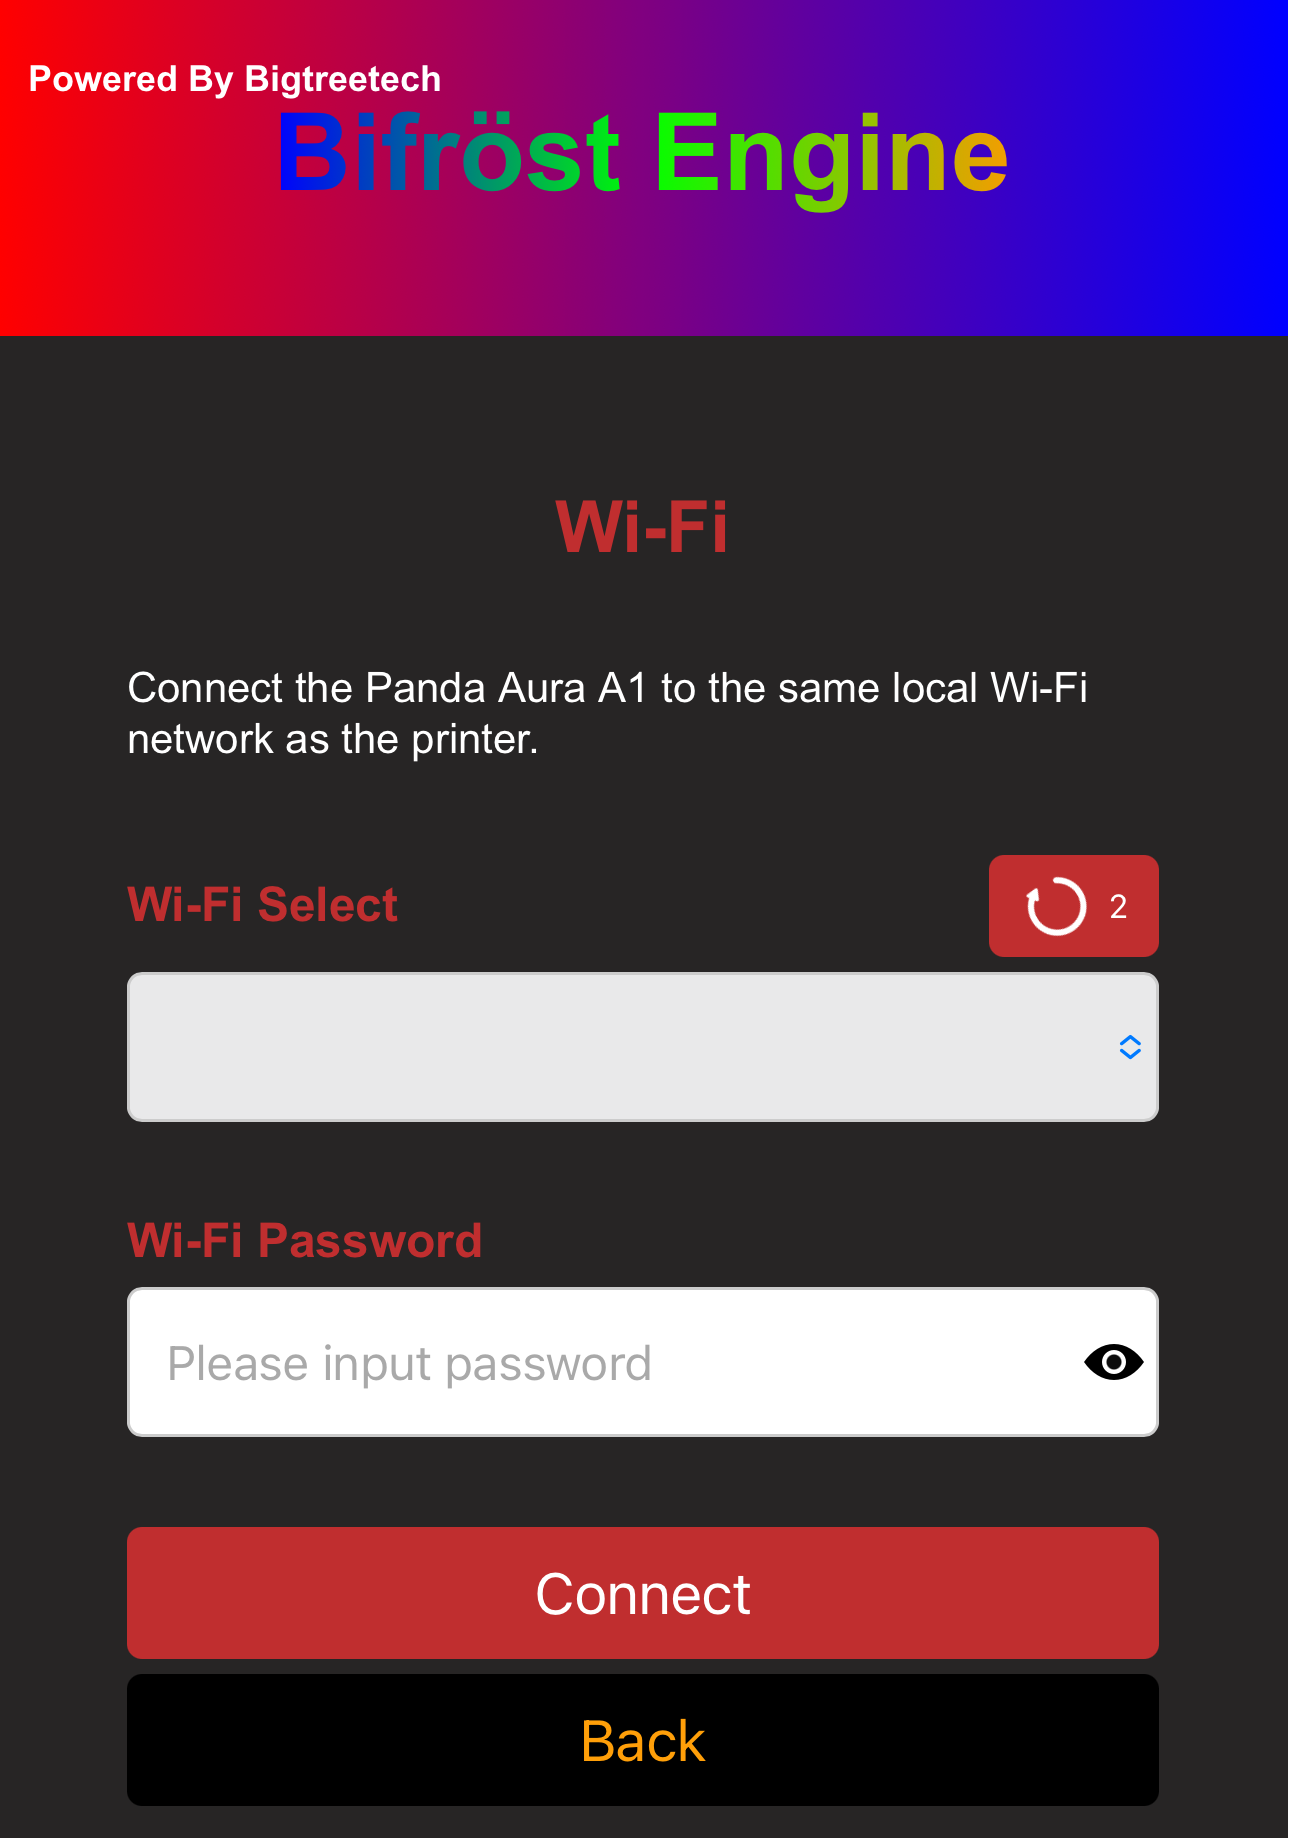
Wi-Fi Connection Interface
-
Upon initial setup or factory reset, the page will automatically scan for nearby Wi-Fi networks. You can also tap "Scan" manually.
-
Once the scan is complete, a "Scan Successful" prompt will appear. Tap "OK" to close it.

-
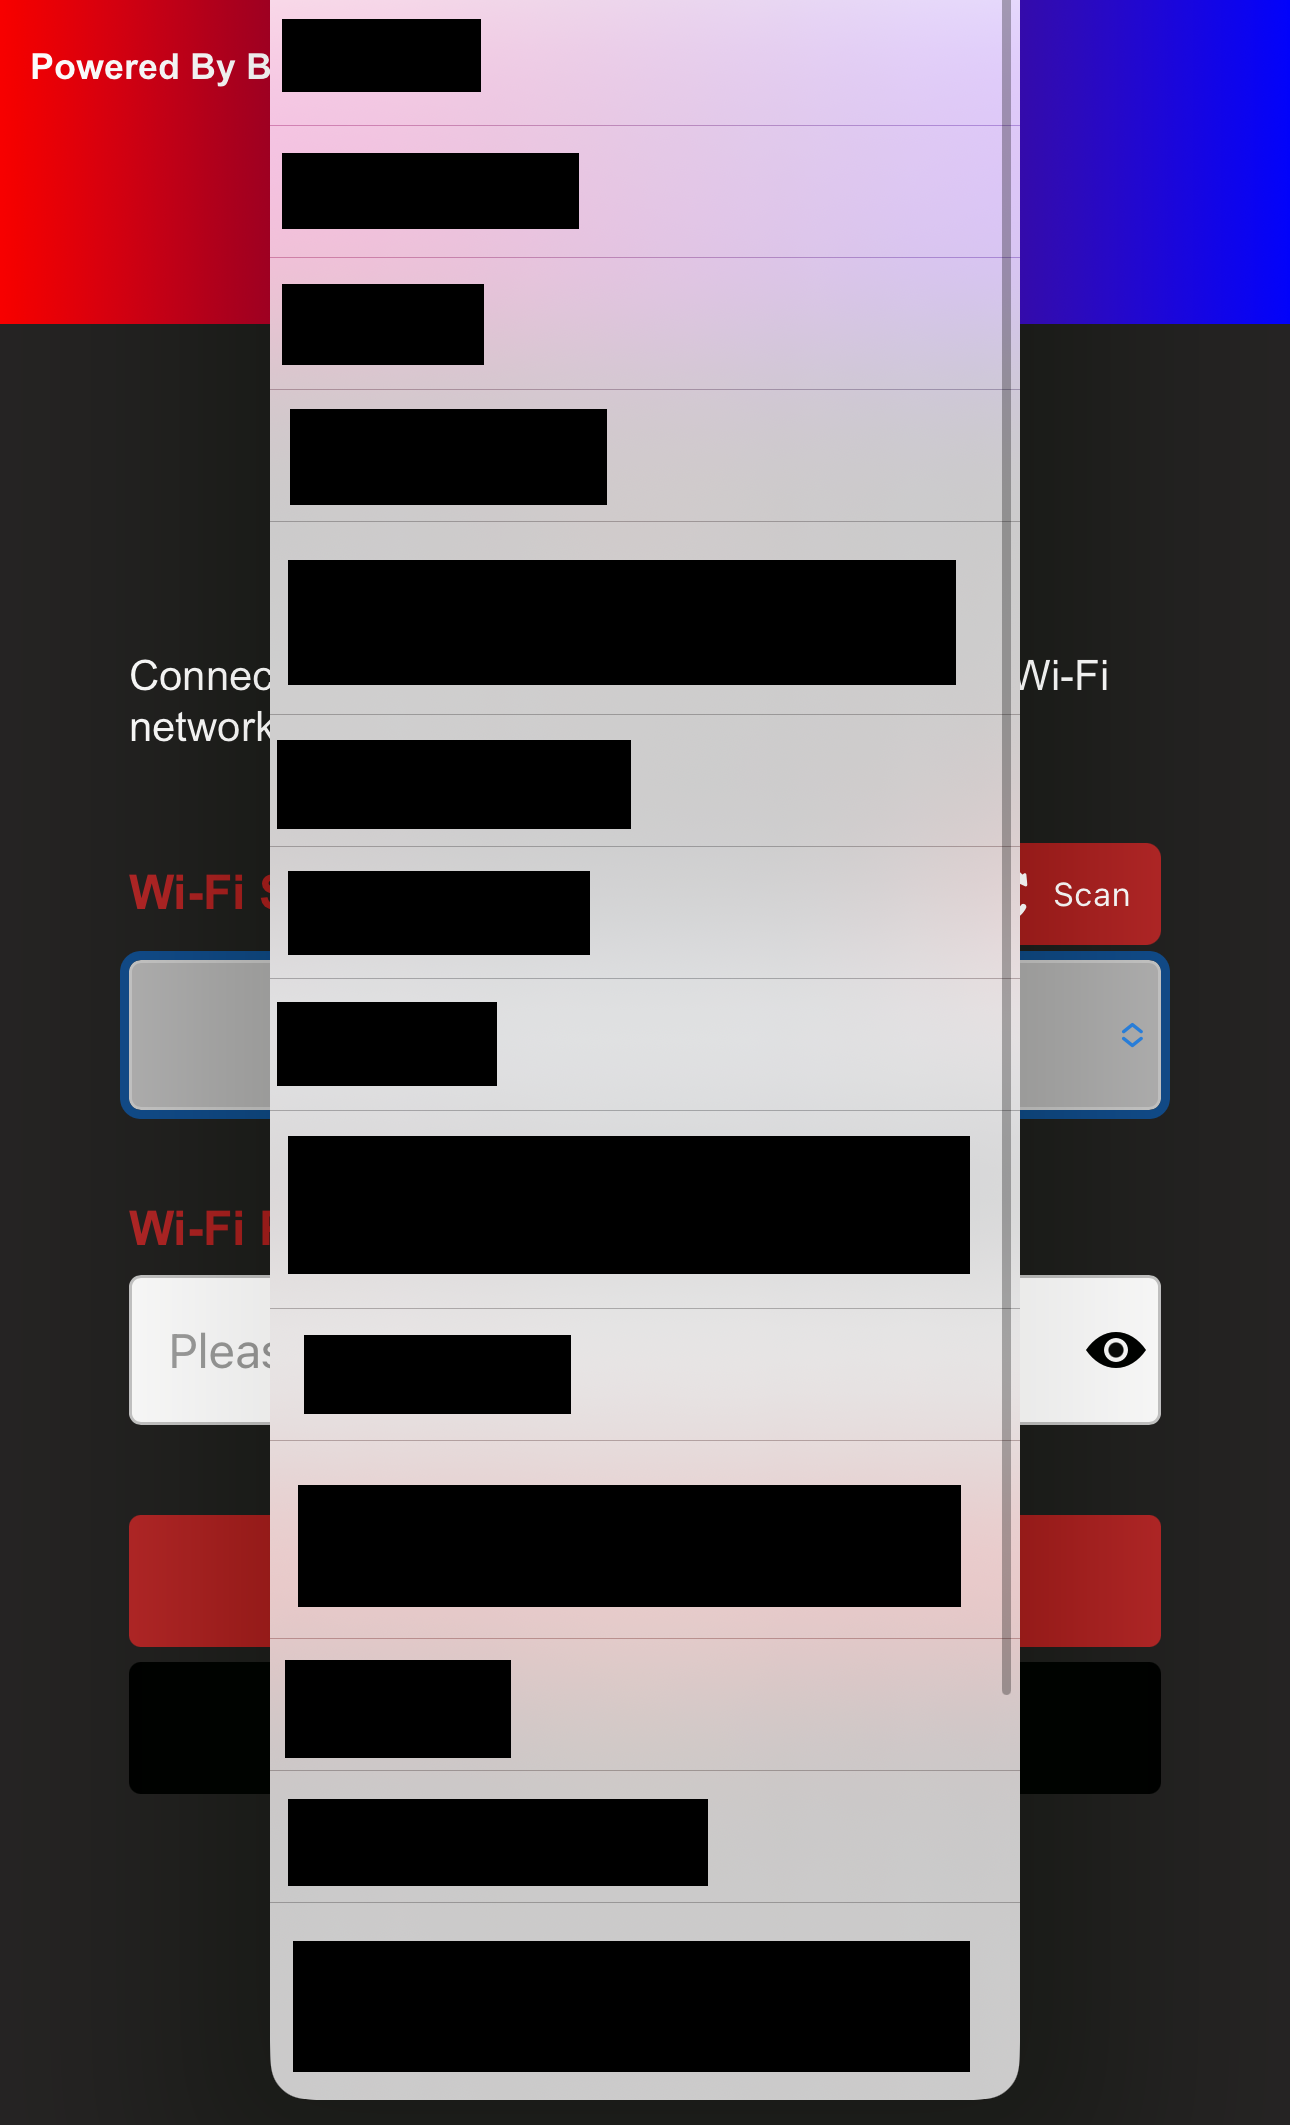
Select the WiFi network you want to connect to.
-
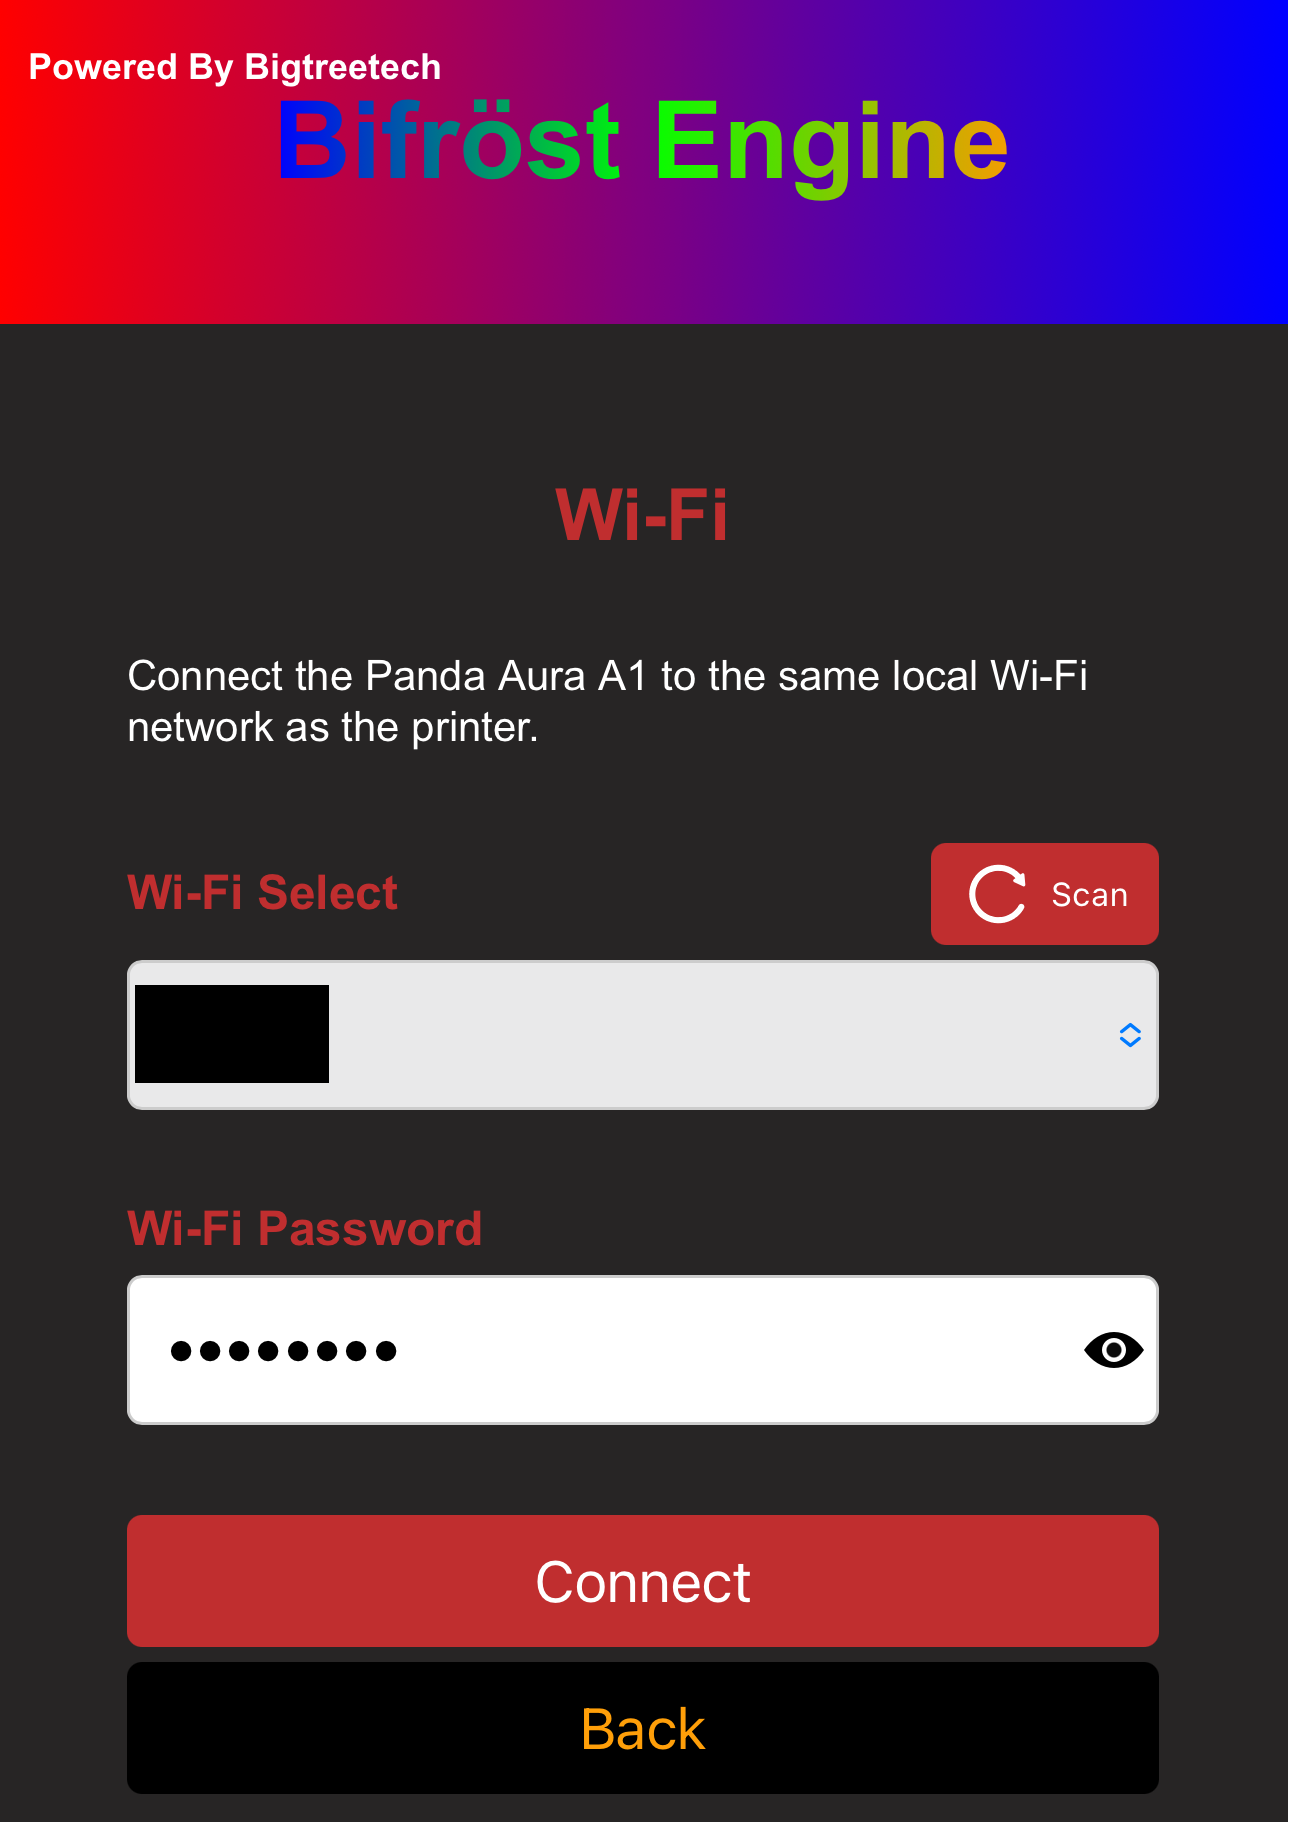
Enter the password. You can tap the "eye" icon to reveal the password.
-
Tap "Connect." The interface will automatically redirect to the "Wi-Fi" status page, showing the connection progress.
-
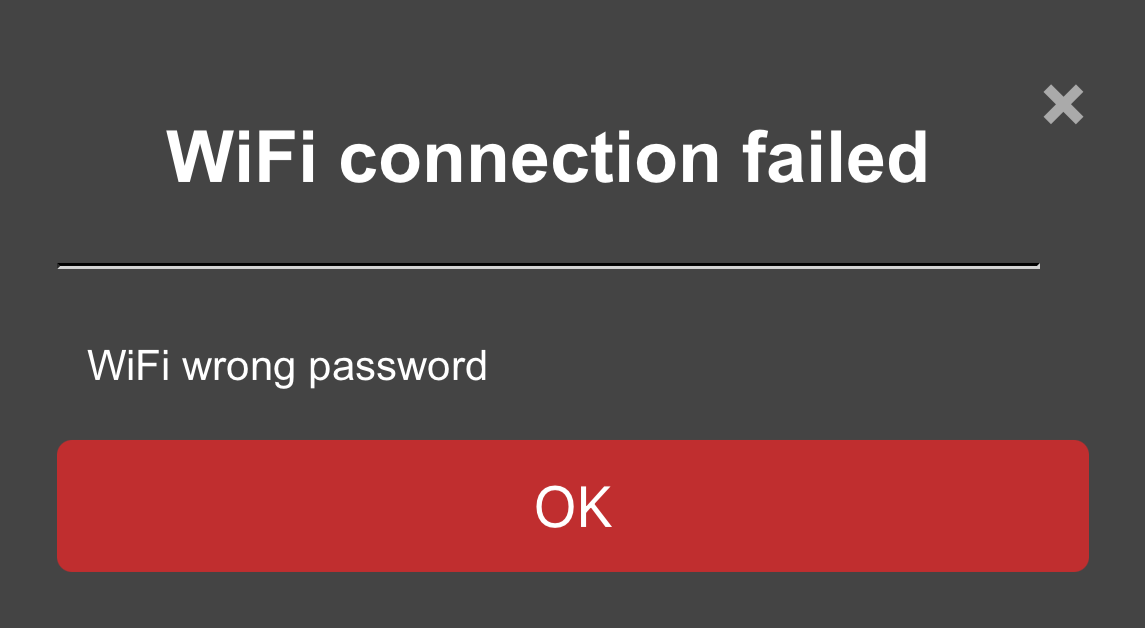
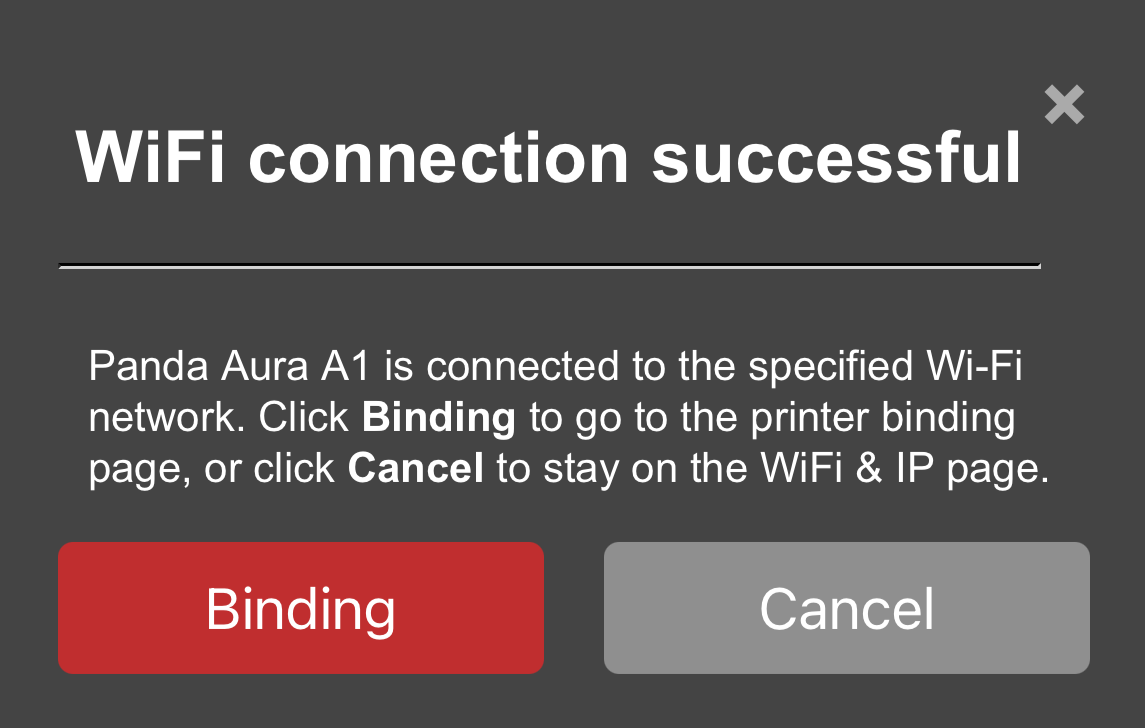
After a moment, a status window will appear.
-
Connection Failed:
-
Connection Successful: You can tap Binding to proceed to the printer interface, or tap "Cancel" to remain on the Wi-Fi page.
-
-
Binding the Printer
-
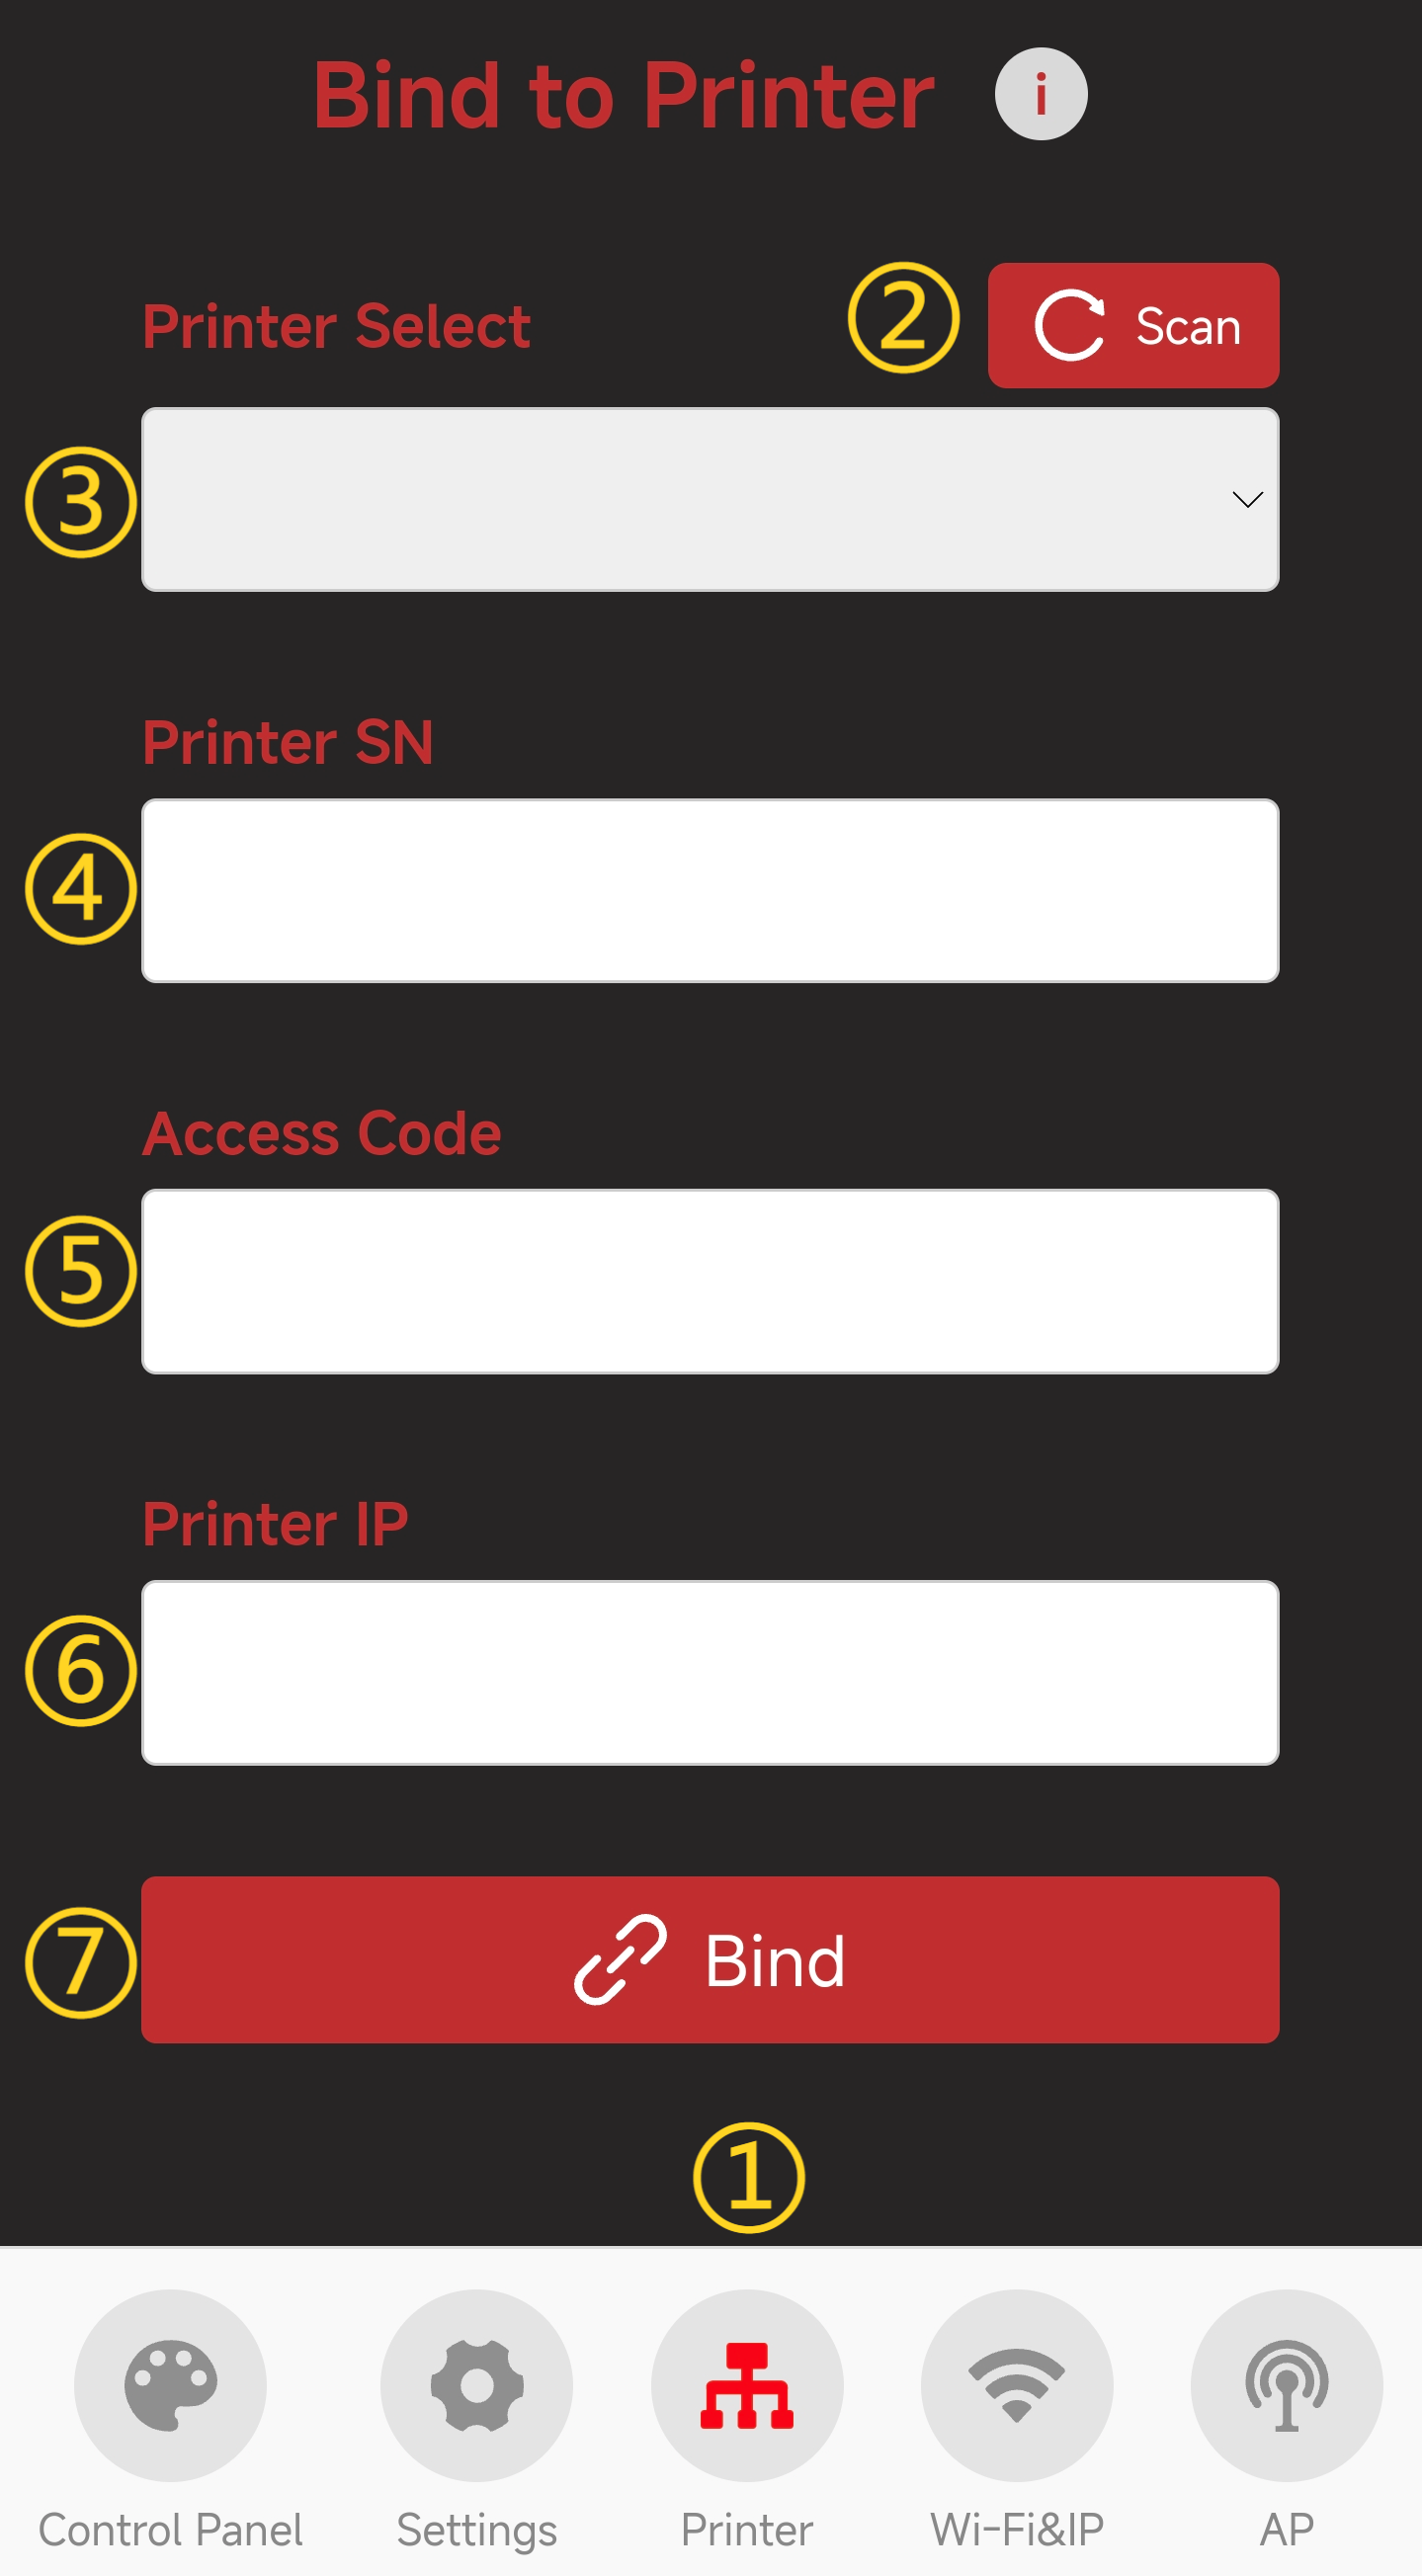
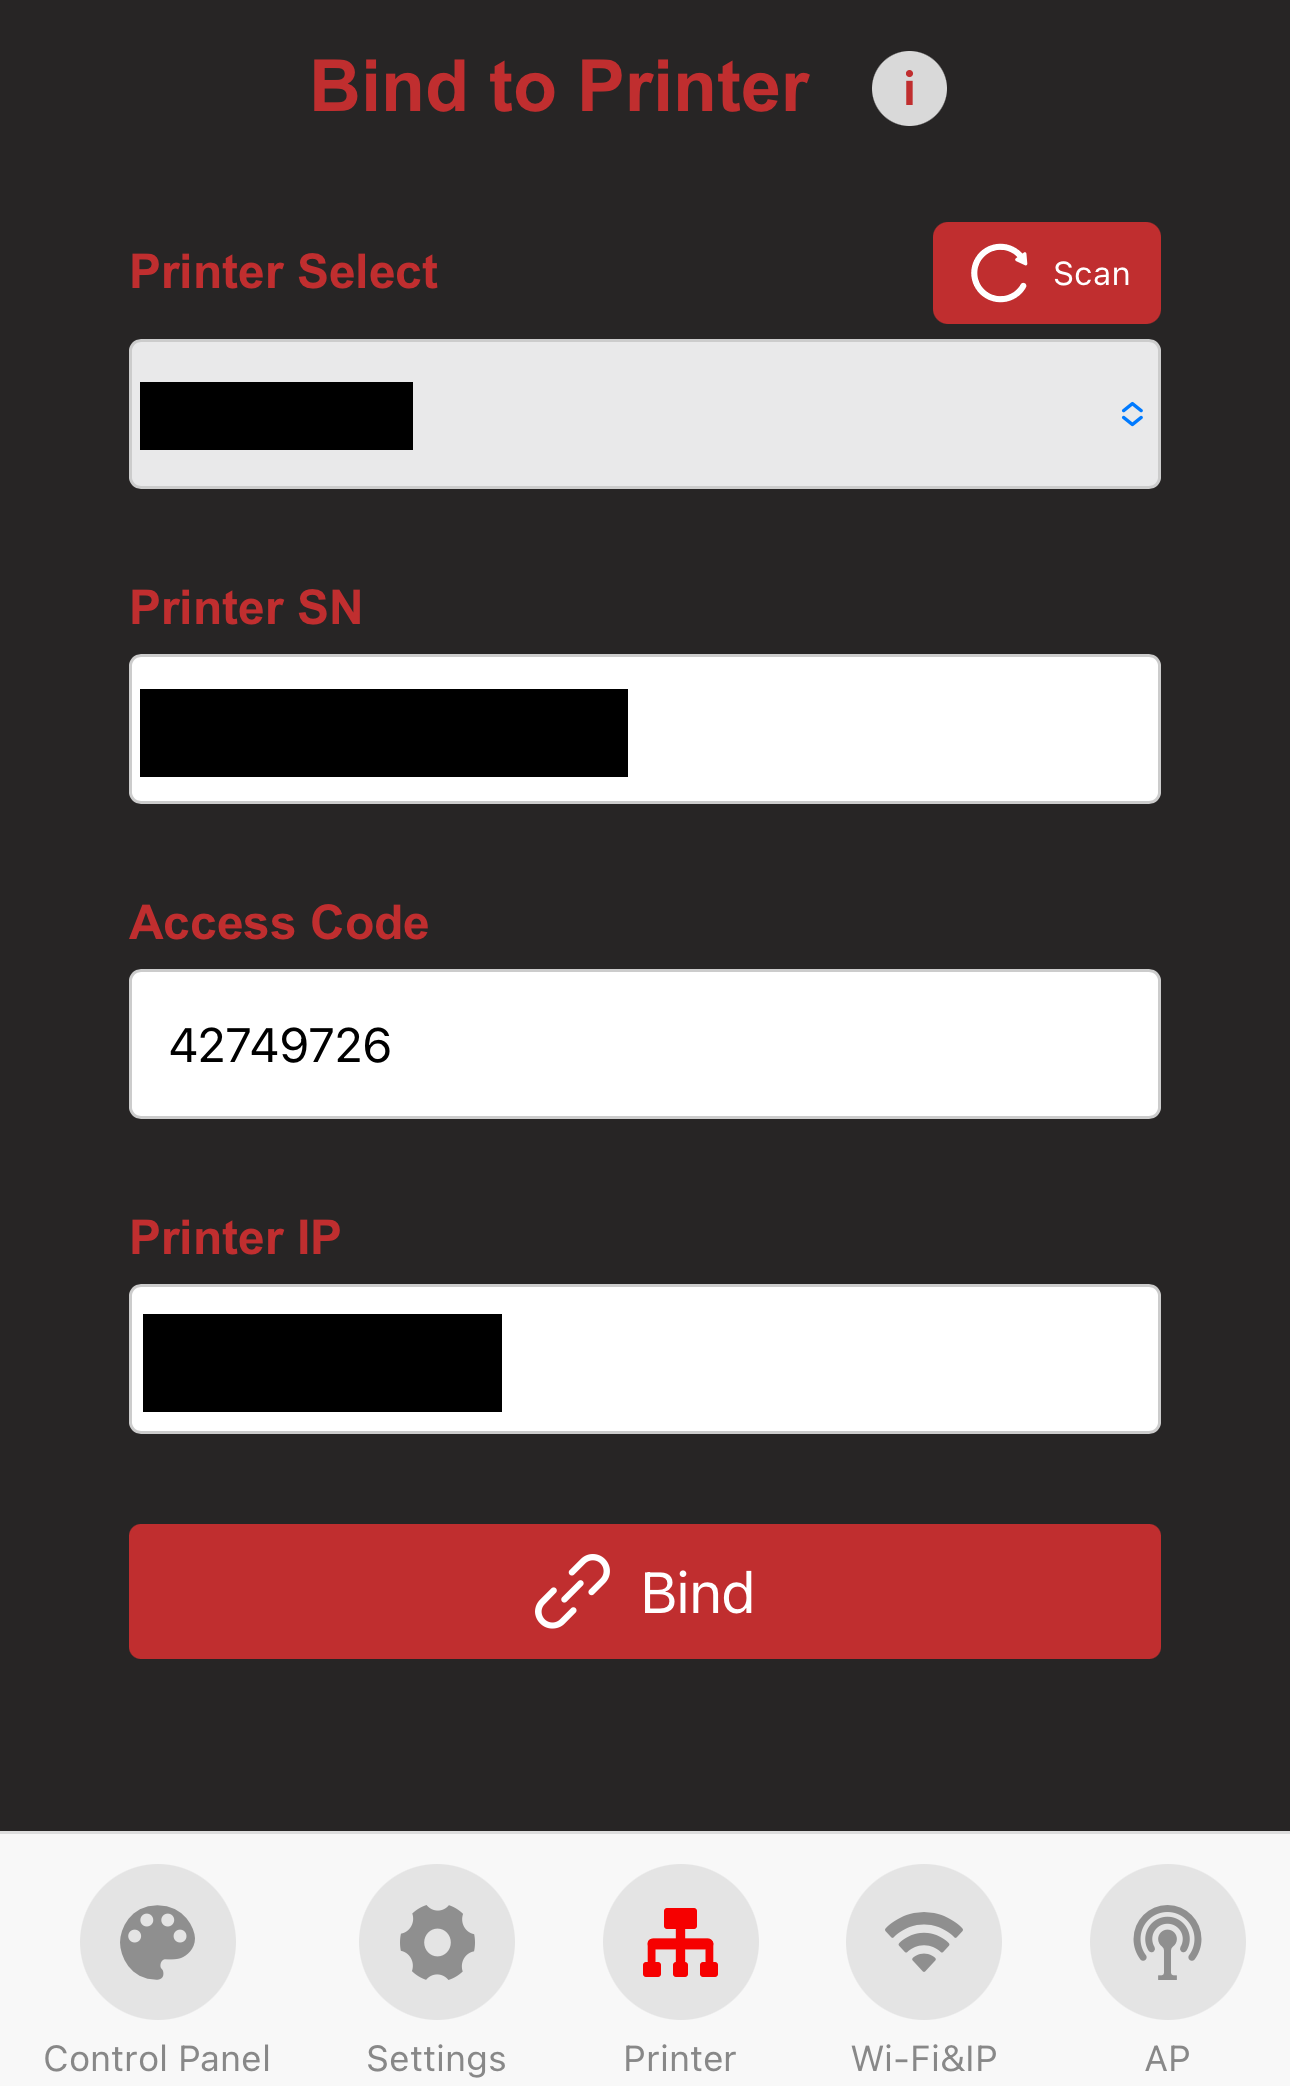
Feature Introduction
-
1.Printer Page Selection: When you tap the icon, it will turn red to indicate that you are on the Printer page.
-
2.Scan for printers within the same local network.
-
3.Select a scanned printer.
-
4.Enter the printer’s SN (Serial Number).
-
5.Enter the printer’s Access Code.
-
6.Enter the printer’s IP Address.
-
7.Confirm and bind the printer.
-
-
How to Bind the Printer
-
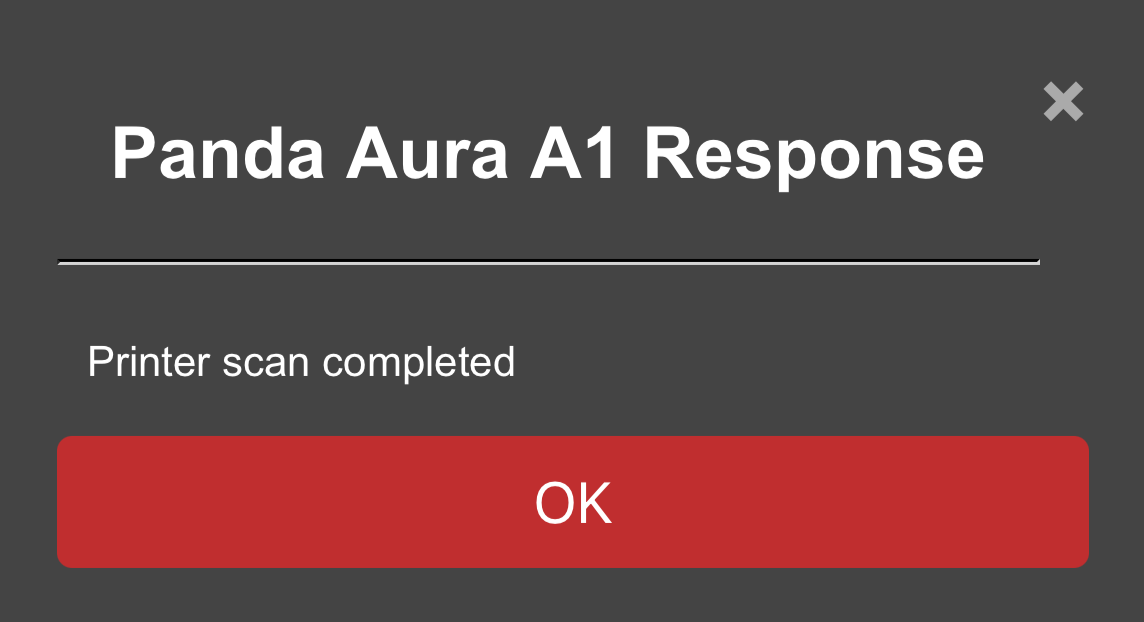
Tap "Scan." After a moment, a "Scan Successful" prompt will appear.
-
Select the discovered printer. The SN and IP address will be filled in automatically.
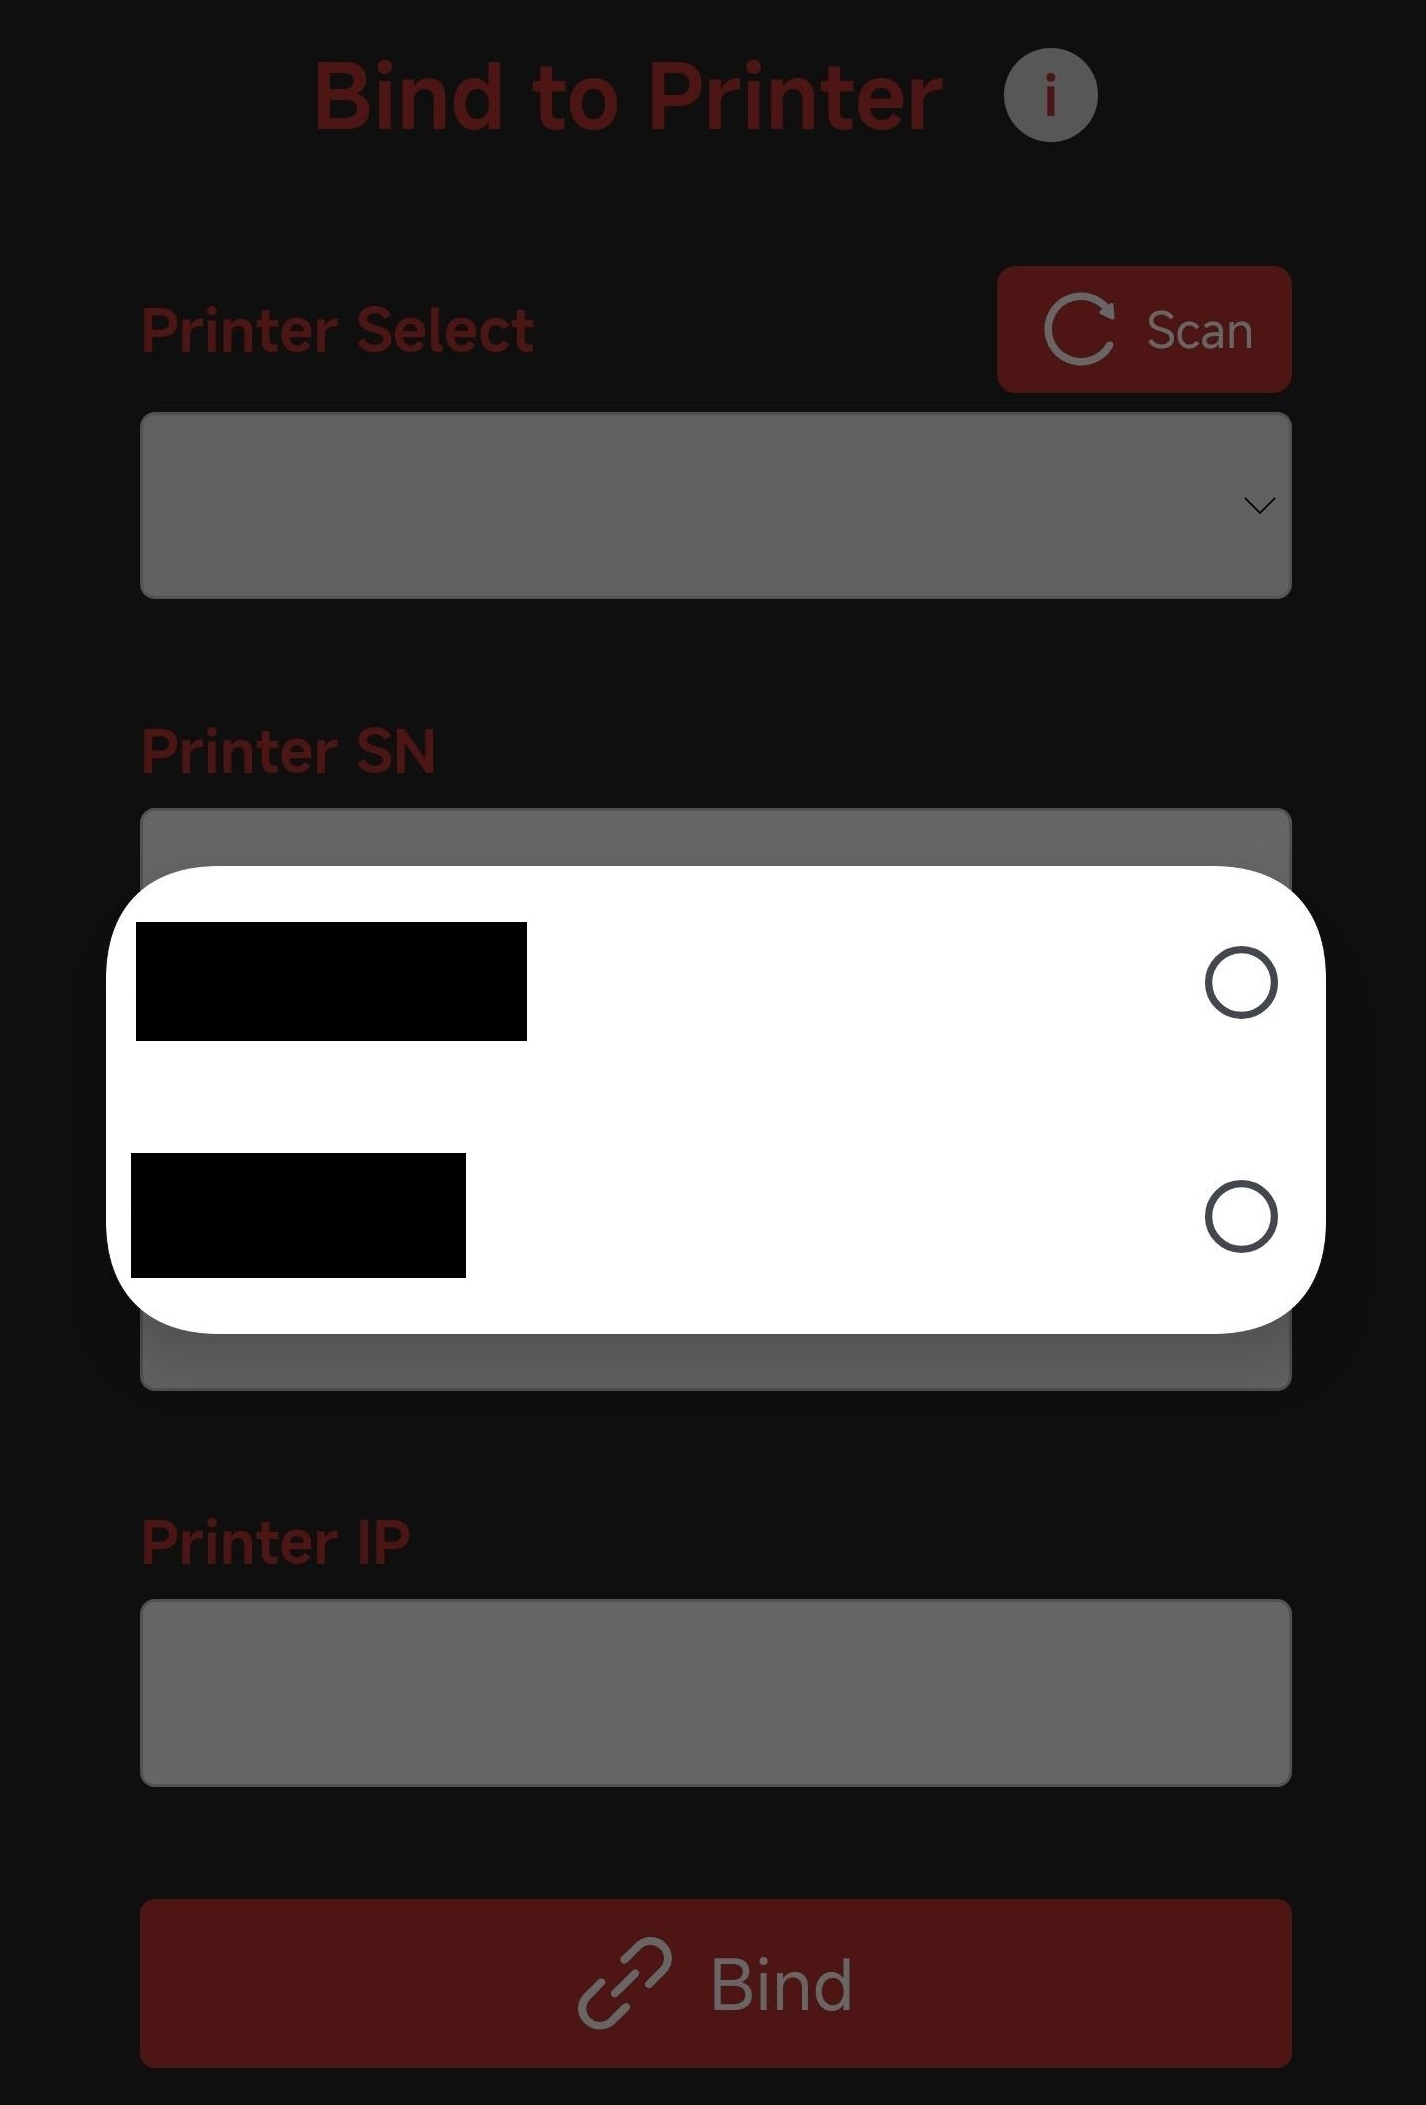
Enter the printer’s "Access Code."
-
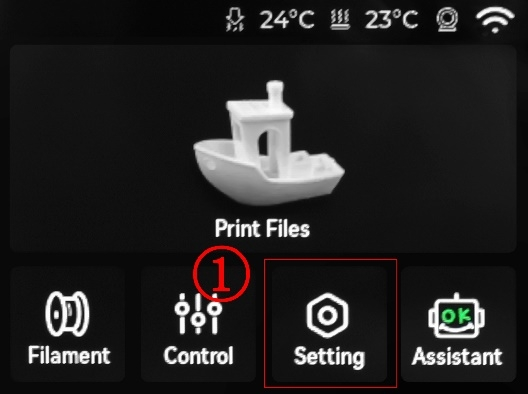
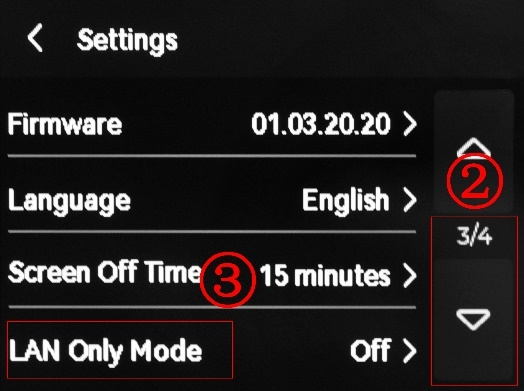
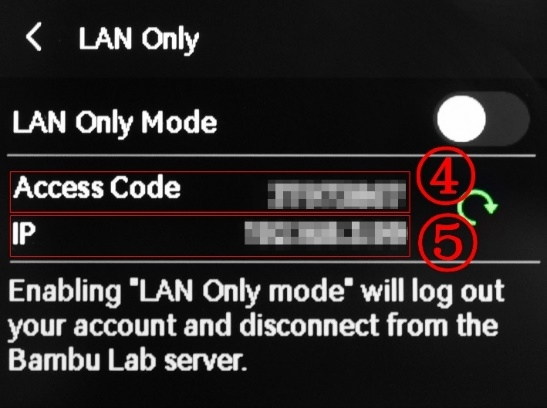
To find the Access Code on your printer (using A1 series as an example):
-
Input the Access Code into the field and tap "Bind" to complete the process.

-
-
User Interface Description
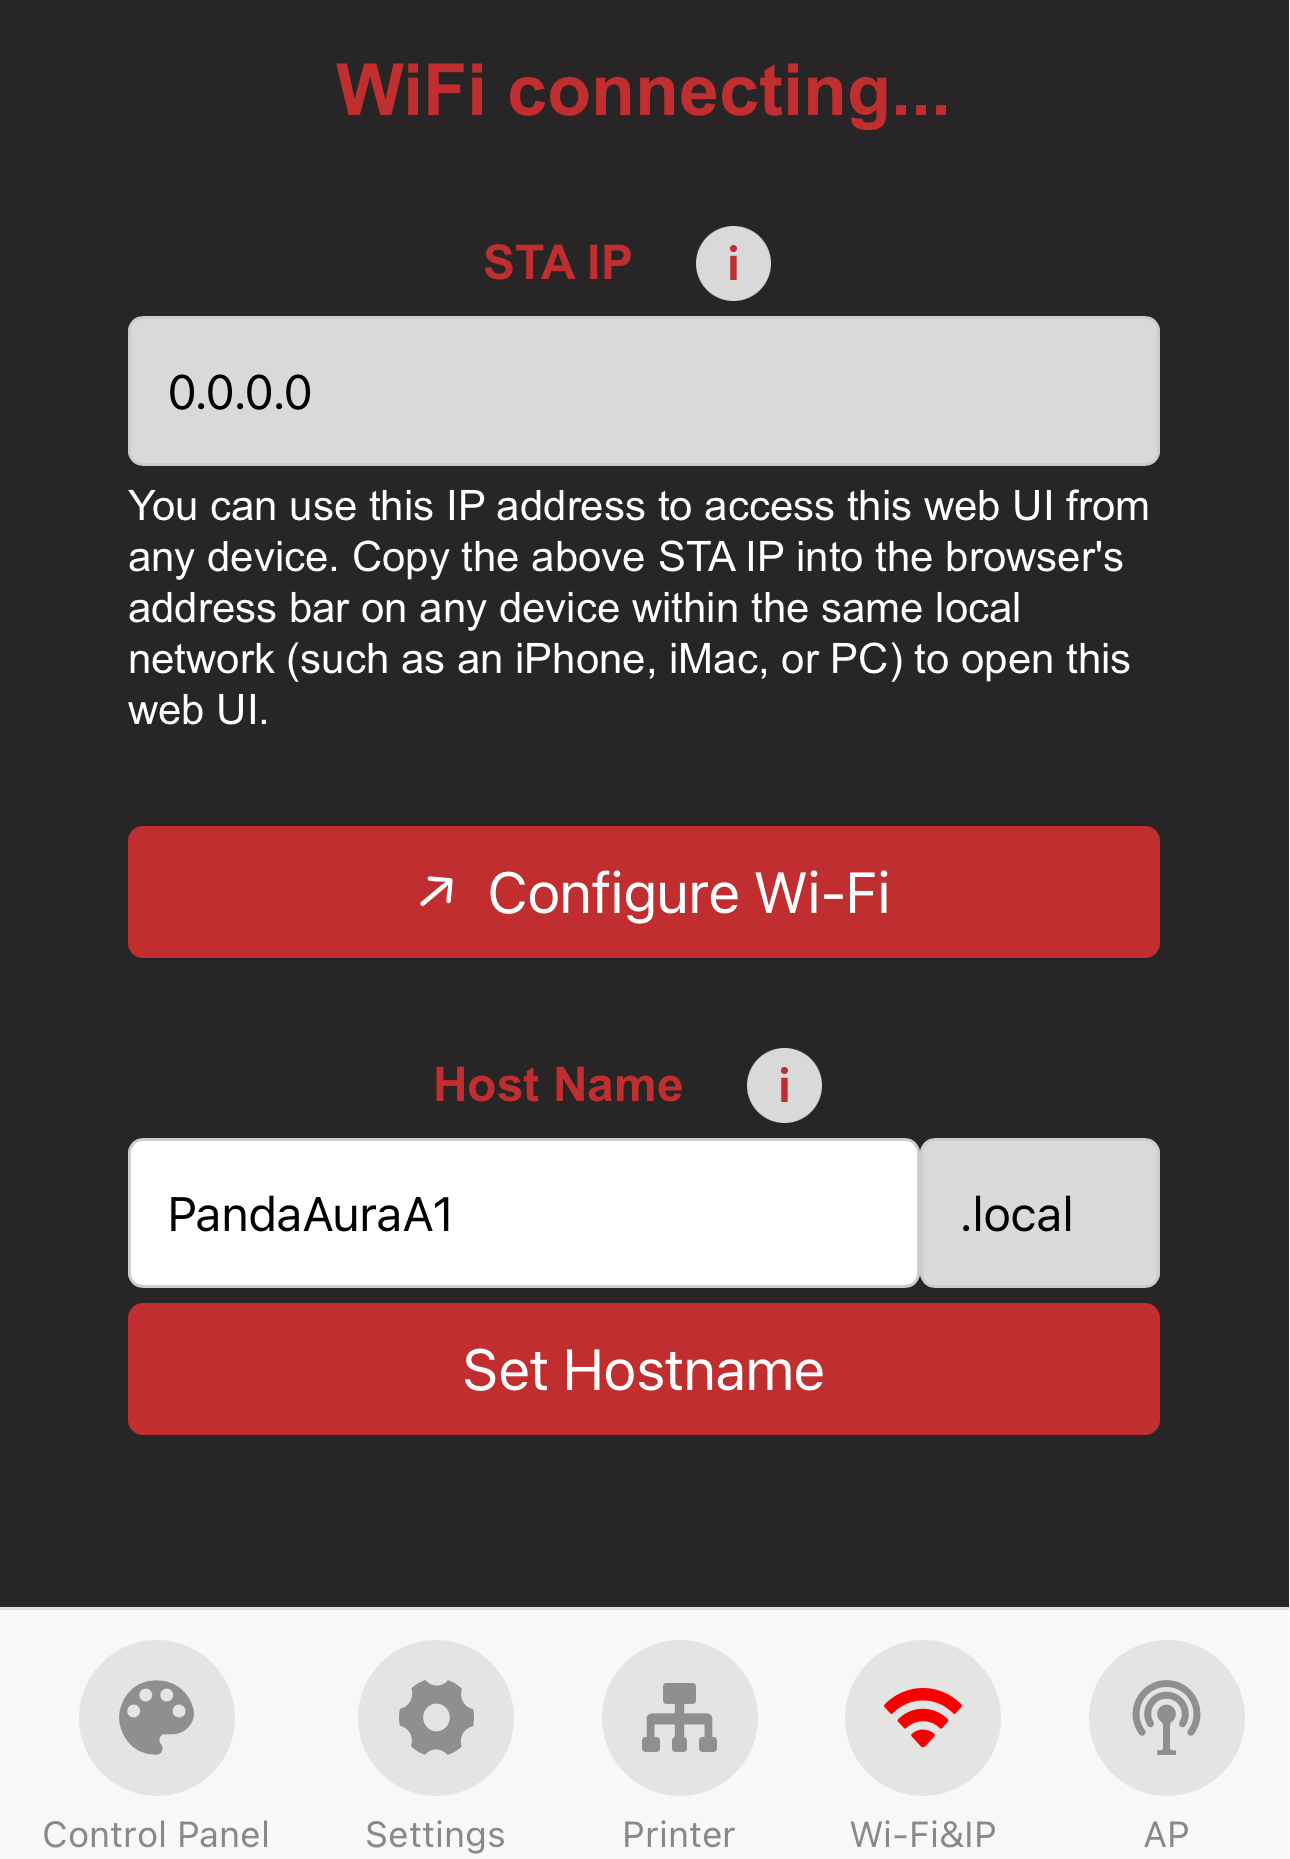
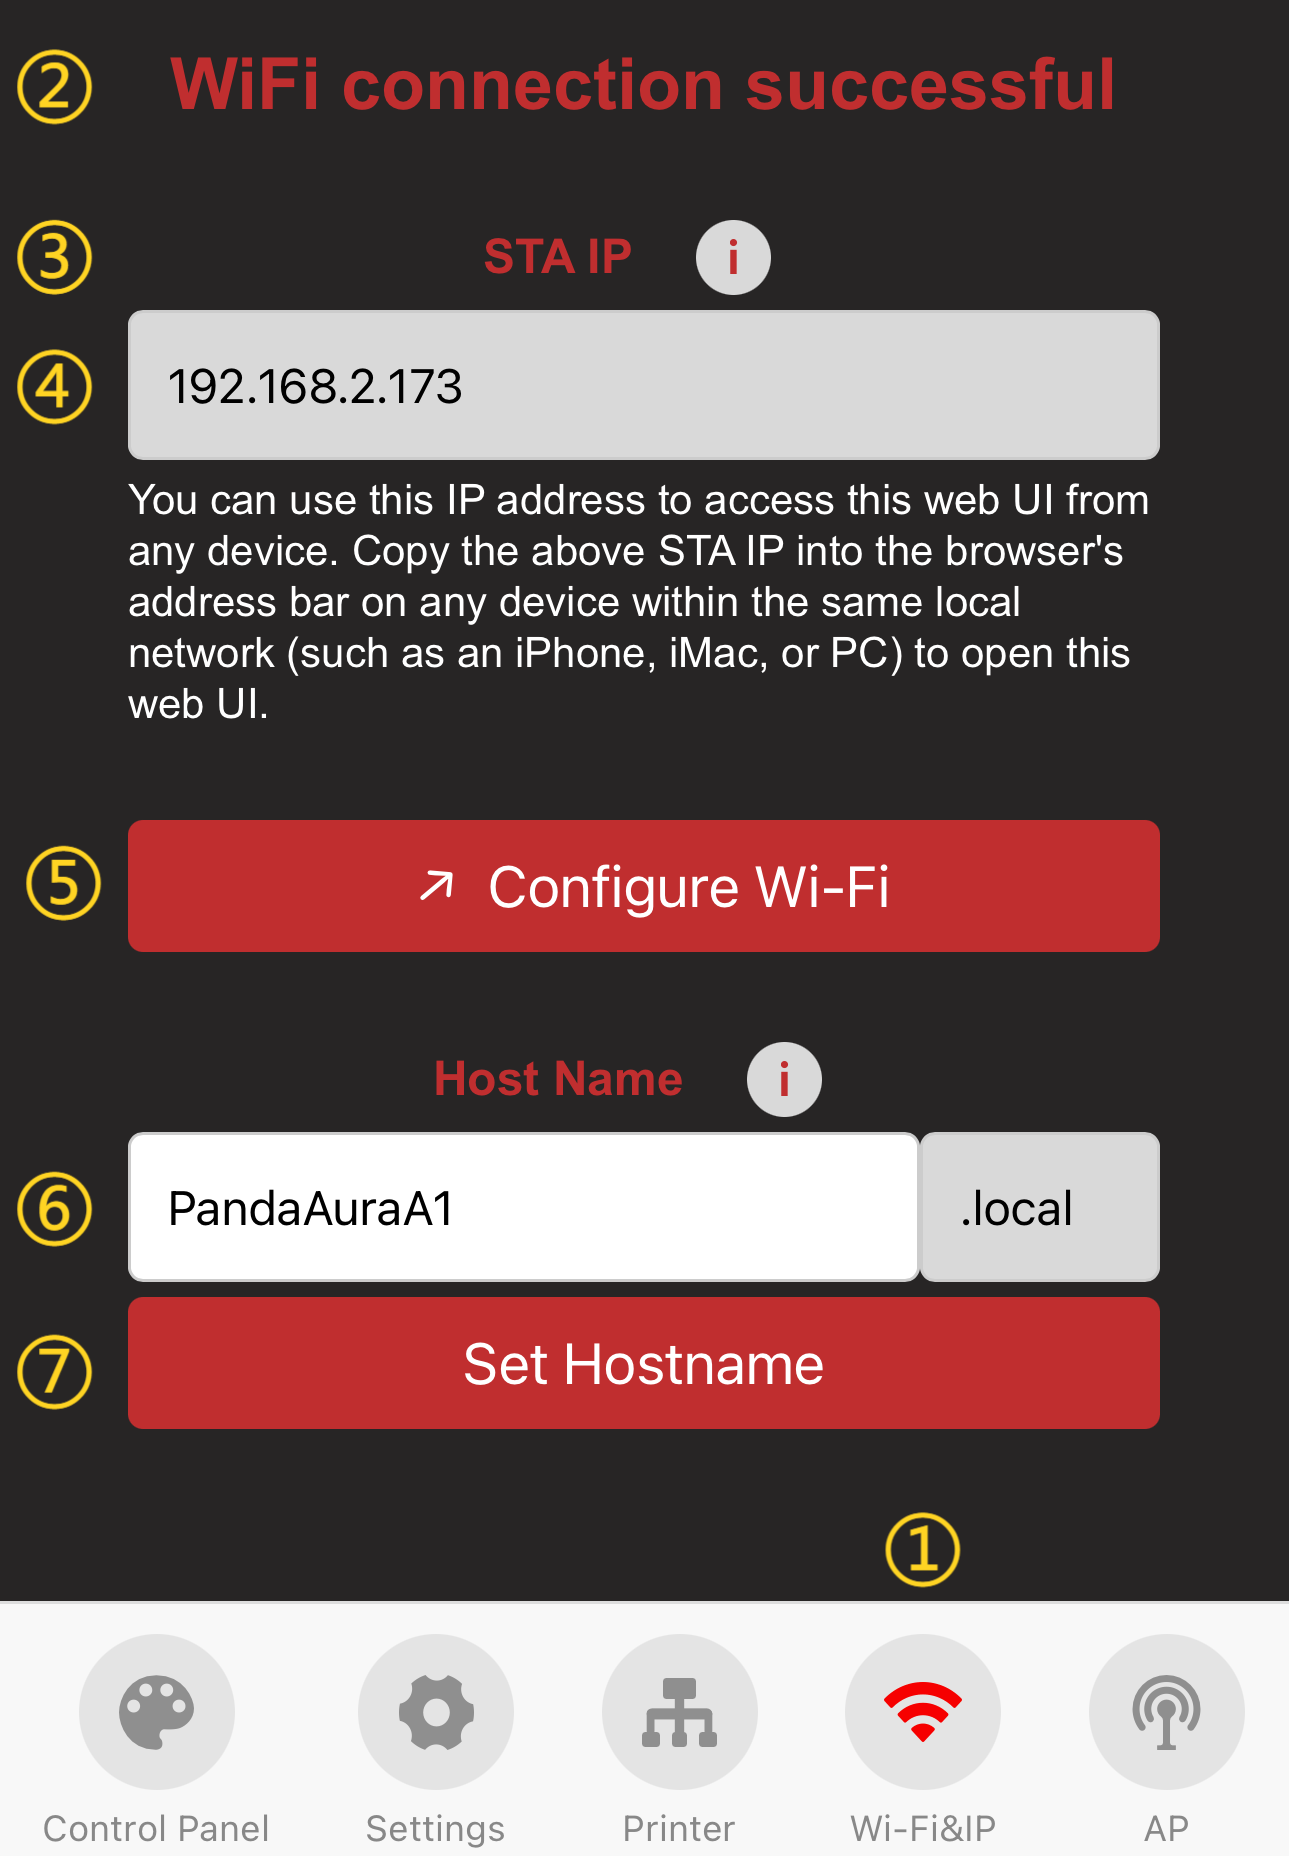
Wi-Fi Interface
-
1.WiFi Page Selection: When you tap the icon, it will turn red to indicate that you are on the WiFi page.
-
2.Current Wi-Fi connection status.
-
3.IP address troubleshooting prompt. If the IP text box is empty, ensure the status shows "Connected." If "Not Connected," please reconfigure network settings.
-
4.IP Address display (used to access the Web UI from other devices on the same network).
-
5.Network configuration button. Tap to return to the Wi-Fi Connection Interface.
-
6.Hostname display. You can access the Web UI via the hostname. Default: Panda_Aura_A1_xxx. If you forget the IP, enter the hostname followed by .local (e.g., http://PandaAura.local). Tap the text box to edit and "Set Hostname" to confirm.
-
7.Confirm hostname change.
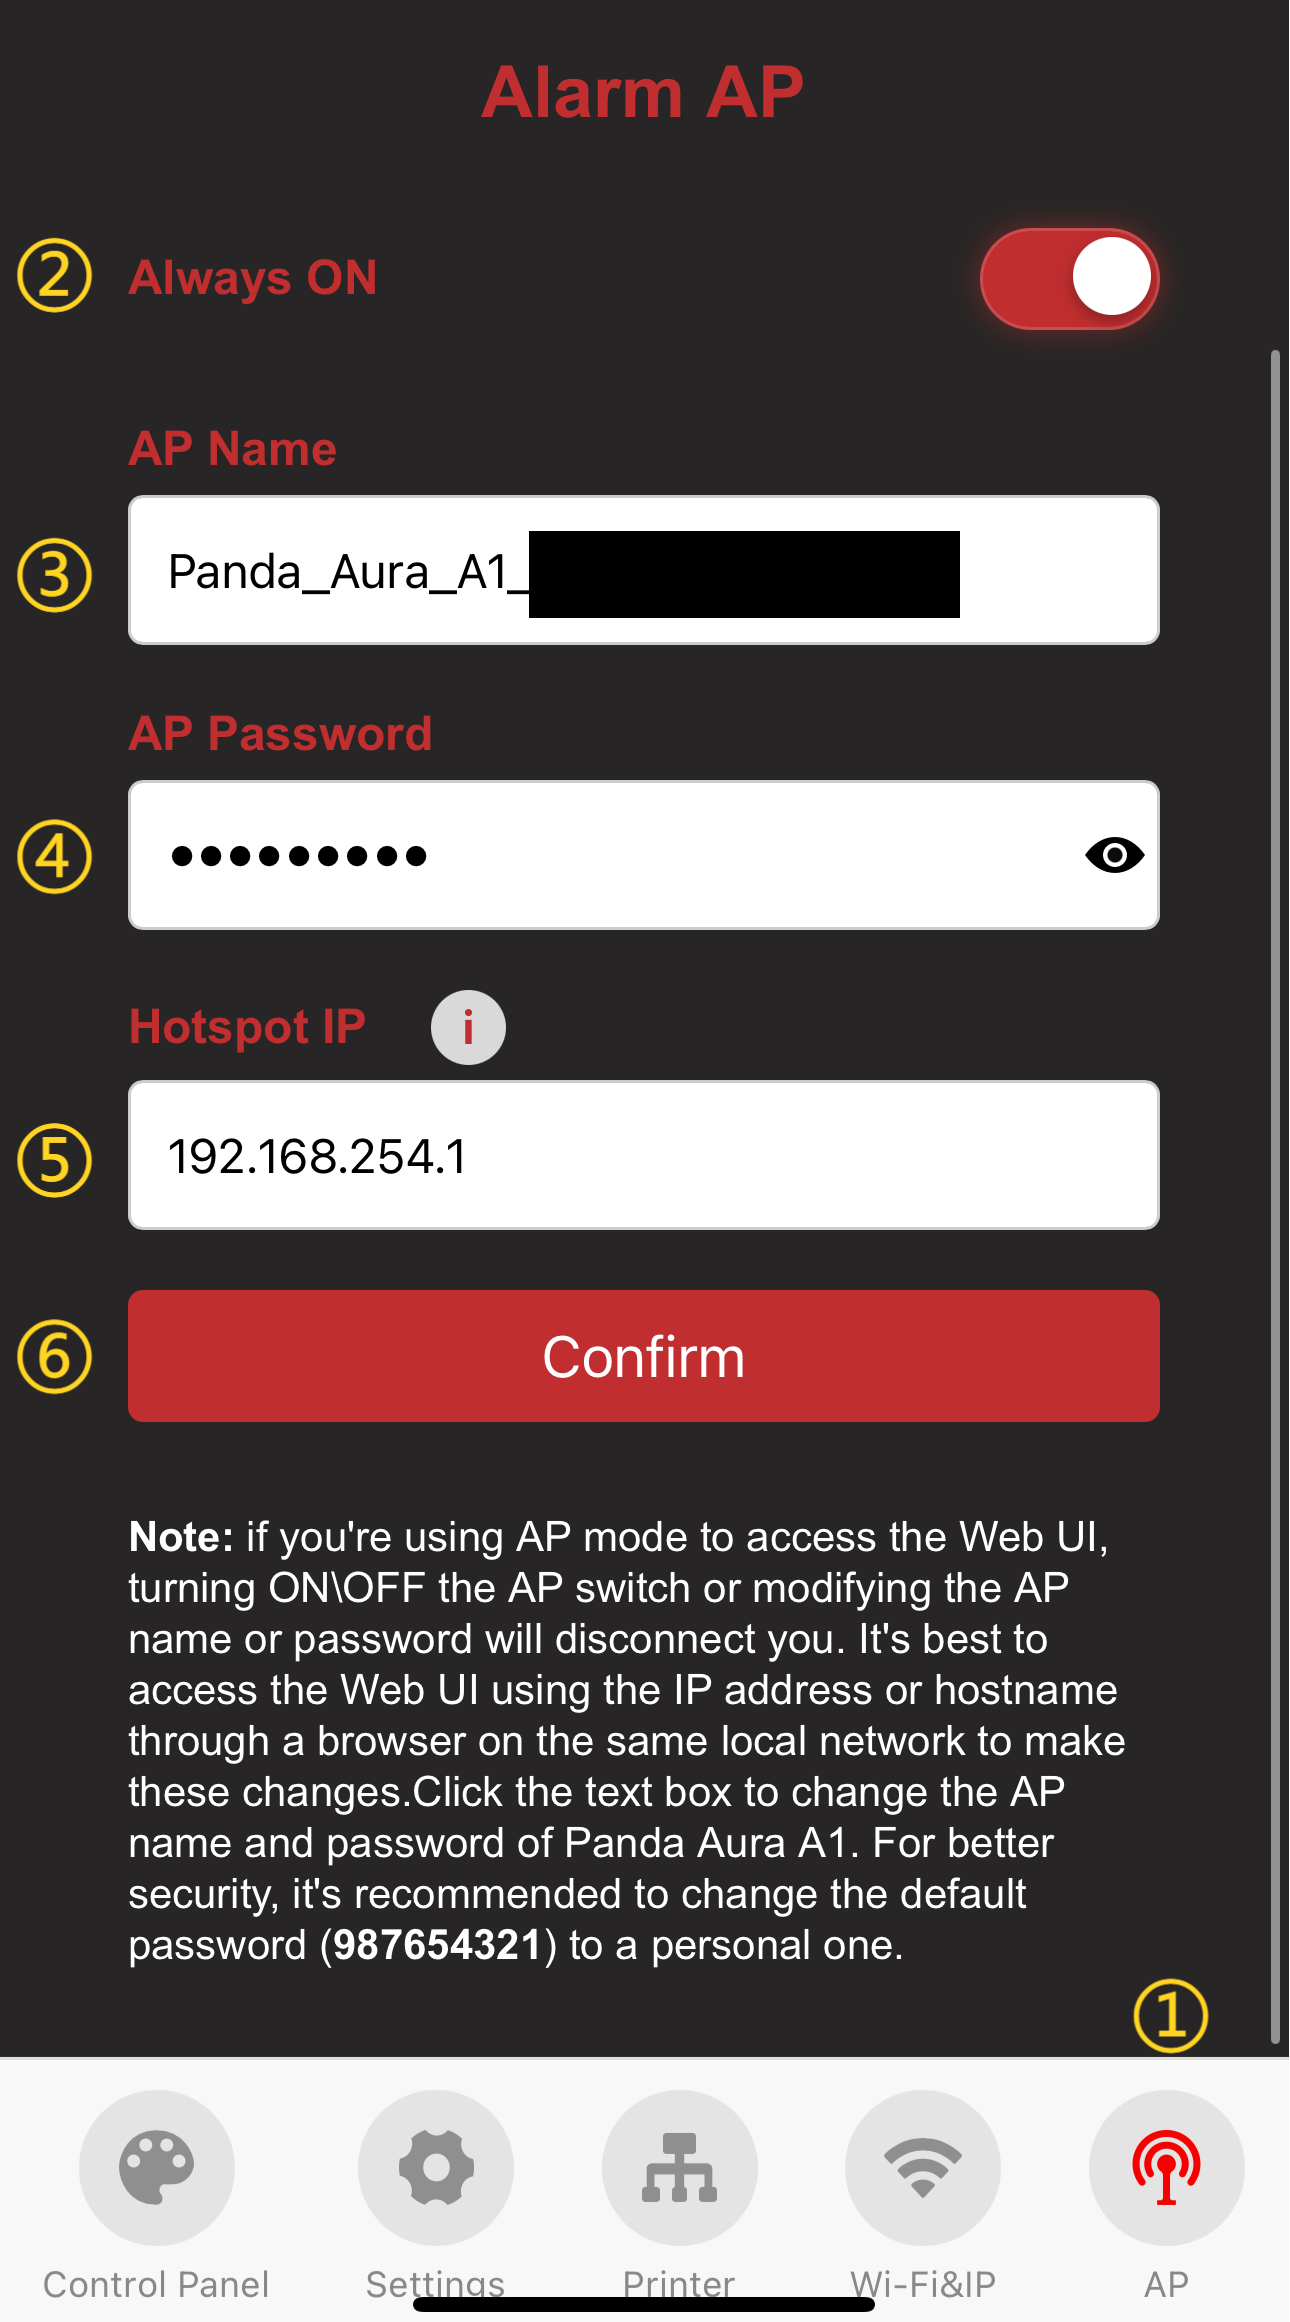
AP Interface
-
1.AP Page Selection: When you tap the icon, it will turn red to indicate that you are on the AP page.
-
2.AP Hotspot toggle (On/Off).
-
3.AP SSID (Hotspot Name). Default:
Panda_Aura_A1_XXXXXXXXXX. -
4.AP Password. Default:
987654321. -
5.Hotspot IP (Default: 192.168.254.1). If your router uses the same 192.168.254.xxx range, a conflict will occur, preventing the device from binding to the printer. Please manually change the Hotspot IP to a different subnet.
-
6.Confirm and Restart. The device will reboot to apply changes. (How to connect to AP)
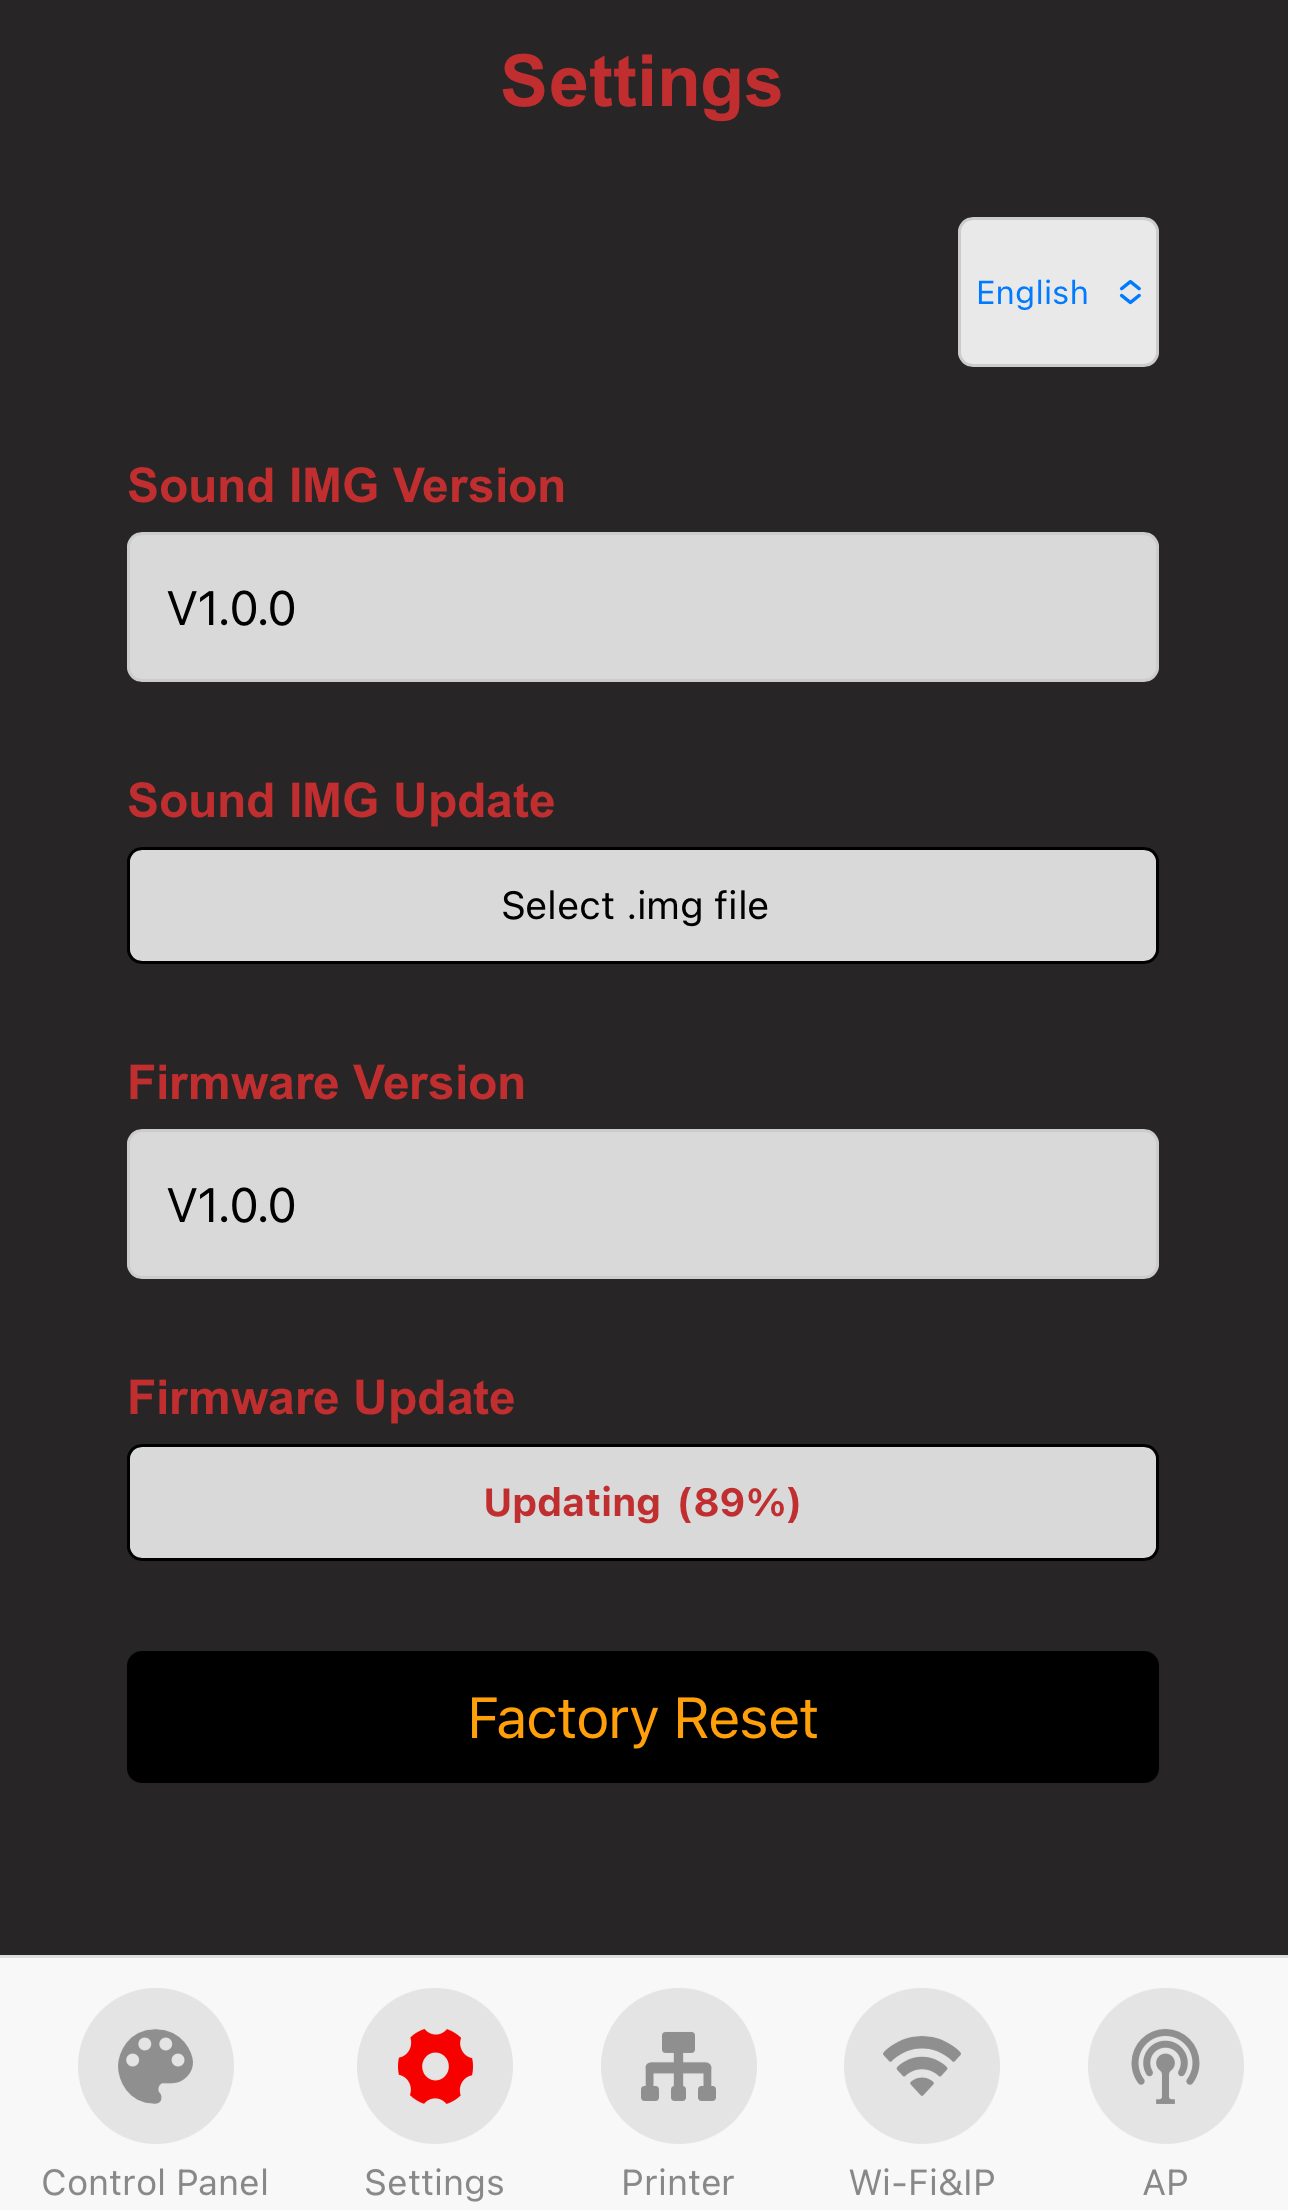
Settings Interface

-
1.Settings Page Selection: When you tap the icon, it will turn red to indicate that you are on the Settings page.
-
2.Language toggle (Default: English).
-
3.Current Sound Firmware version.
-
4.Sound OTA Update (select
.imgfile). -
5.Current Firmware version.
-
6.Firmware OTA Update (select
.binfile). -
7.Factory Reset.
-
To perform an OTA, tap "Select .bin file" and choose the appropriate file.

-
Wait for the progress bar. The device will automatically restart upon completion.
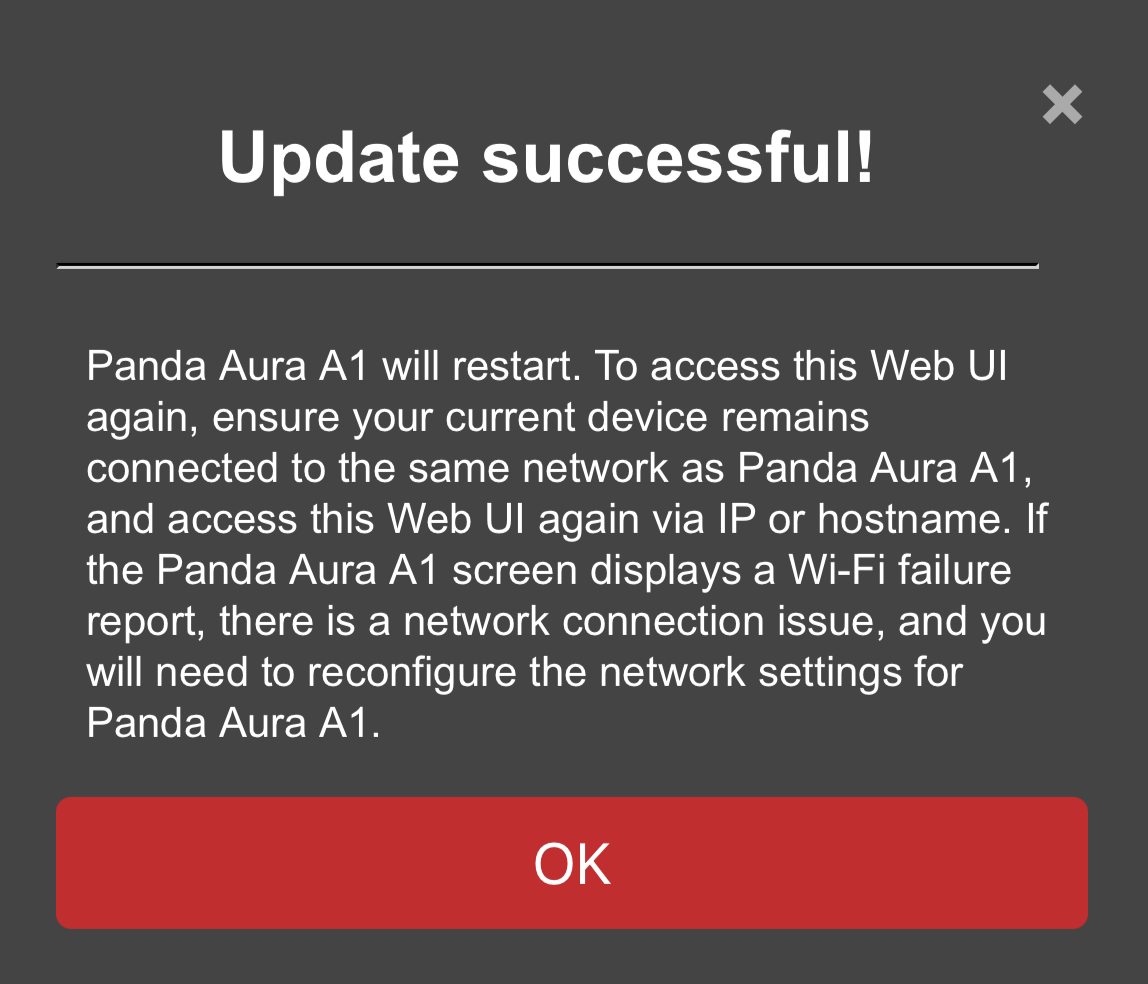
-
-
- Factory Reset confirmation button. (Return to Initial Setup)
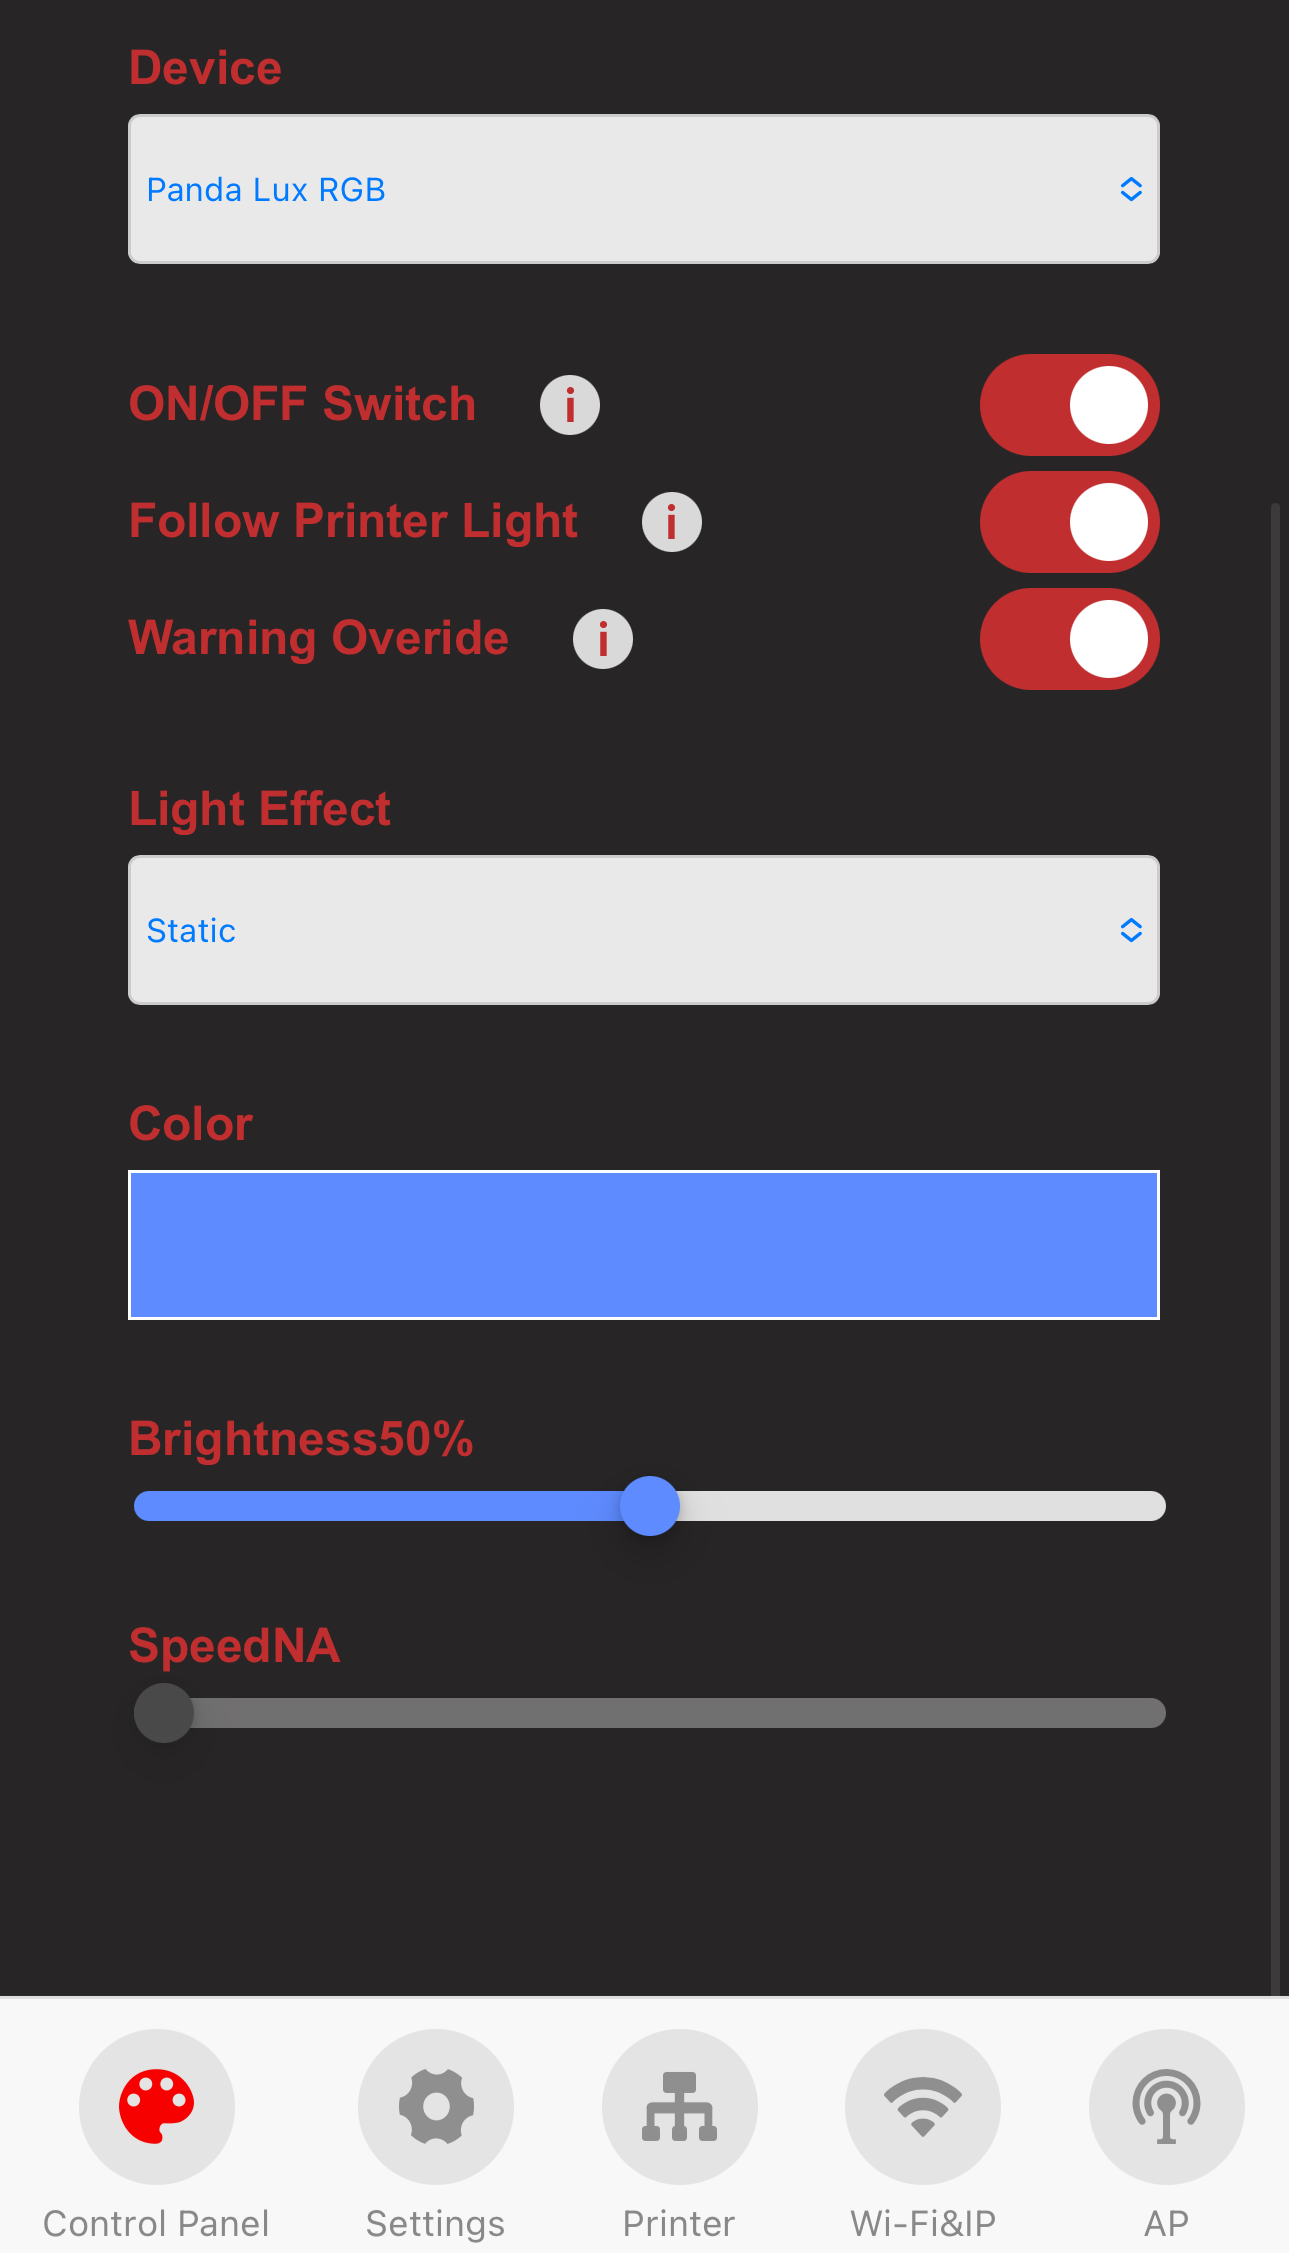
Control Page
-
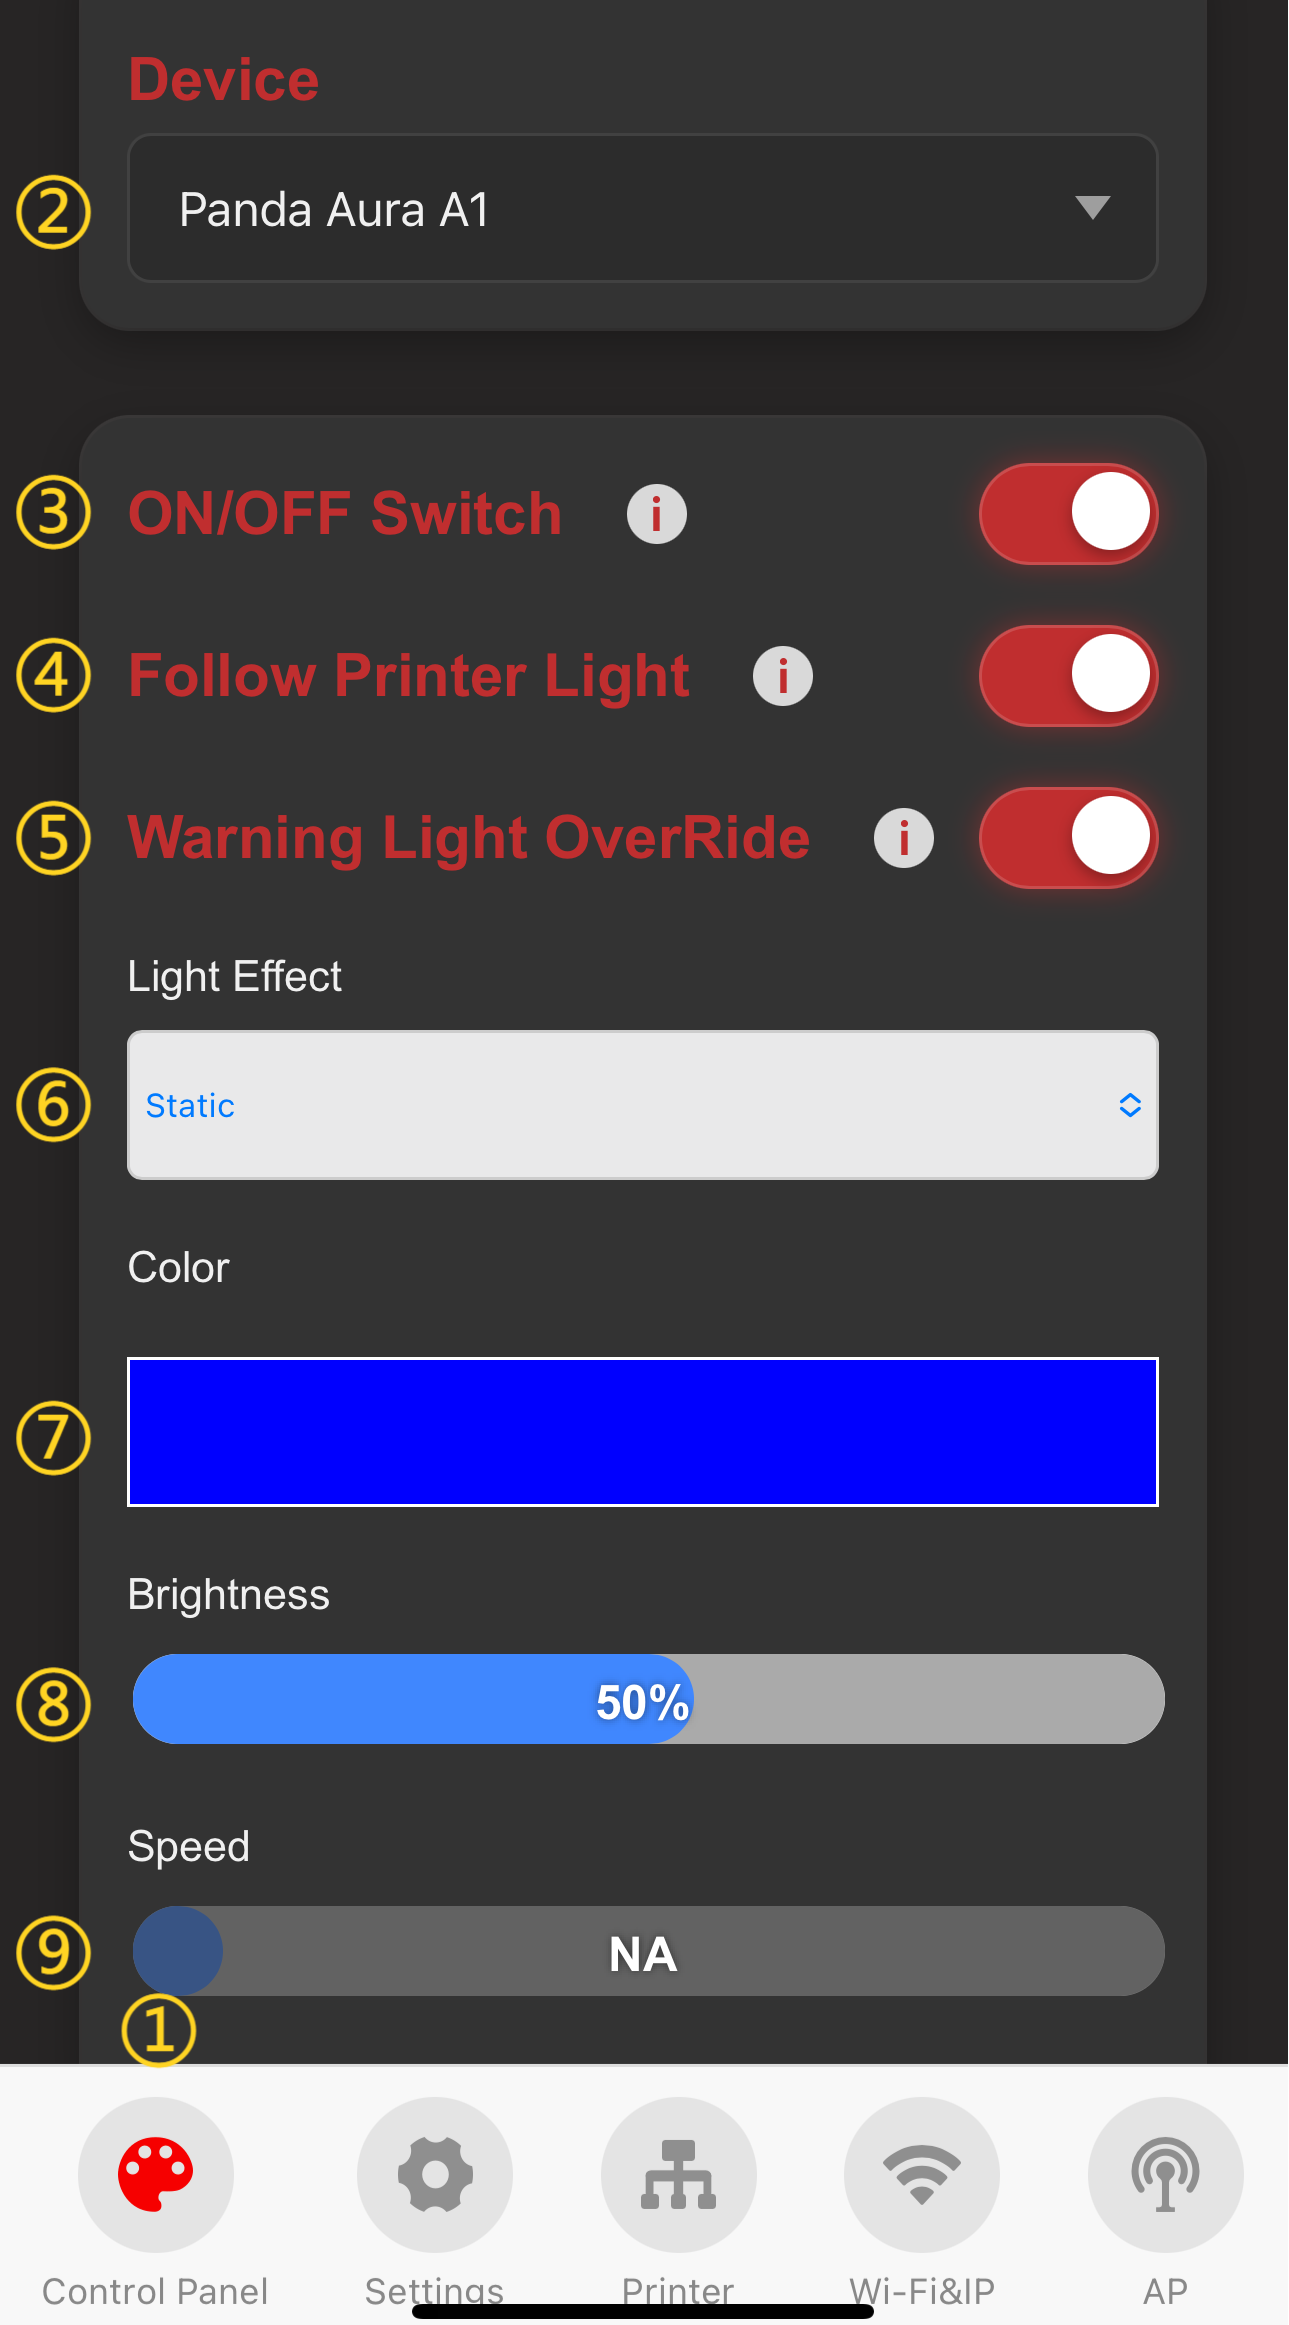
Feature Introduction
-
1.Control Page Selection: When you tap the icon, it will turn red to indicate that you are on the Control page.
-
2.Current Device Name.
-
3.Toggle switch for RGB light effects.
-
4.Automatically turns RGB effect ON and OFF following the printers stock light.
-
5.Error Override: Tap to dismiss/override the red flashing warning light when the printer is in an error state.
-
6.Lighting effect selection.
-
7.Color settings.
-
8.Brightness.
-
9.Effect speed.
-
-
Lighting Effect Modes

-
1-6.Select a mode to apply the corresponding lighting effect immediately.
-
7.Temperature-Sync Mode: Reflects the printer's real-time temperature through light color. You can set specific effects (Static or Flash) for both "Safe" and "Danger" thresholds.

-
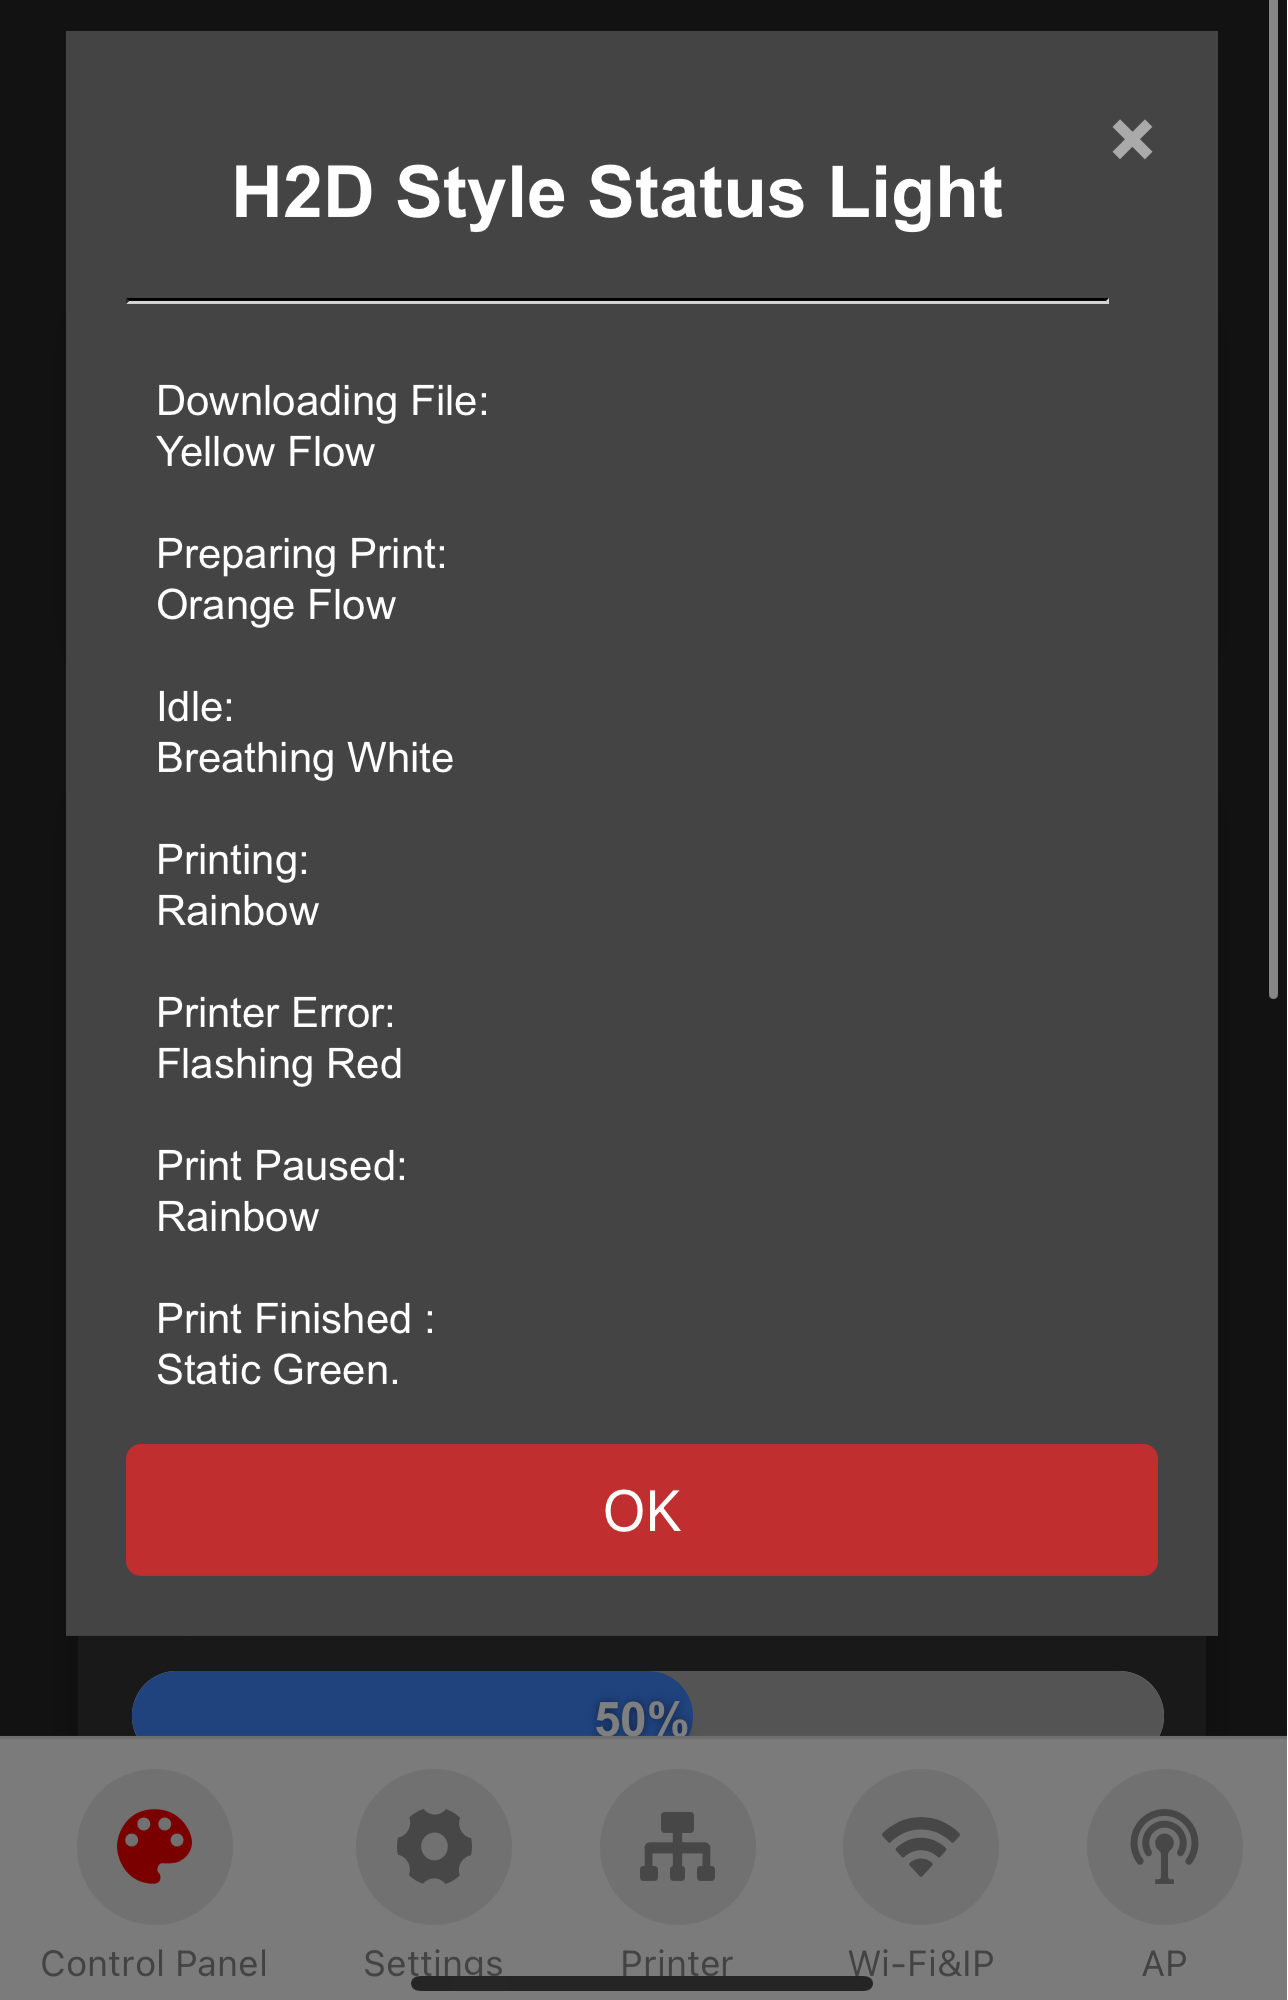
8.Printer Status Indicator: Synchronizes light color with real-time printer status for instant visual feedback.
-
-
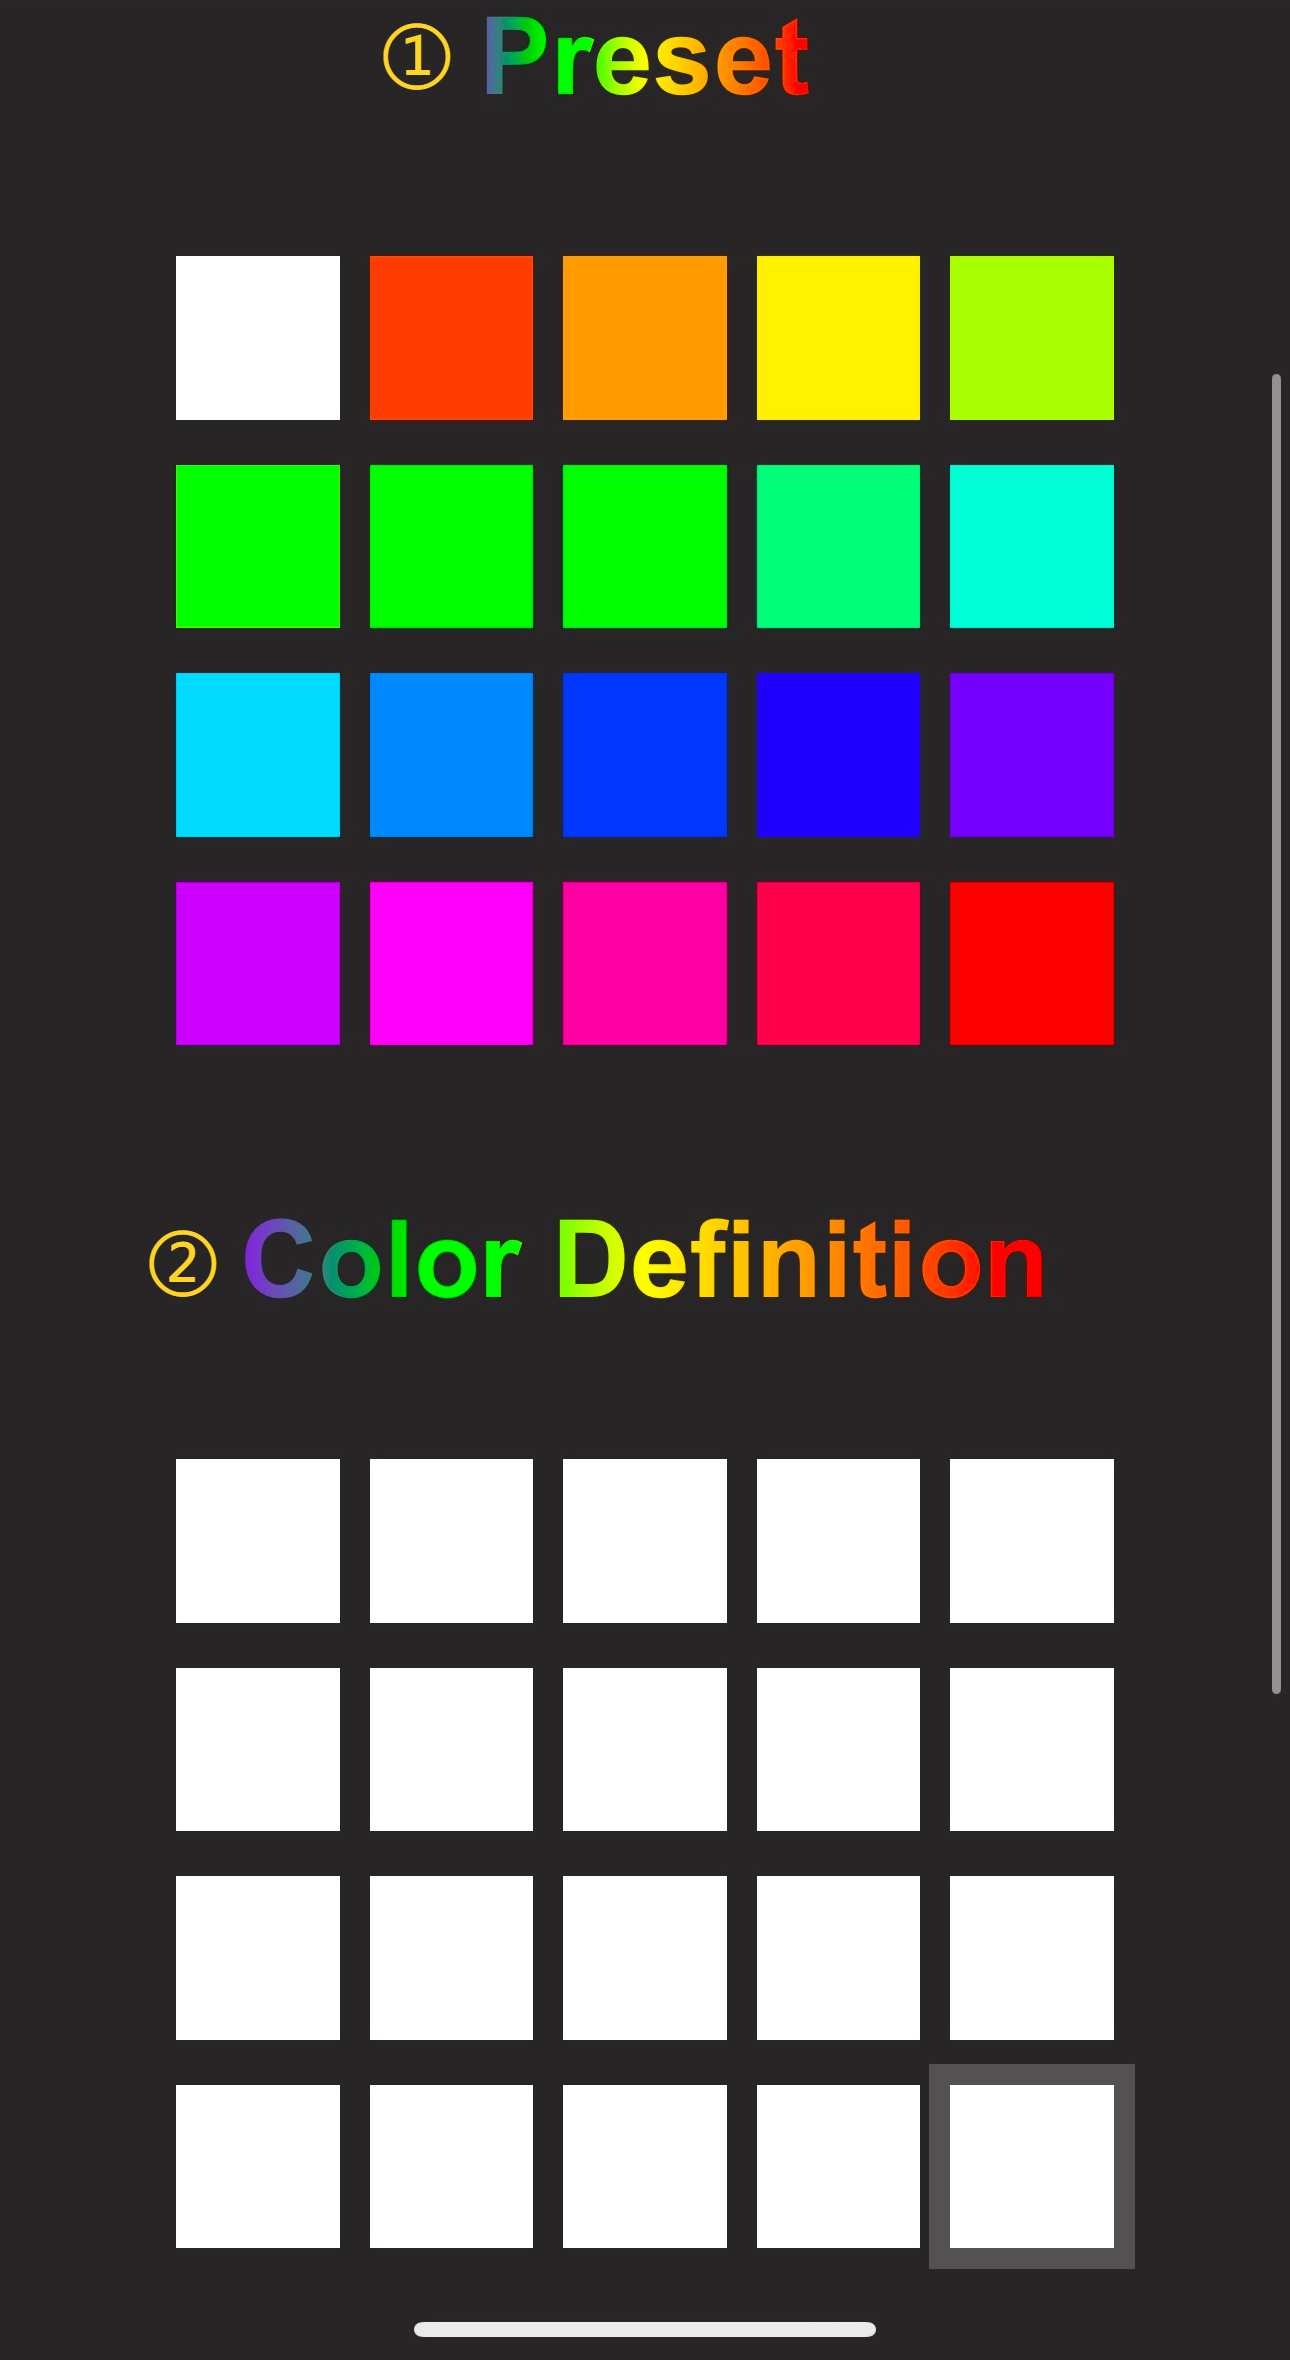
Custom Lighting Colors (Static Mode Example)
-
Tap the color settings option to enter the color selection page.
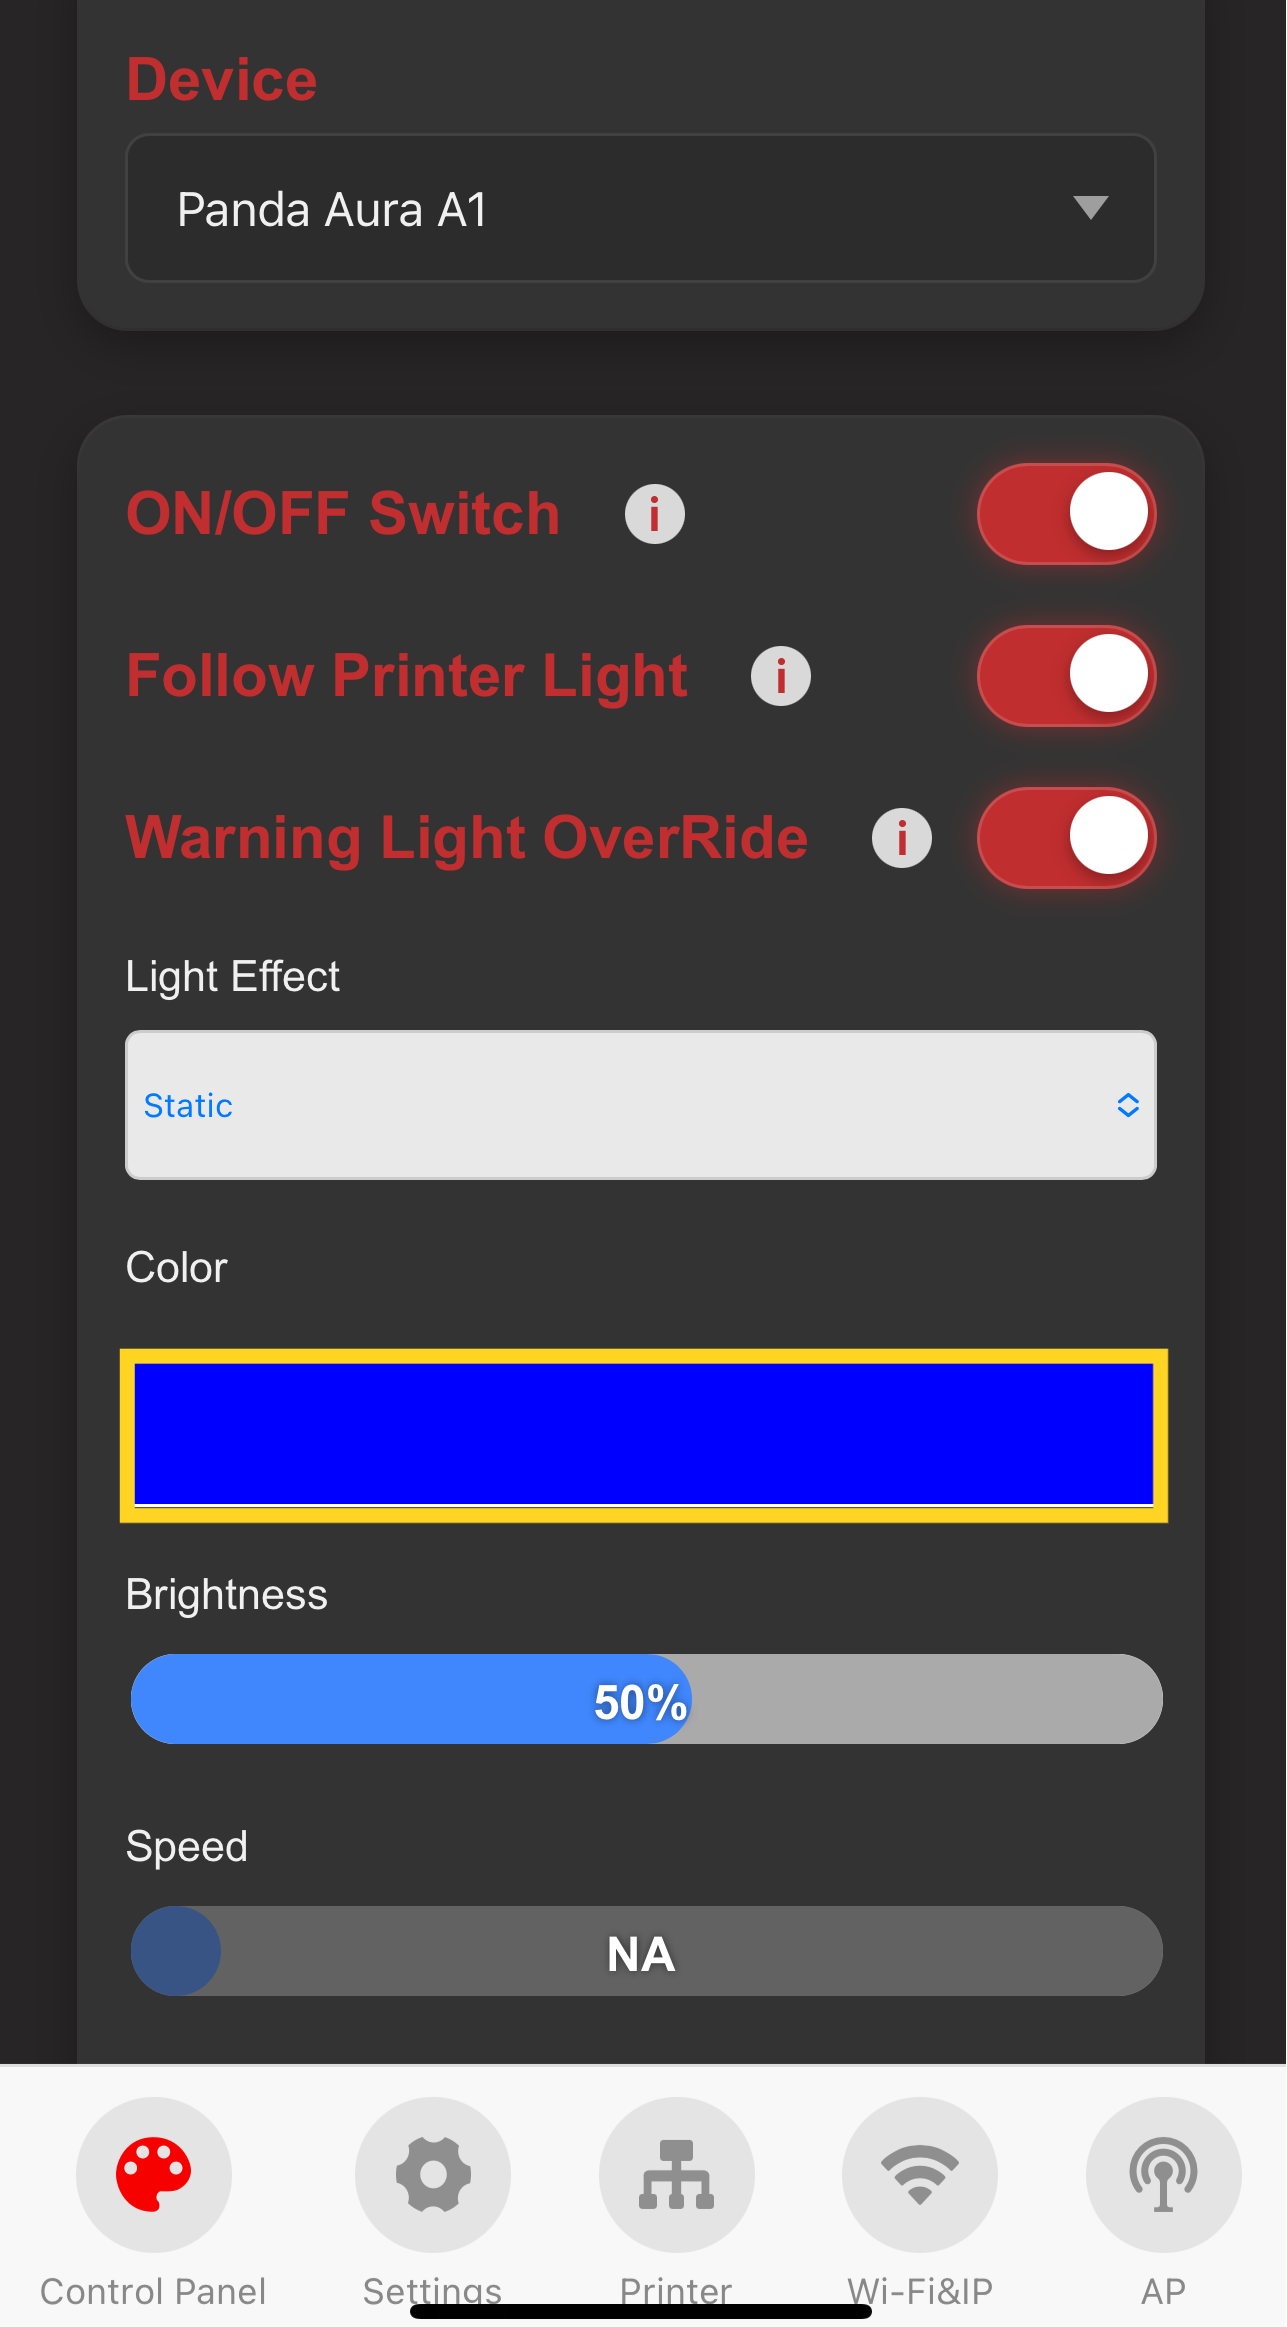
-
Choose your desired color.
-
1.Factory default preset colors.
-
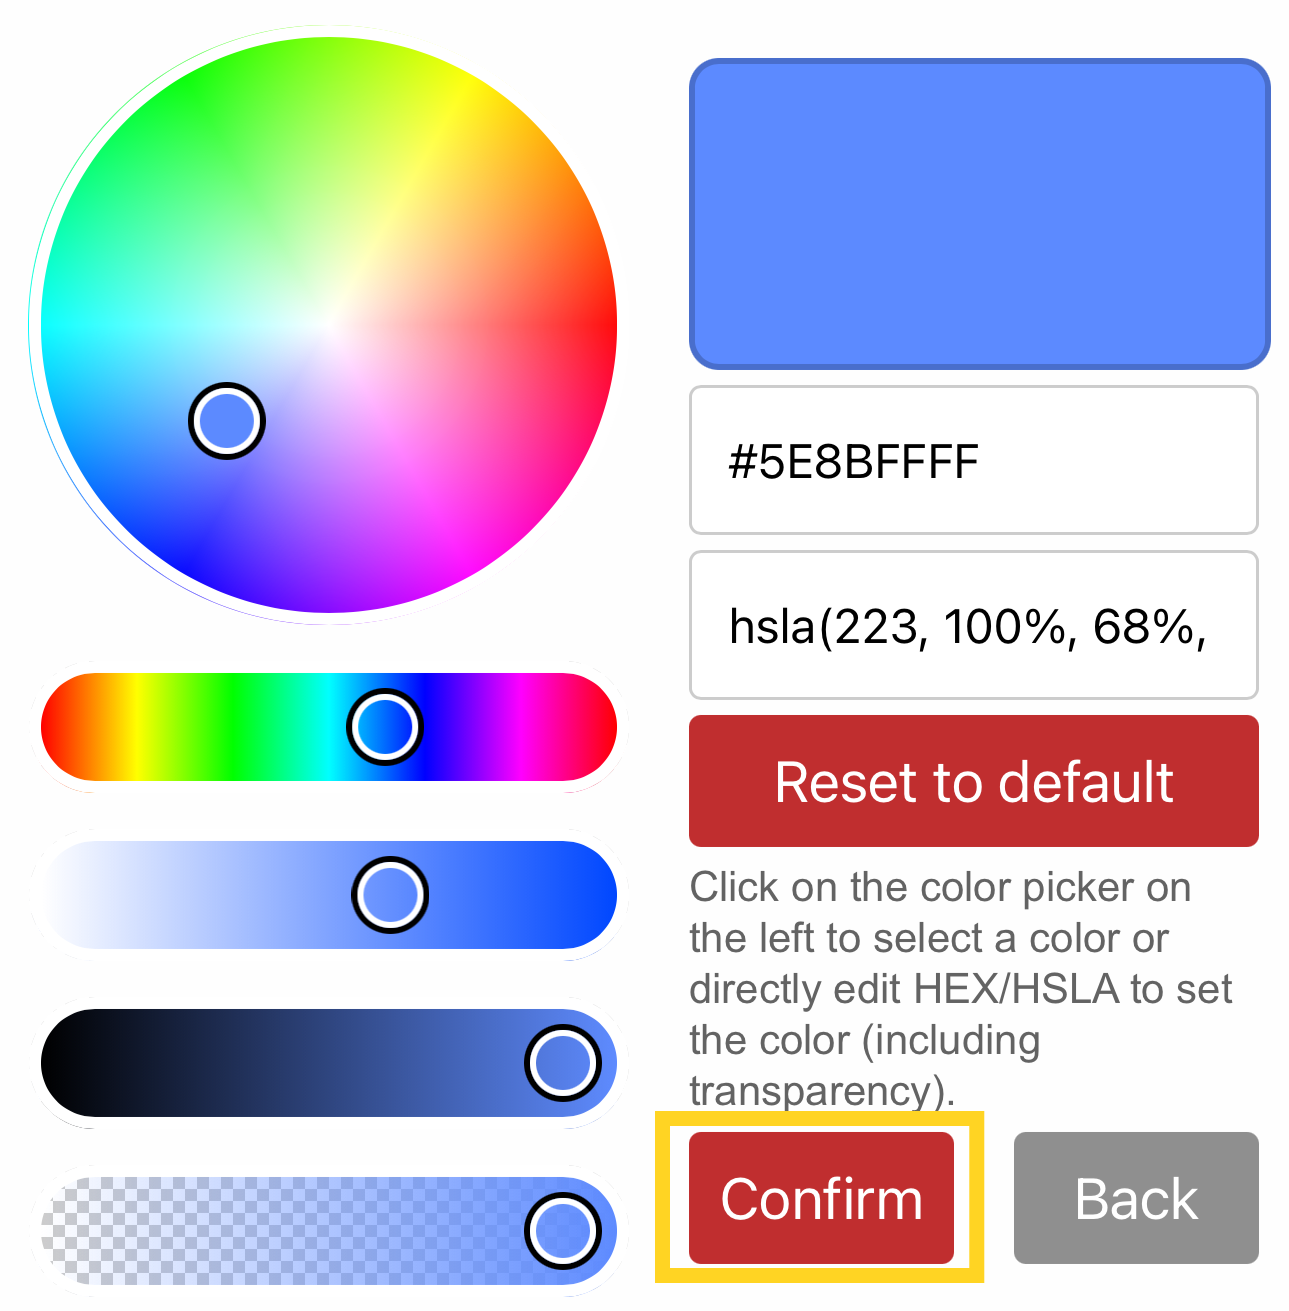
2.Custom colors. Tap a empty block to open the color picker and set specific values.
-
-
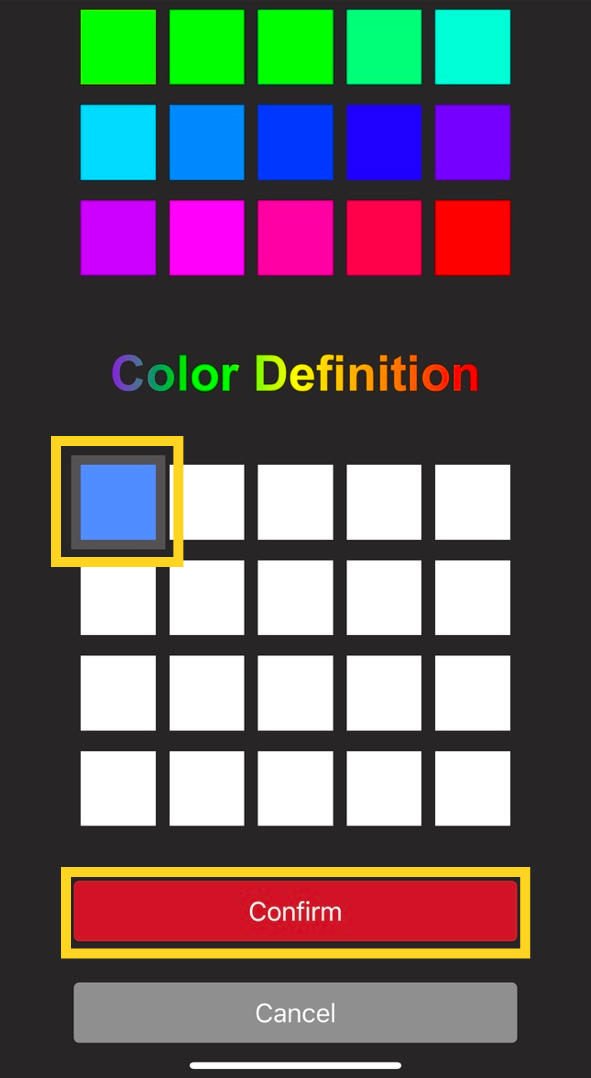
Select a preset or custom color block, then tap "Confirm" to apply it to the RGB lighting.
-
-
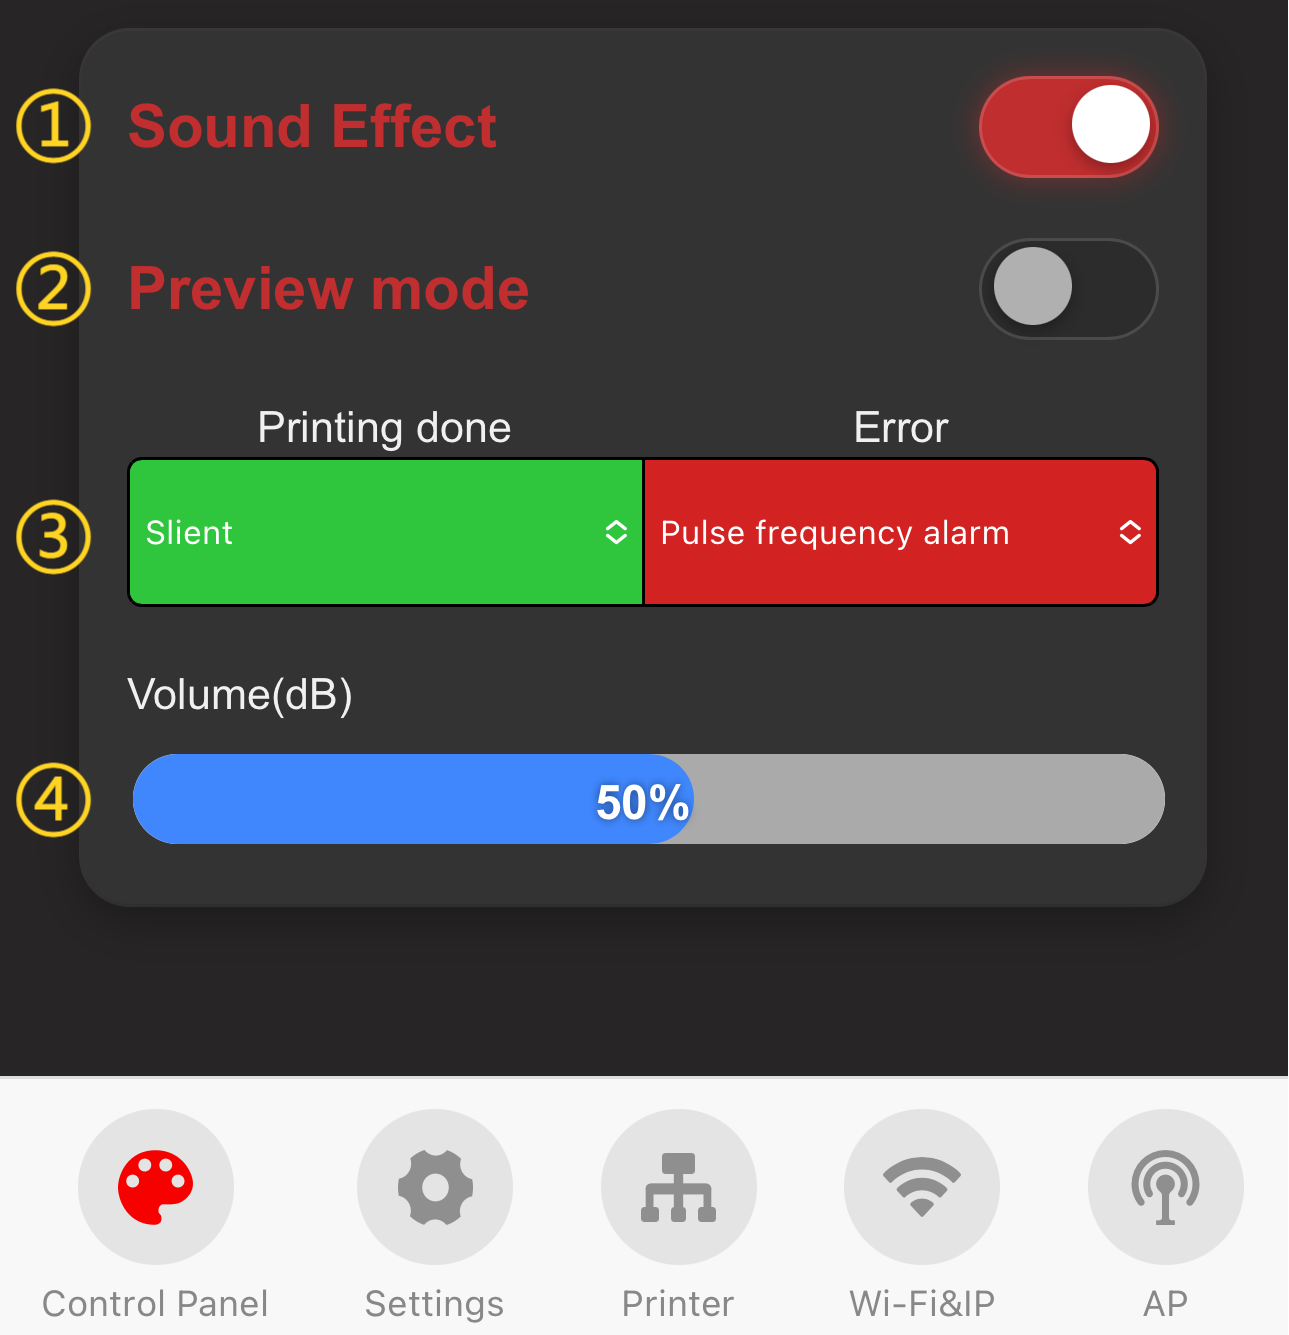
Sound Effects
-
1.Toggle switch for sound feature.
-
2."Preview Mode": Used to audition sound effects. When enabled, selecting a "Simulated Status" will trigger the corresponding audio on the product.
-
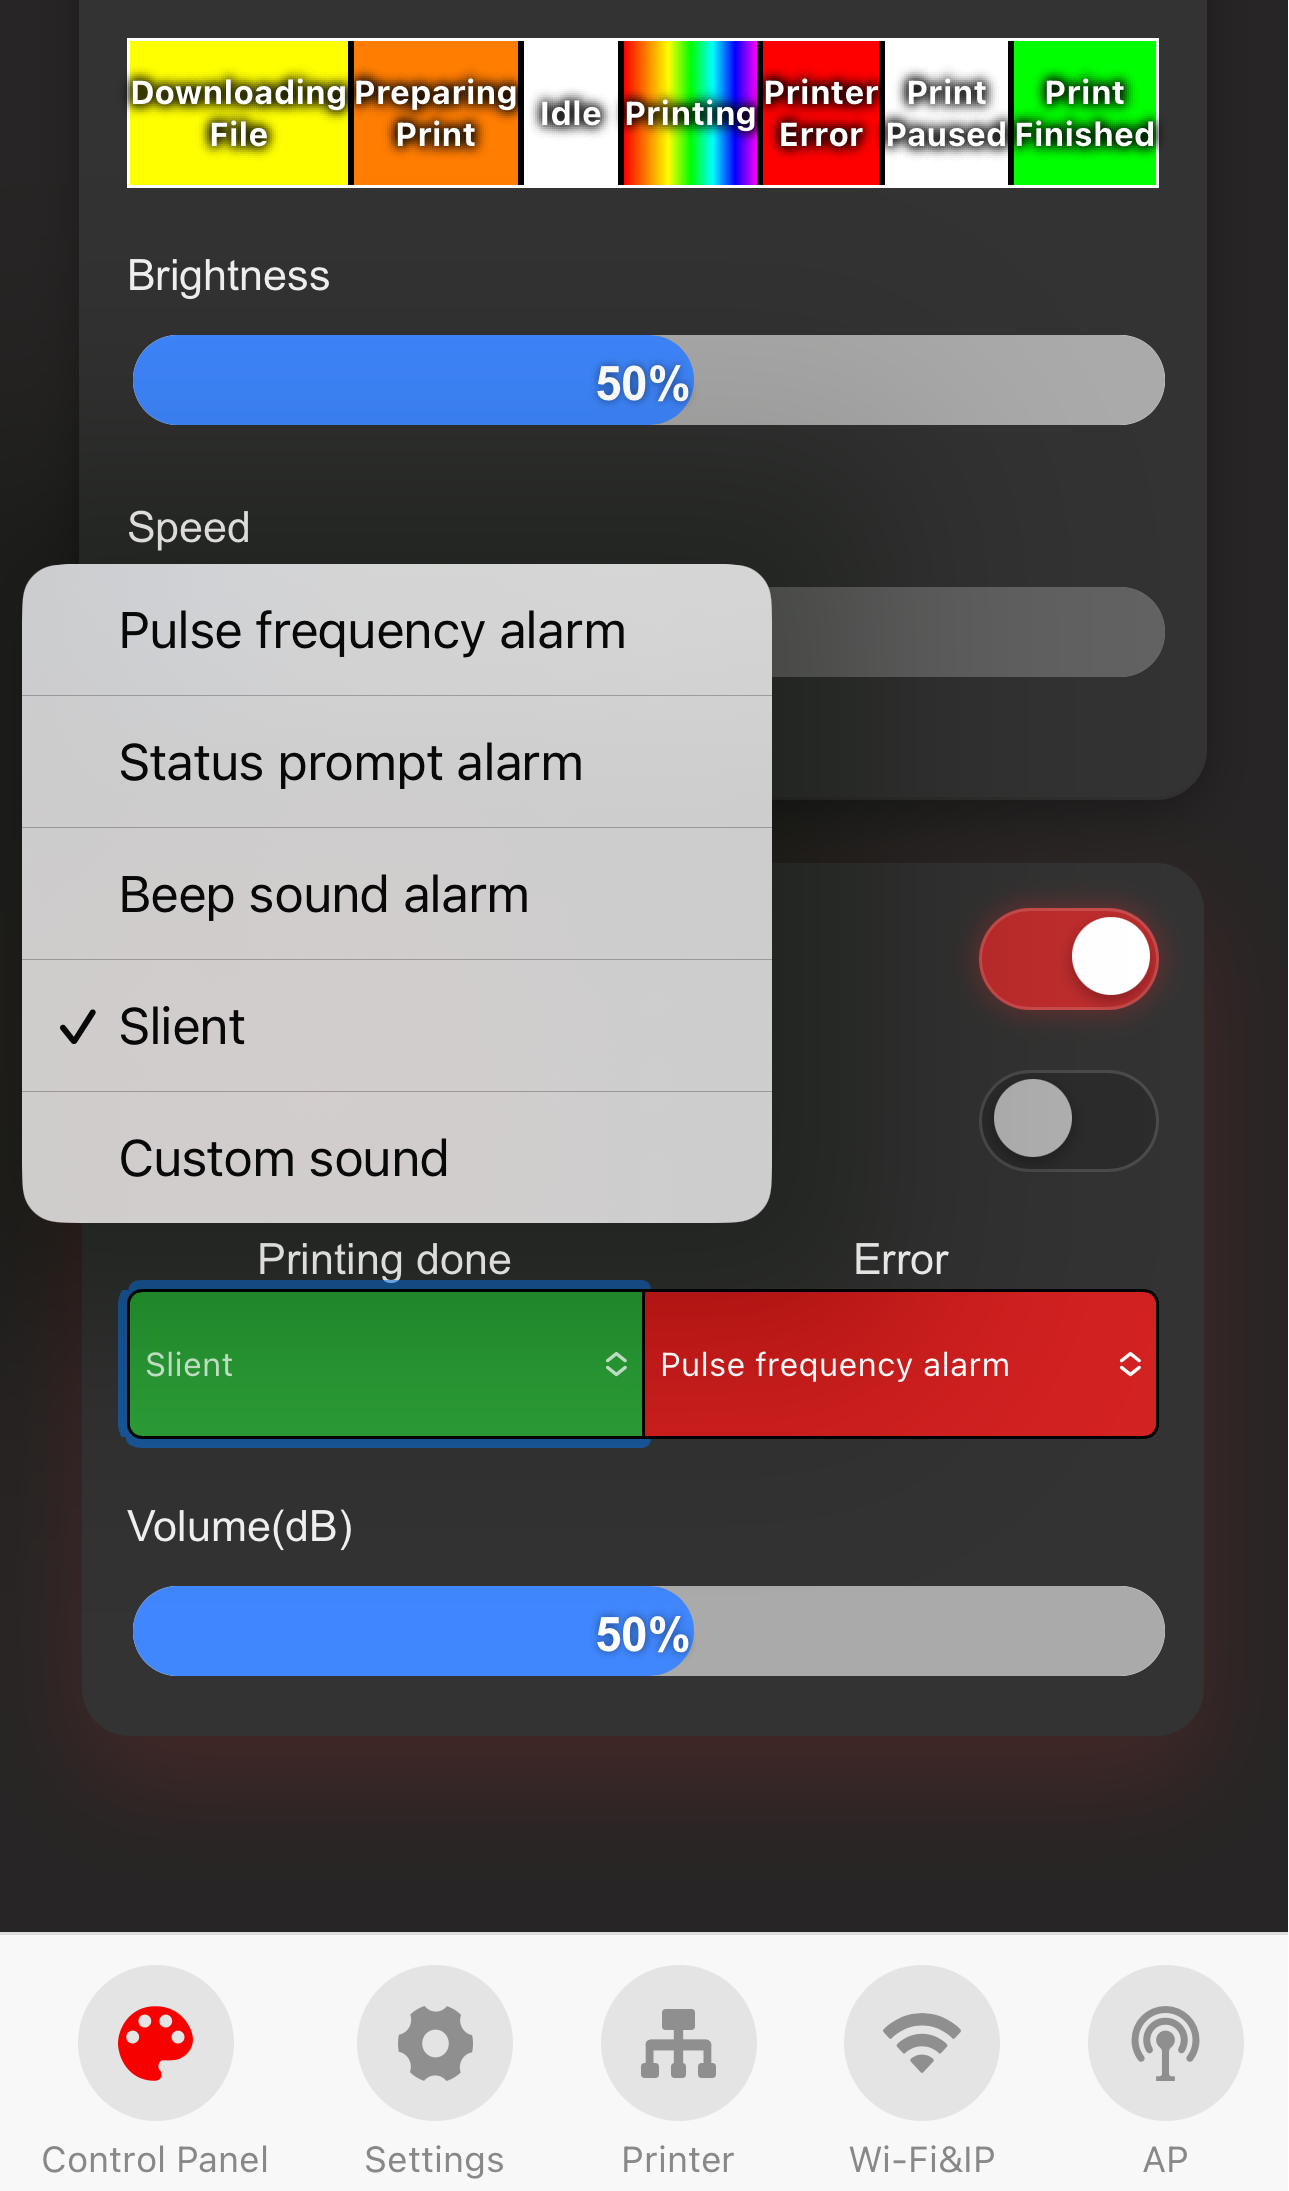
3.Select different sound effects.
-
4.Volume control.
-
Model-Specific Features

Panda Aura A1 RGBW and Panda Aura A1 Plus include additional configuration options compared to the Panda Aura A1 and Panda Aura A1mini. These allow independent configuration of modes and colors for both the light panel and the light strip.
Firmware History
Note: Panda Aura A1 RGBW and Panda Aura A1 Plus share the panda_aura_a1_plus.bin firmware for OTA updates.
V1.0.0
- Initial factory release.
Feature Requests
If you have features you would like to see in future firmware updates, please log a request on our official GitHub repository. Request a Feature.