Panda Stack
- Product Link: Buy Here
- MakerWorld: Print Files on MakerWorld or GitHub
Revision Log
| Version | Date | Revision |
|---|---|---|
| v1.00 | October 28th, 2025 | Initial Version |
Introduction
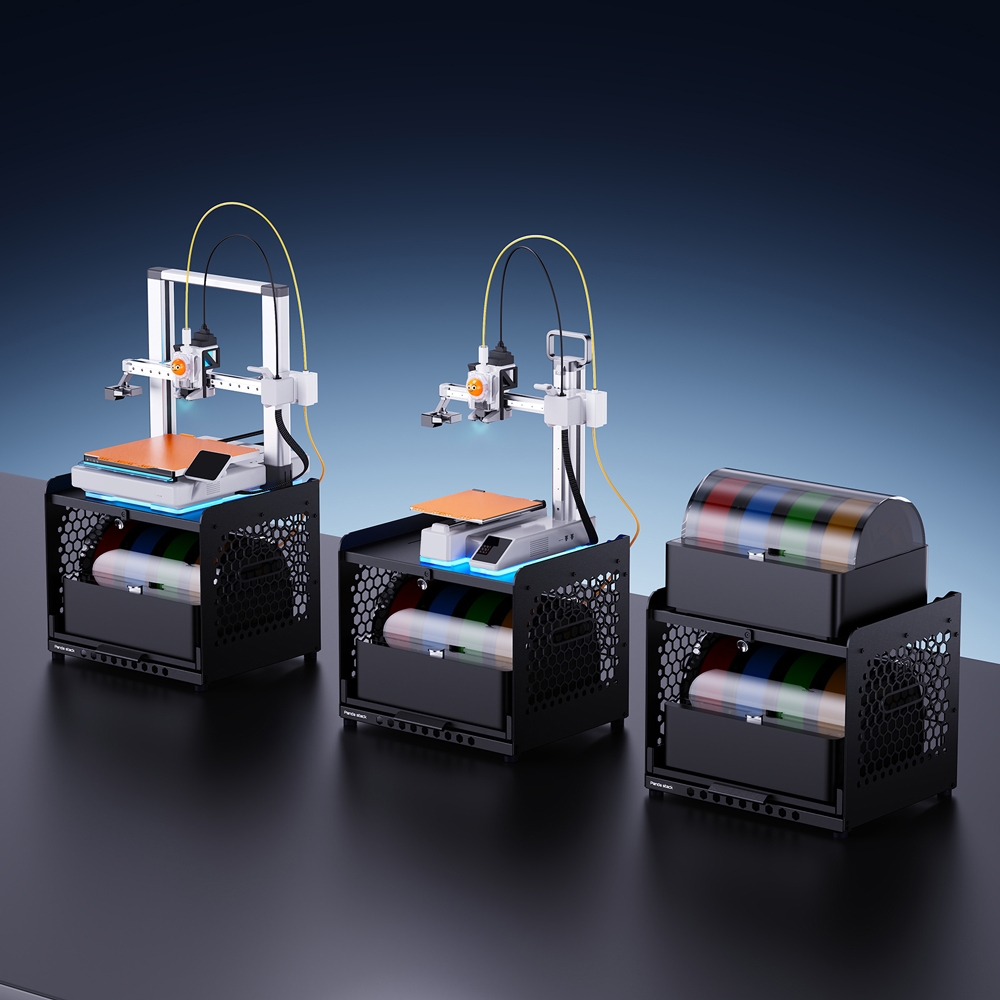
Panda Stack is a dual-layer storage rack designed for Bambu Lab printers.
The top layer supports the A1/A1 mini printer, while the lower layer accommodates the AMS 2 Pro, maximizing workspace efficiency.
It also provides organized storage for AMS, ACE, and ViViD units.
Optional RGB lighting kits can be added for a customizable and visually appealing setup.
Key Features
- Space-Saving Vertical Storage
Arranges the printer on top and the AMS unit below, maximizing workspace efficiency without compromising accessibility.
- High-Strength Construction
Crafted from 6061 aluminum, the body ensures exceptional durability and heavy-duty load-bearing performance.
- Printable Accessory Mounts
Easily add custom modules like a waste bin, tool holder, or USB slot.
- RGB Ambient Lighting Support
H2D/H2S color indicators provide instant visual status alerts and are fully controllable through the WEBUI or BQ App.
- Wide Compatibility
Compatible with A1 and A1 mini printers on the top layer, and supports AMS, ViViD, or ACE units on the lower layer.
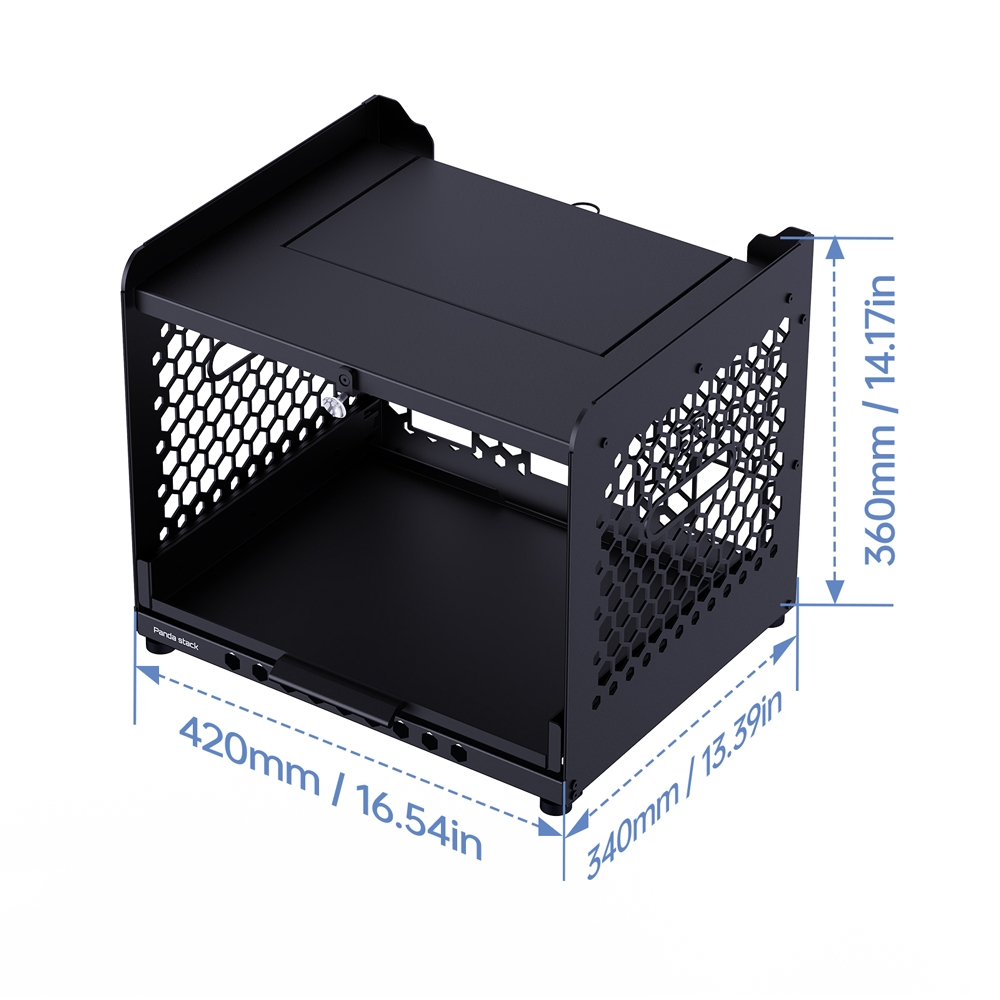
Specifications
- Product Name: BIQU Panda Stack
- Material 6061 Aluminum Alloy + Iron (Top Panel)
- Compatibility:
- Top Layer - A1/A1 mini
- Lower Layer - AMS/ViViD/ACE unit
- Product Diamensions:
Installation Guide
Packaging List
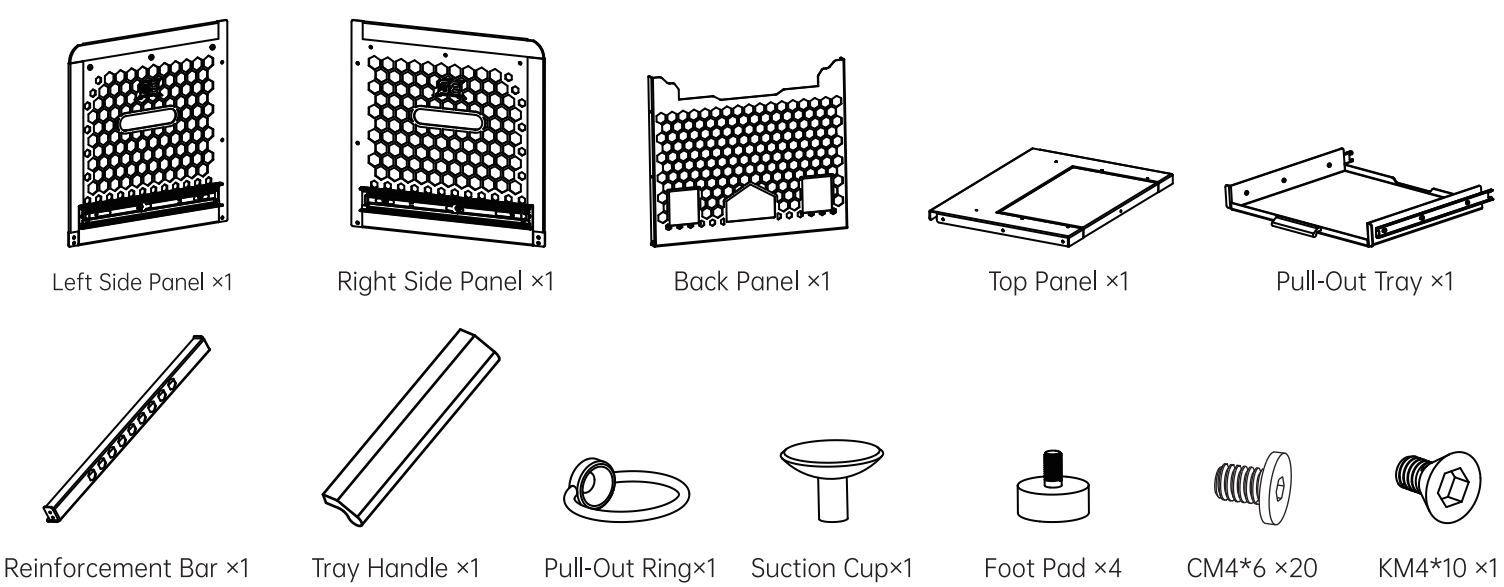
-
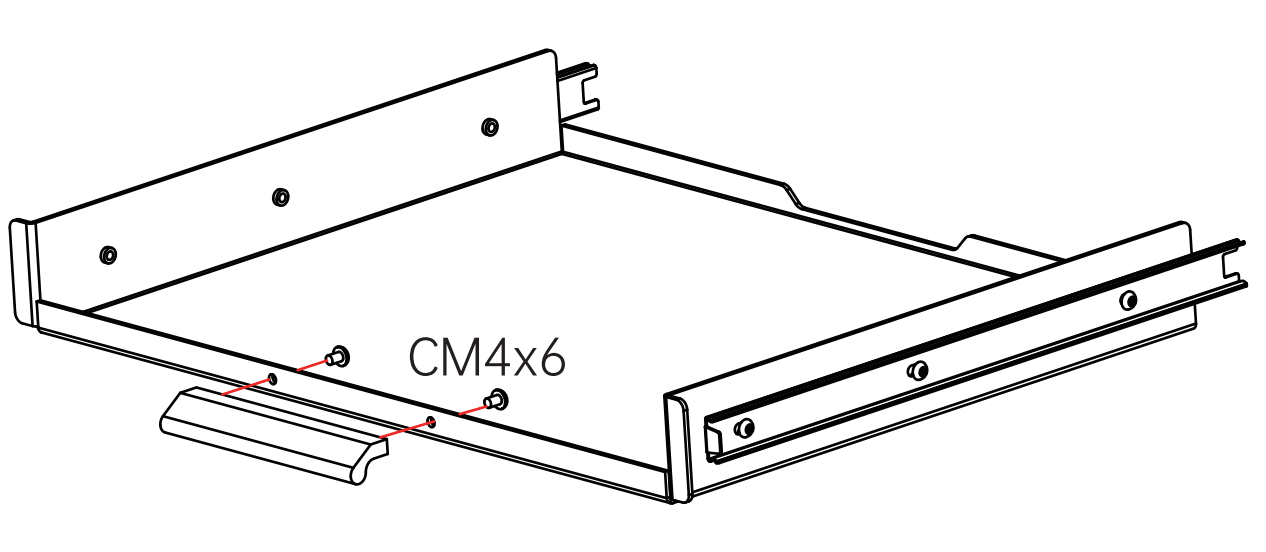
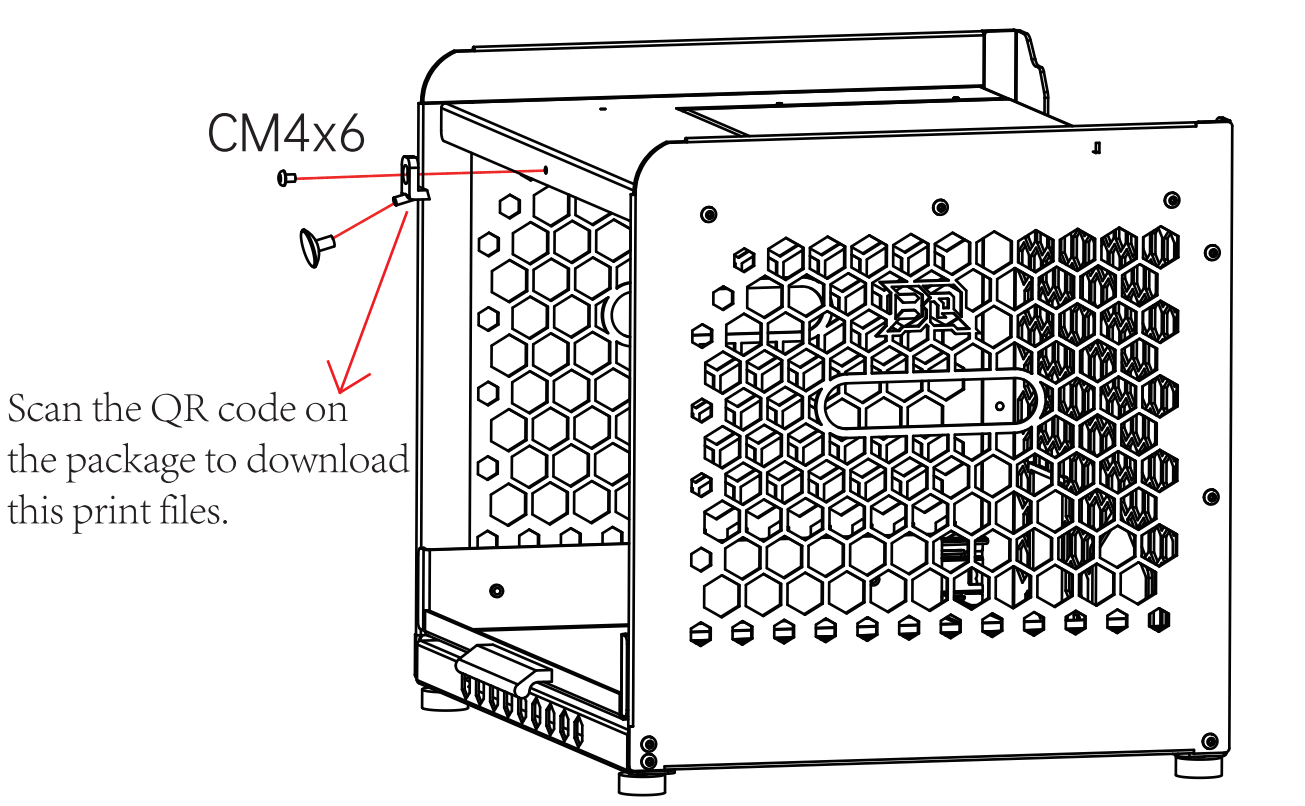
Step 1 – Install the Tray Handle
Attach the handle to the pull-out tray using CM4×6 screws.
-
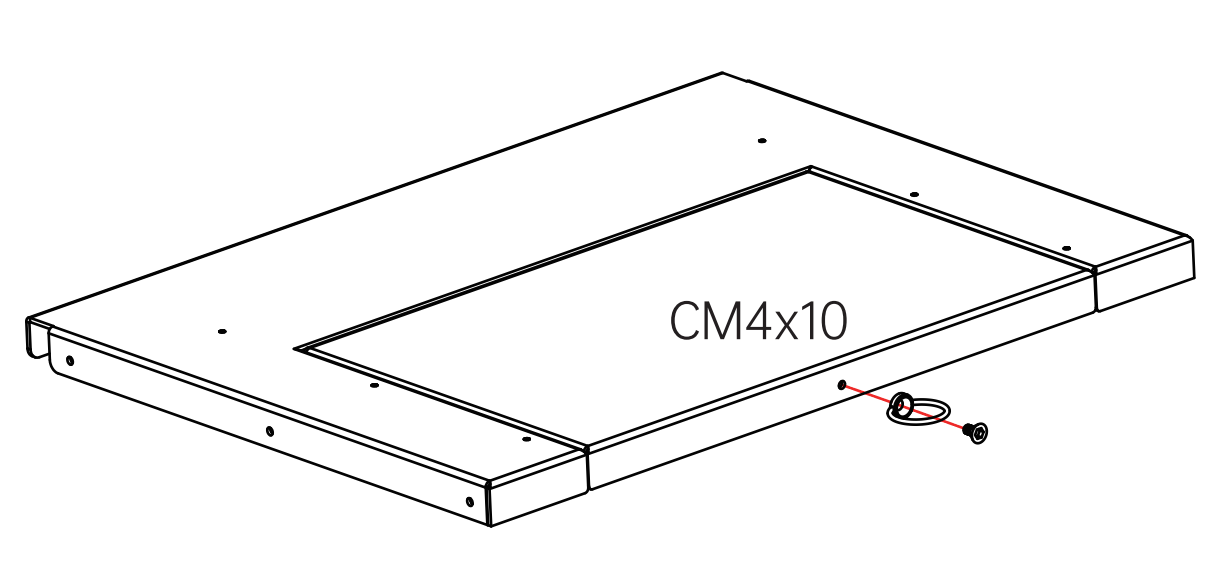
Step 2 – Attach the Pull-Out Ring
Mount the pull-out ring on the slide-out top panel using CM4×10 screws.
-
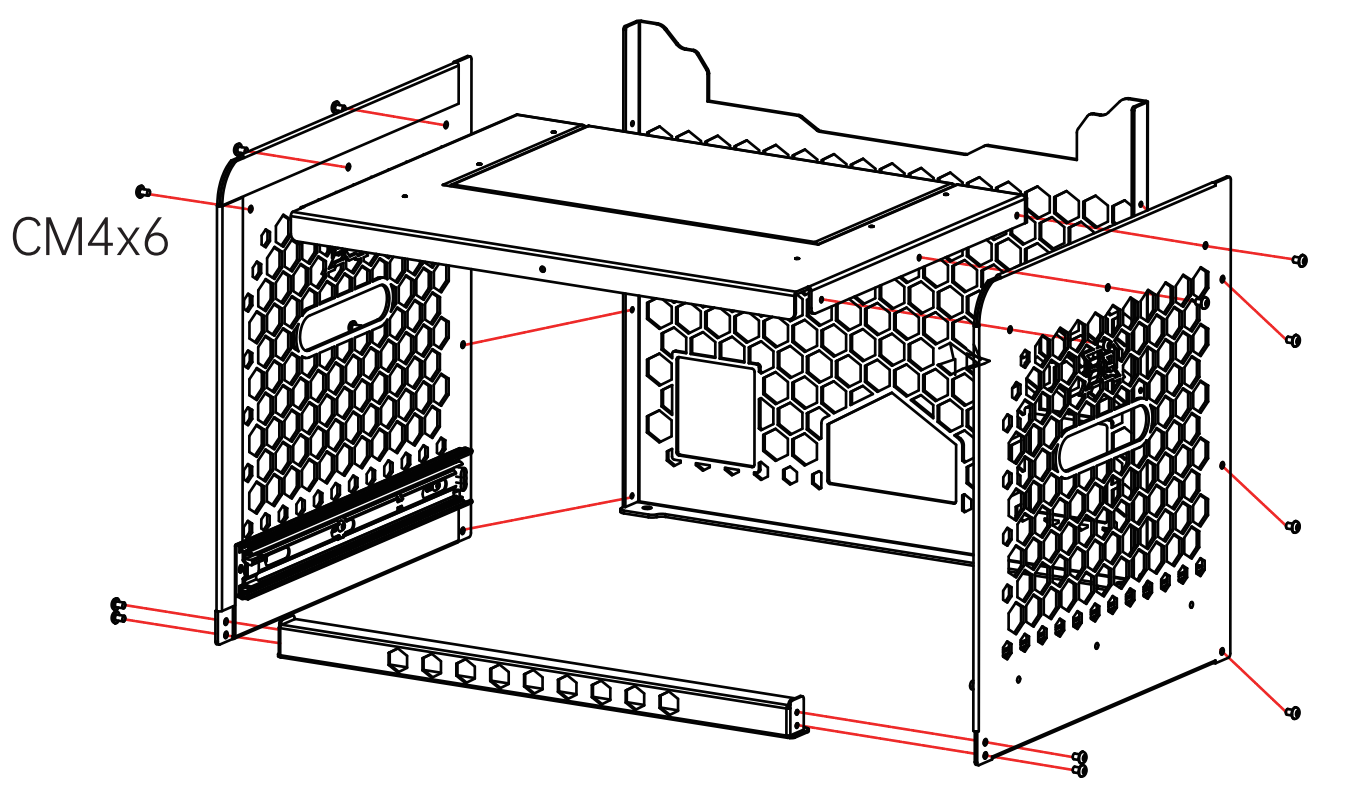
Step 3 – Assemble the Frame
Attach the left and right panels (with rails facing inward) to the back panel using CM4×6 screws.
Next, install the reinforcement bar, then secure the top panel, ensuring the slide-out extension panel faces backward.
-
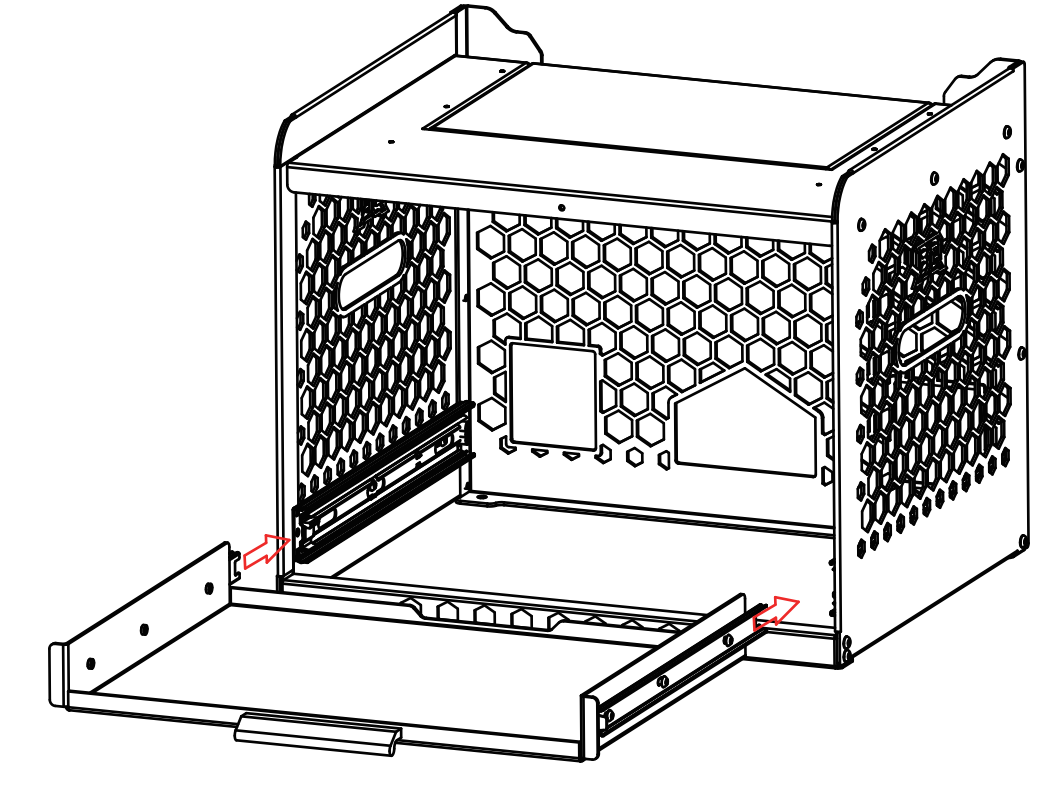
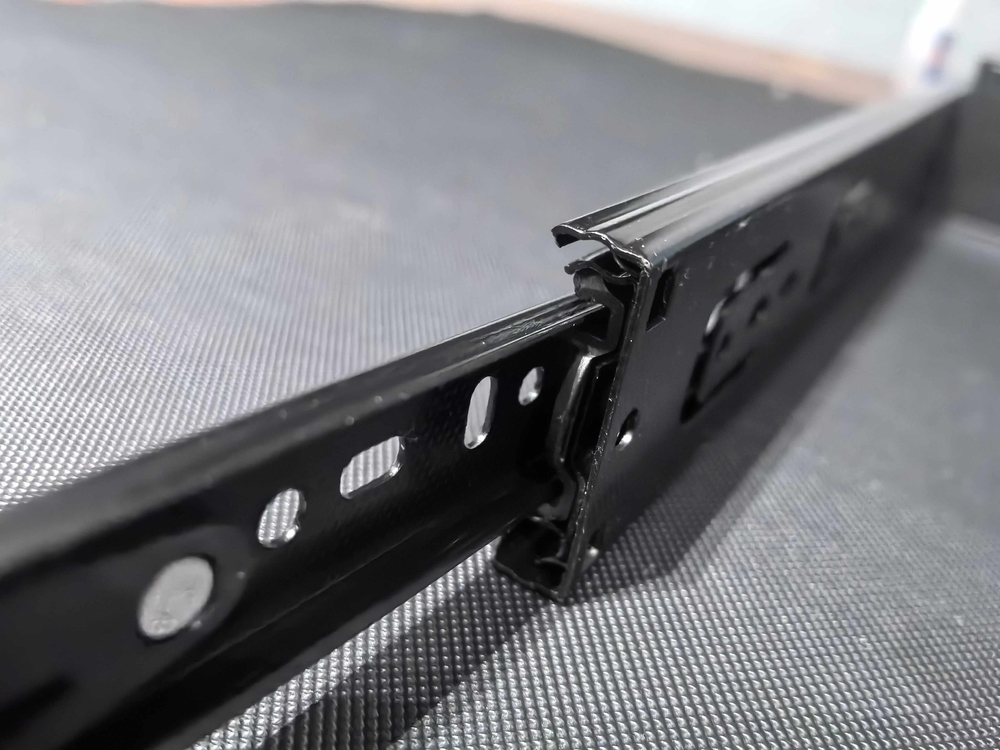
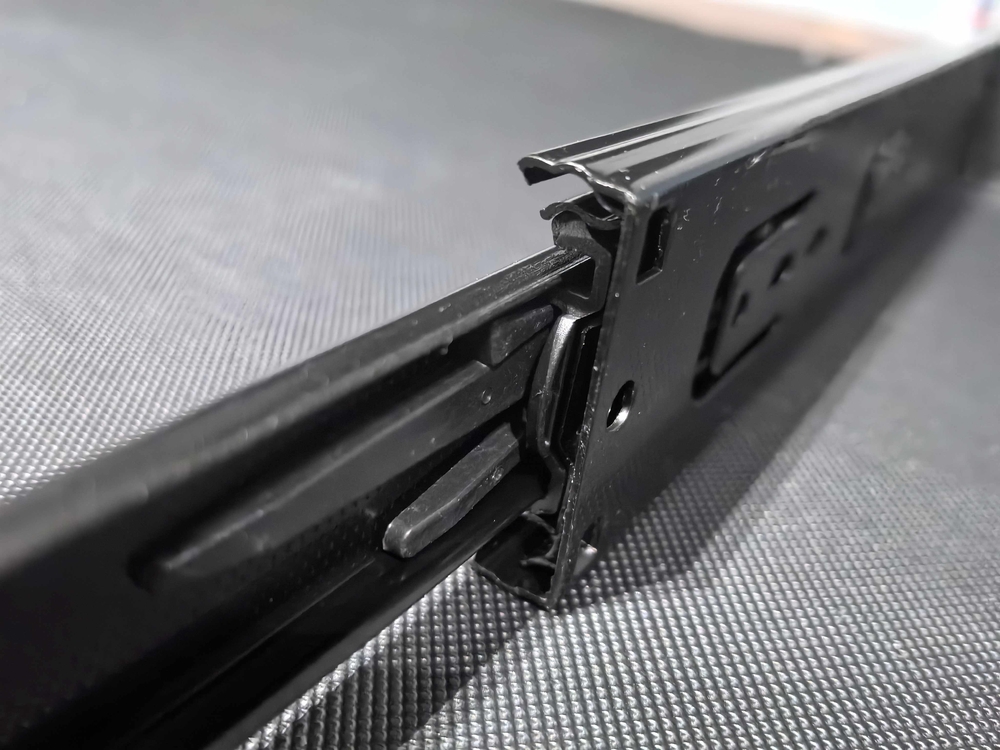
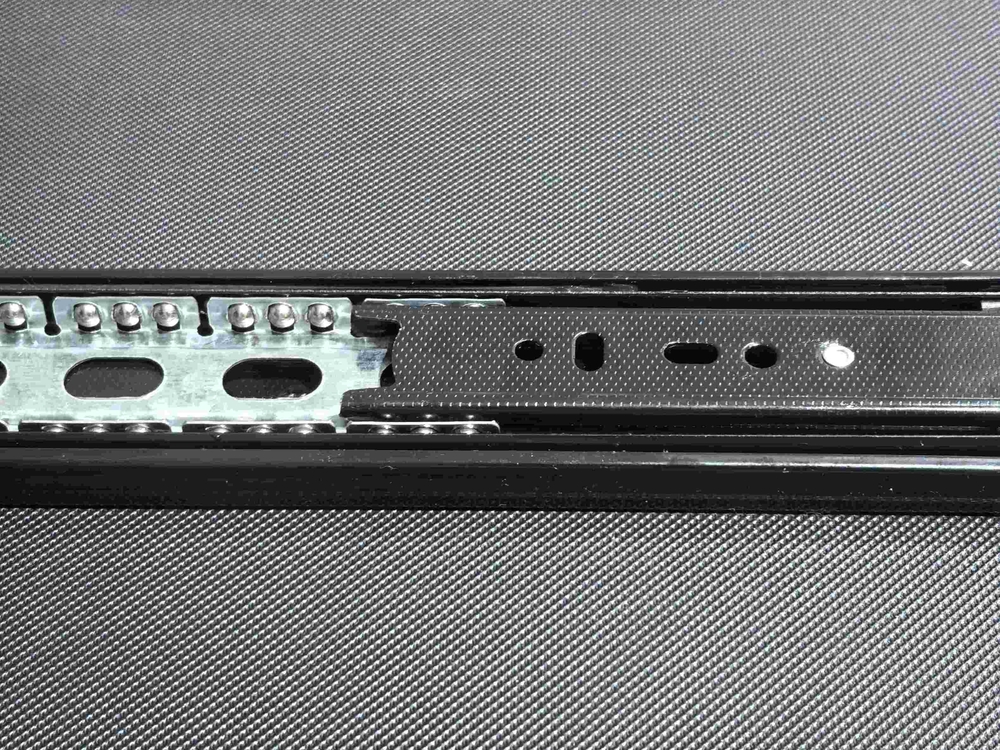
Step 4 – Install the Pull-Out Tray
Align the tray rails with the main body tracks, then push the tray in fully until it locks into place.
⚠️ Note: Keep the tray level during installation. If it doesn’t slide smoothly, remove it and realign the tracks before reinserting — do not force it.
-
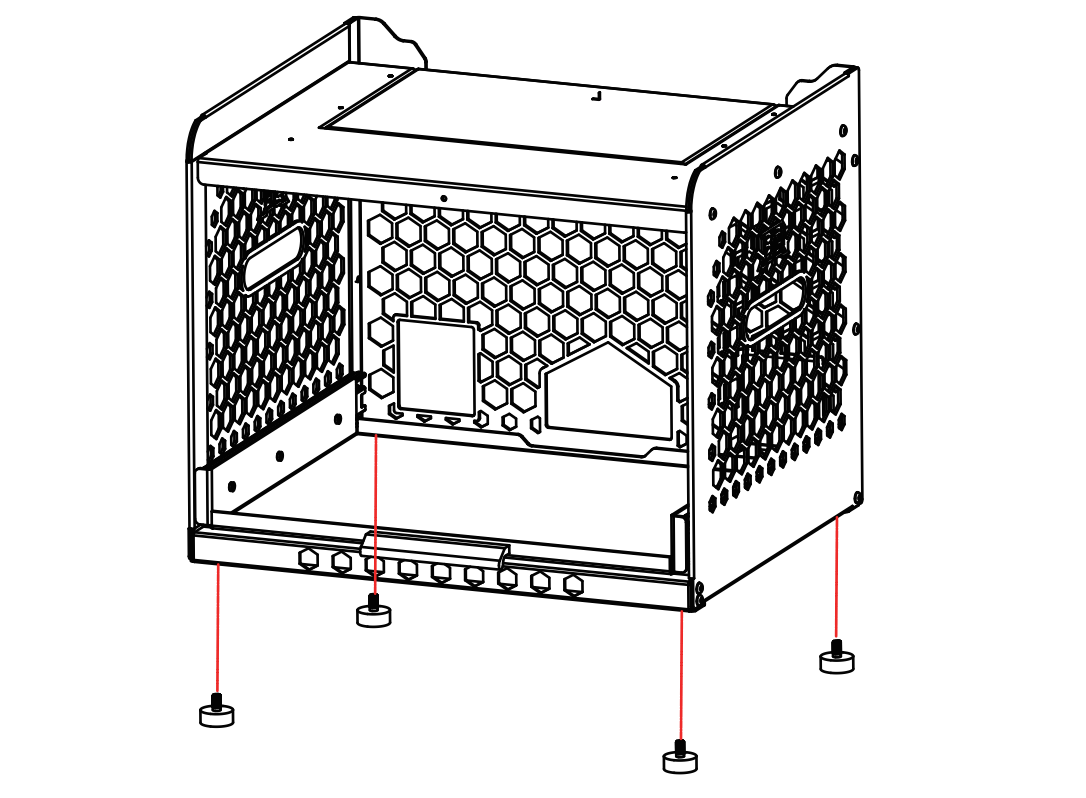
Step 5 – Attach the Foot Pads
Screw the four foot pads into the designated holes at each bottom corner of the main body.
-
Step 6 – Install the Suction Cup
The package also includes a suction cup, which can be paired with a printed support part to hold the AMS cover open during filament swaps for easier access and convenience.
RGB Strip Installation Guide
Note: The RGB Strip is sold separately. To function correctly, it requires the compatible Controller and Power Supply, which are also sold separately.
-
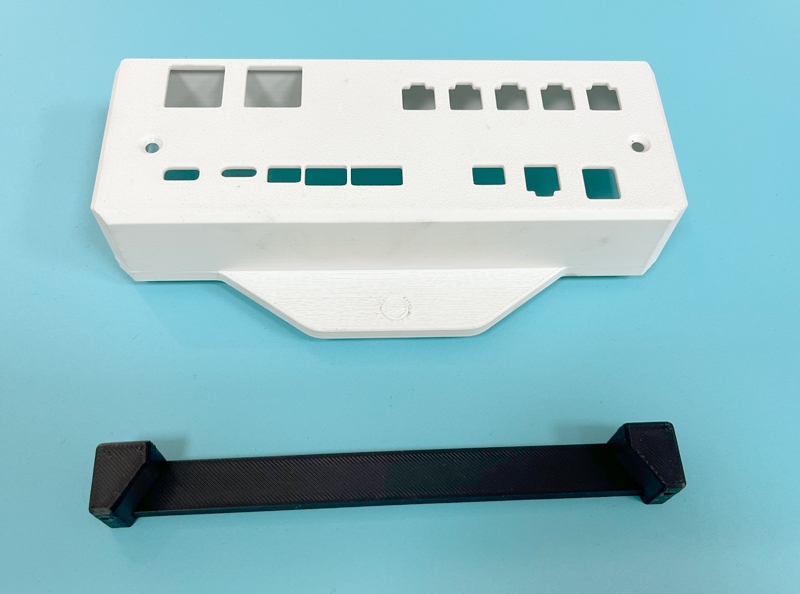
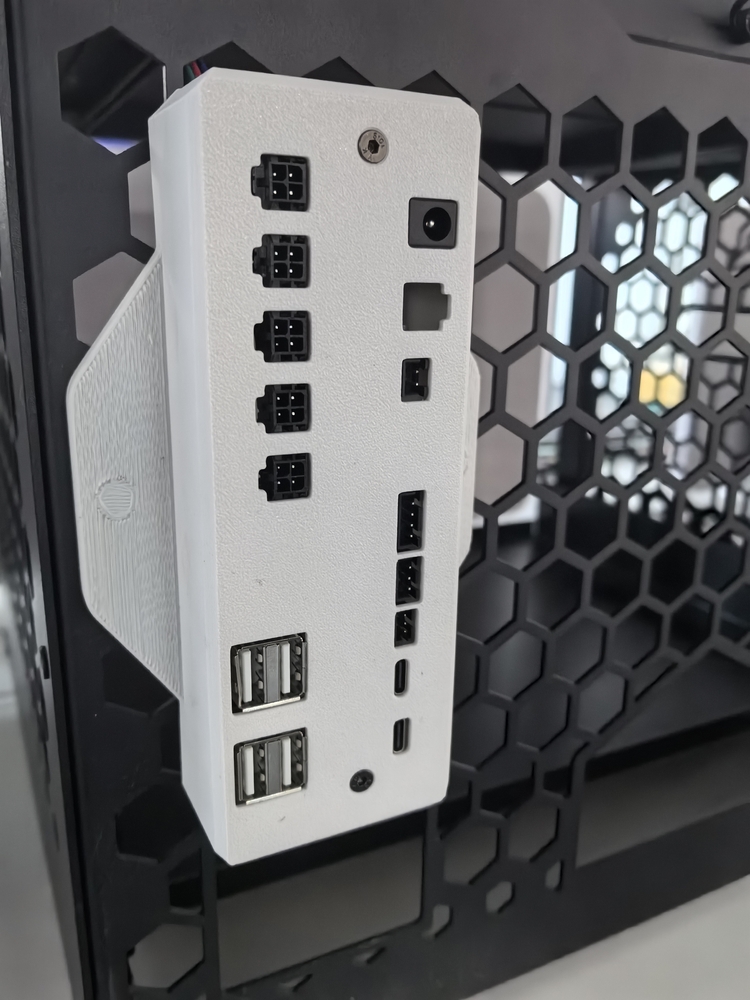
Step 1: Prepare the Controller Box
-
- Print the controller shell in advance.
-
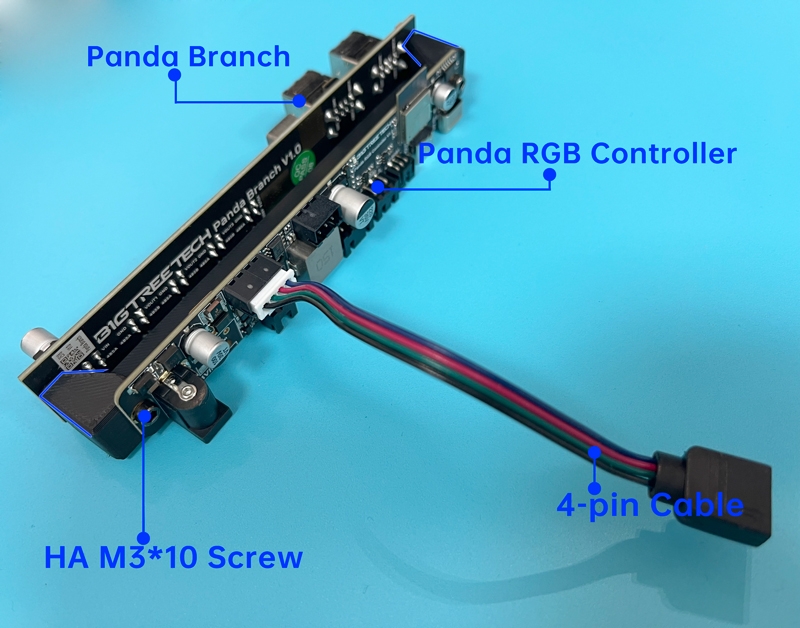
- Using the four HA M3*10 screws provided, secure the two PCBA boards to the printed bracket.
Note: The bracket is trapezoidal; the Panda Branch board attaches to the smaller side, while the Panda RGB Controller attaches to the larger side.
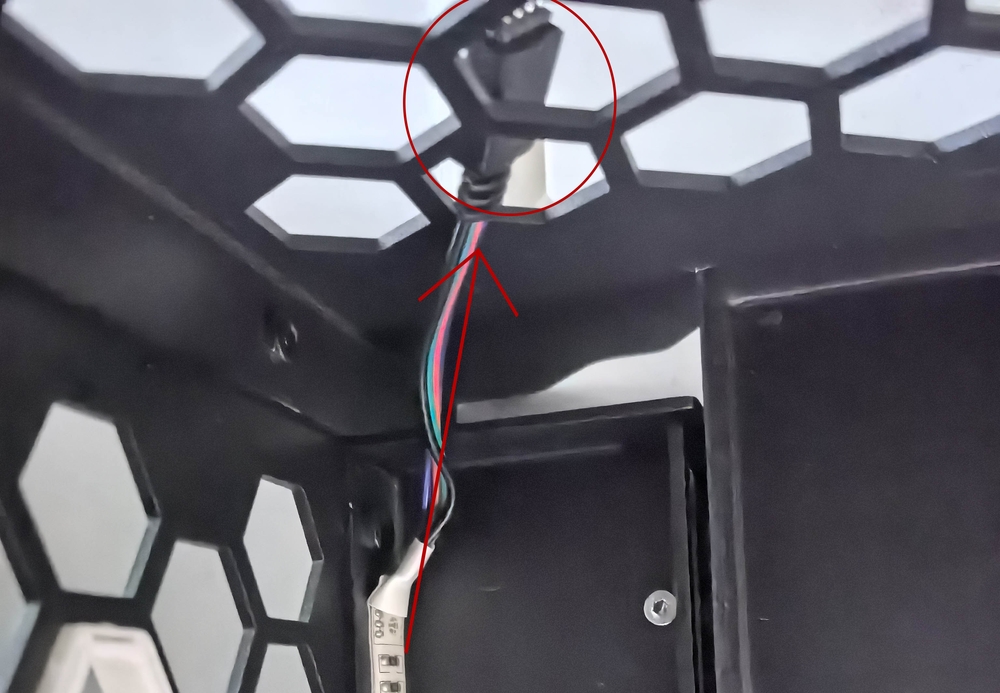
Finally, locate the 4-pin cable and connect it to its corresponding connector on the board, ensuring proper alignment by referencing the provided image.
-
- Carefully place the assembled bracket into the printed shell, ensuring the connectors on both boards align with their designated holes and the bracket's mounting holes are correctly positioned with those in the shell. Once aligned, secure the assembly by fastening it with the two M3x6 screws.

-
-
Step 2: Install the LED Strip
-
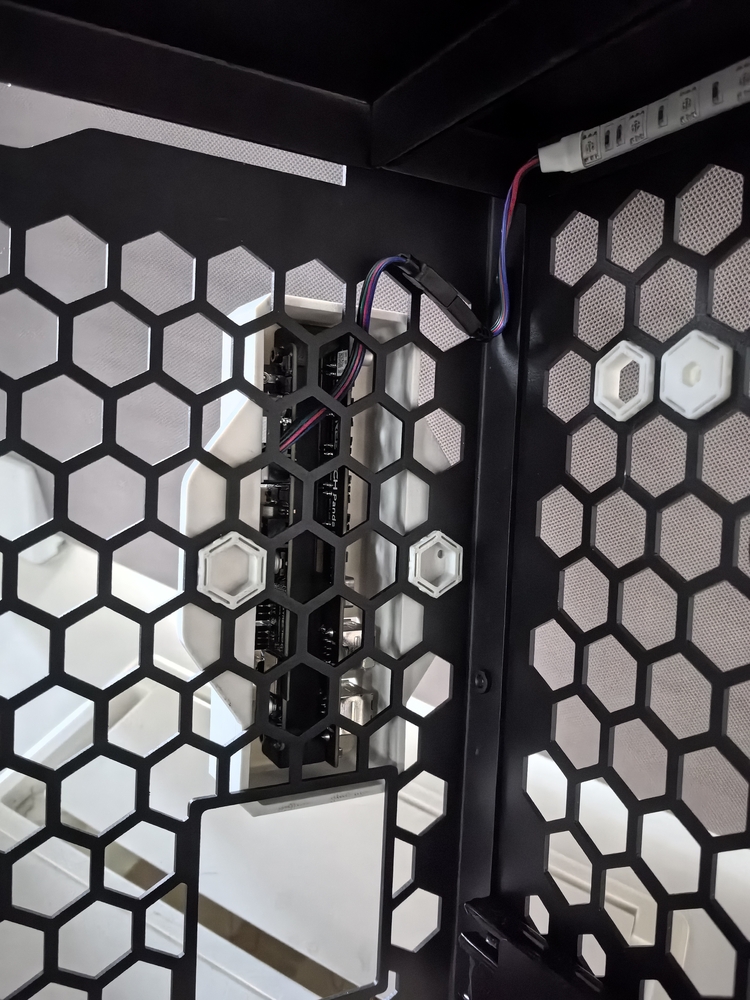
- For easier installation, carefully turn the Panda Stack upside-down and place it on a flat, stable surface.
-
- Pass the LED strip's connector through the hollow openings on the back of the Panda Stack, as shown in the diagram.
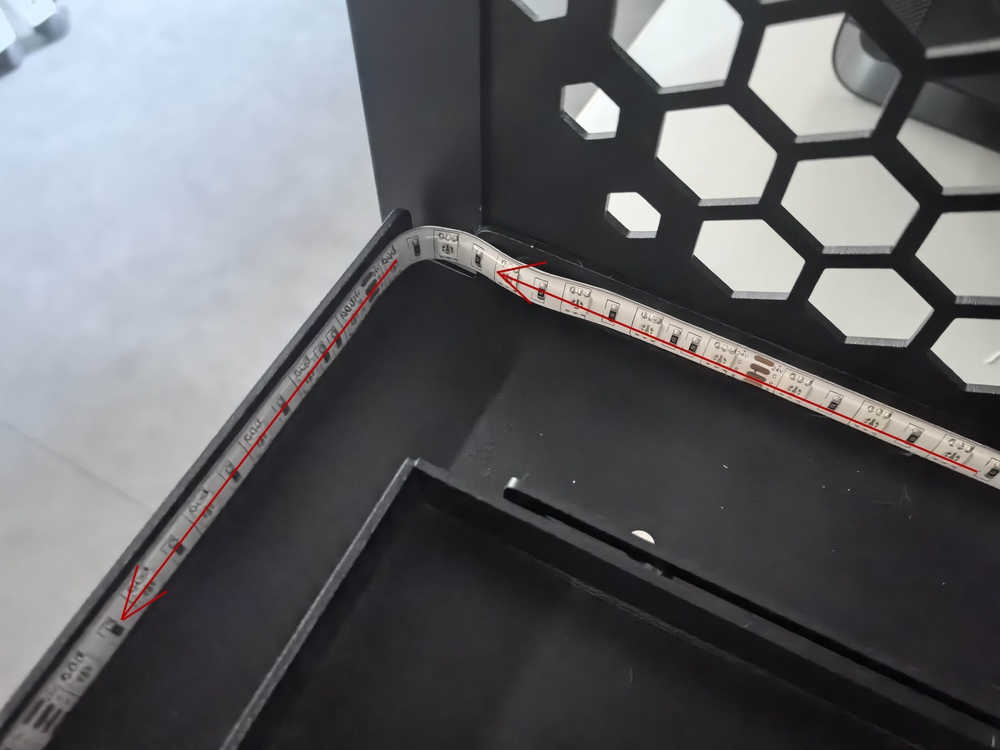
Peel off the adhesive backing and apply the LED strip along the edges of the Panda Stack, ensuring it covers sides A, B, and C. Press firmly along the entire length to secure the bond.
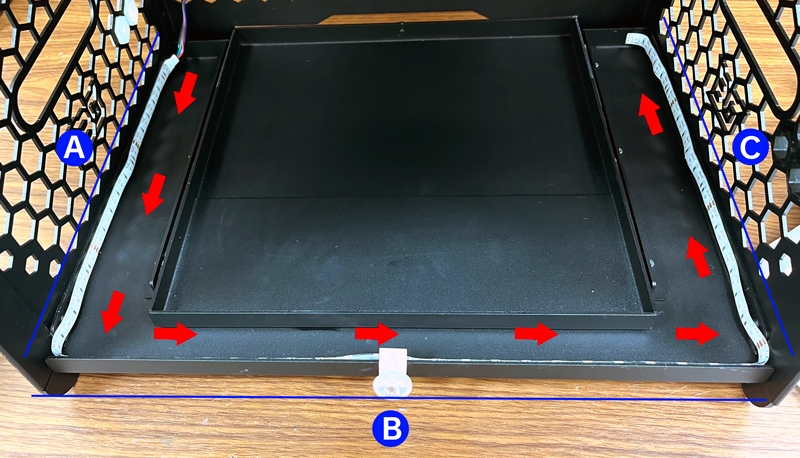
Note: The product was inverted in Step 1. Please note that the surface shown as the "bottom layer" in the image corresponds to the upper inner frame of the final assembly. Apply the LED strip to this upper inner frame.
-
- Cut the LED strip along the designated cut lines to fit the appropriate length.

-
-
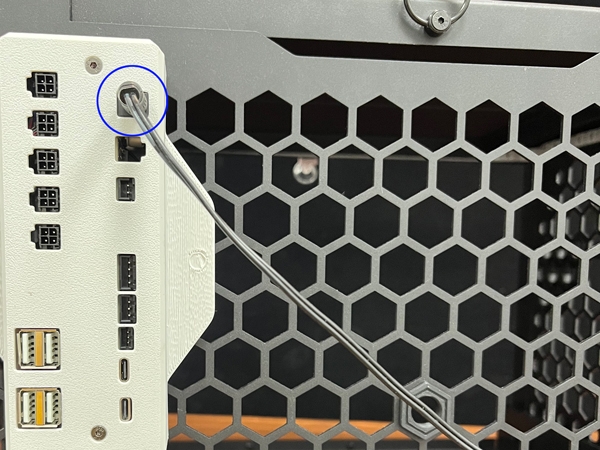
Step 3: Connect the Controller Box
-
- After securing the LED strip, gently return the Panda Stack to its upright position.
-
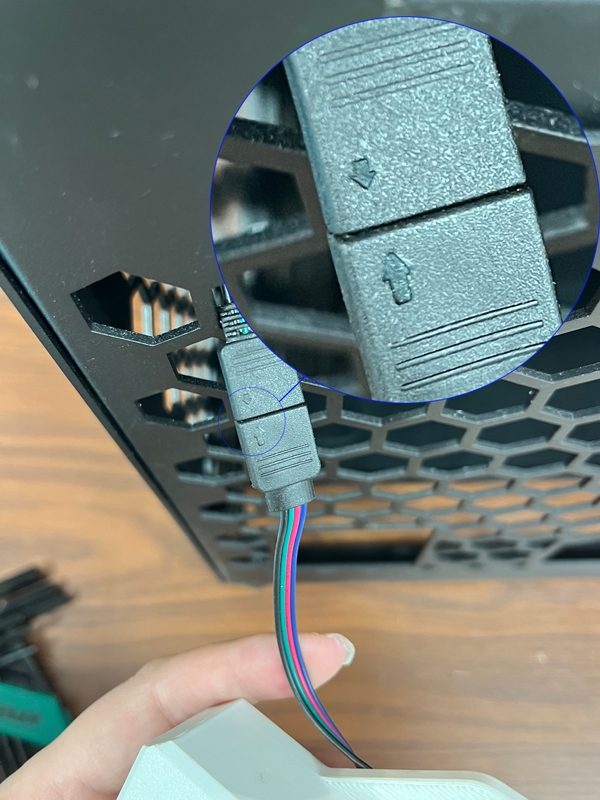
- Locate the 4-pin cable that was installed in Step 1 and connect it to the LED strip's connector. Ensure the connection is secure by aligning the arrows on both connector terminals.
-
- Snap the controller box onto the back of the Panda Stack and plug in the power cable.
-
You have successfully completed the physical installation of the RGB LED strip. For detailed instructions on network setup and configuration, please refer to the Panda RGB Controller Wiki.
Important Notice
Failure to follow the above instructions or any improper installation may void the product warranty and could result in damage to the product. BIGTREETECH/BIQU is not liable for any damage or loss resulting from the misuse or incorrect installation of this product.